background image

PaGE 4

KrP PrEP taBlEs

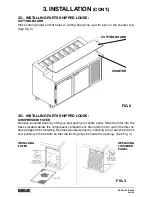
FIG. 2

InstallInG
FIltEr

rEPlacInG
louVErED
PanEl

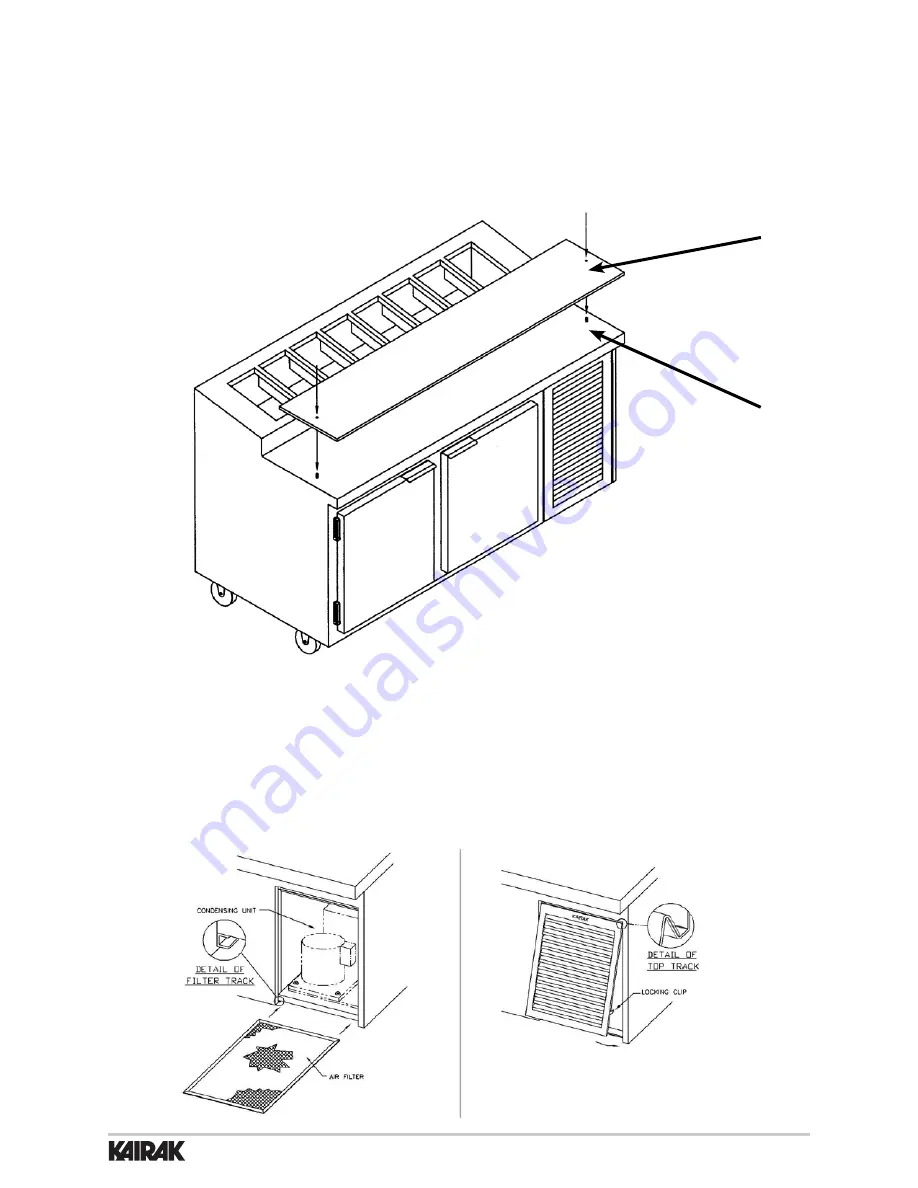
3c - InstallInG Parts sHIPPED loosE:

cuttInG BoarD
Place cutting board so that holes in cutting board line up with pins on the counter top. 
(See Fig. 2)

cuttInG BoarD

countEr

3D - InstallInG Parts sHIPPED loosE:

coMPrEssor FIltEr
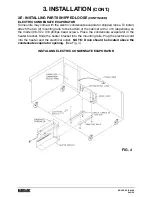
Remove louvered panel by lifting up and pulling out entire panel. Slide the filter into the 
tracks located below the compressor compartment. Be careful not to catch the filter on 
sharp edges when installing. Replace louvered panel by installing top of panel into track 
and pushing in the bottom so that the locking clips fit inside the opening.  (See Fig. 3)

3. InstallatIon 

(cont.)

FIG. 3

Summary of Contents for KRP

Page 1: ...Instruction Manual KRP PREP TABLES 500 S State College Blvd Fullerton CA 92831 Phone 714 870 8661 Fax 714 870 6473 www kairak com KAIRAK a division of ITW Food Equipment Group LLC All Rights Reserved...

Page 2: ...n Chillers B Removing Food Product At Night C Leaving Food Product In Overnight D Defrost Time Clock Settings Freezer Models E Temperature Control Settings 7 OPERATION a Pan Chiller B Lower Storage Ca...

Page 3: ...AL MODEL VOLTS Hz PH TOTAL CURRENT AMPS MINIMUM CIRCUIT AMPS MAXIMUM OVERCURRENT PROTECTION AMPS LIGHTS WATTS HEATERS AMPS REFRIGERANT TYPE OZ DESIGN PRESSURE HIGH LOW REFRIGERANT TYPE OZ DESIGN PRESS...

Page 4: ...contact Kairak customer care at 714 870 8661 to request a return 3 installation 3A UNPACKING Inspect equipment for shipping damage prior to installation If shipping damage is found save the packing m...

Page 5: ...UNTER 3D INSTALLING PARTS SHIPPED LOOSE COMPRESSOR FILTER Remove louvered panel by lifting up and pulling out entire panel Slide the filter into the tracks located below the compressor compartment Be...

Page 6: ...To install attach the two 2 mounting rails to the bottom of the cabinet with 4 or 6 depending on the model 6 32 x 3 8 phillips head screws Place the condensate evaporator in the heater bracket Slide t...

Page 7: ...erant line brazing 50 50 or cold solder is not acceptable For system charge follow remote refrigeration system manufacturer s instructions 5 ELECTRICAL CONNECTIONS Refer to the wiring diagram shipped...

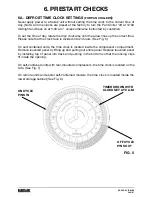
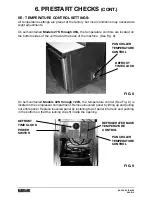
Page 8: ...se note that the clock face is divided into 24 hours See Fig 5 On self contained units the time clock is located inside the compressor compartment Remove louvered panel by lifting up and pulling out e...

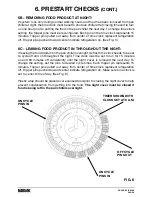
Page 9: ...ng the food product in the pan chiller overnight defrost time clock needs to be set to cycle off and on throughout the night Time clock must be set to run for 15 minutes on and 60 minutes off consiste...

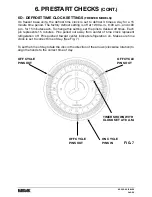
Page 10: ...eriod The factory defrost setting is off at 12 00 a m 8 00 a m and 4 00 p m for 15 minutes each To change this setting set the pins to desired off times Each pin represents 15 minutes Pins pulled out...

Page 11: ...k of the machine See Fig 8 DEFROST TIME CLOCK PAN CHILLER TEMPERATURE CONTROL FIG 8 FIG 9 DEFROST TIME CLOCK POWER SWITCH PAN CHILLER TEMPERATURE CONTROL REFRIGERATED BASE TEMPERATURE CONTROL On self...

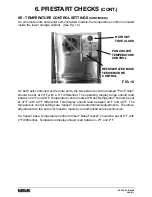
Page 12: ...arked Pan Chiller should be set at 23 F with a 3 F differential The operating display range should read between 20 F and 28 F Temperature control marked Base Refrigerator should be set at 37 F with a...

Page 13: ...pans will help prevent over chilling 7 For remote refrigerators with pan chiller systems it is imperative that the existing refrigeration equipment must be sized properly and in good working conditio...

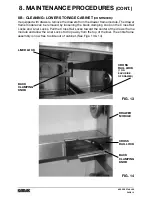
Page 14: ...loth Always rub in the same direction as the grain pattern on the stainless steel To clean the inside of the lower storage cabinet remove wire shelves All wire shelves are adjustable and can be easily...

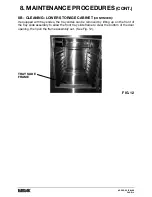
Page 15: ...8B CLEANING LOWER STORAGE CABINET CONTINUED If equipped with tray slides the tray slides can be removed by lifting up on the front of the tray slide assembly to allow the front tray slide frame to cle...

Page 16: ...h drawers remove the drawers from the drawer frame module The drawer frame module can be removed by loosening the black clamping knob on the Cross Rail Locks and Liner Locks Pull the Cross Rail Locks...

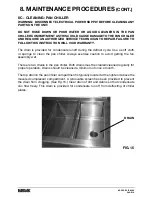
Page 17: ...efrost cycle Use a soft cloth or sponge to clean the pan chiller Always exercise caution to avoid getting the fan assembly wet There are two drains in the pan chiller Both drains must be cleared clean...

Page 18: ...uired frequency of cleaning However both should be cleaned a minimum of once every three months Air must be able to freely circulate through the condenser Unit performance and operating efficiency are...

Page 19: ...coil must be cleaned regularly Remove the access panel using a phillips head screwdriver Carefully clean dirt and lint from the condenser coil using a vacuum cleaner or soft brush do not use a wire b...

Page 20: ...is iced up or dirty Prolonged and or frequent door openings or door s ajar Excessive load of warm food placed into lower storage cabinet 3 Lower storage cabinet not holding temperature Temperature co...

Page 21: ...NEVER dump water into the rail when cleaning This can overflow into the fan causing failure and the resulting service call 10 Do not use sharp utensils to clean the gaskets Wiping them down daily ensu...

Page 22: ...t charges are paid File claim for damages with freight agent immediately BLU fixtures manufactured by Kairak hold a 3 year parts and labor warranty Kairak holds a 5 year compressor warranty with a one...

Page 23: ...NOTES...

Page 24: ...500 S State College Blvd Fullerton CA 92831 Phone 714 870 8661 Fax 714 870 6473 www kairak com KAIRAK a division of ITW Food Equipment Group LLC All Rights Reserved Rev 5 10...

Reviews: