43
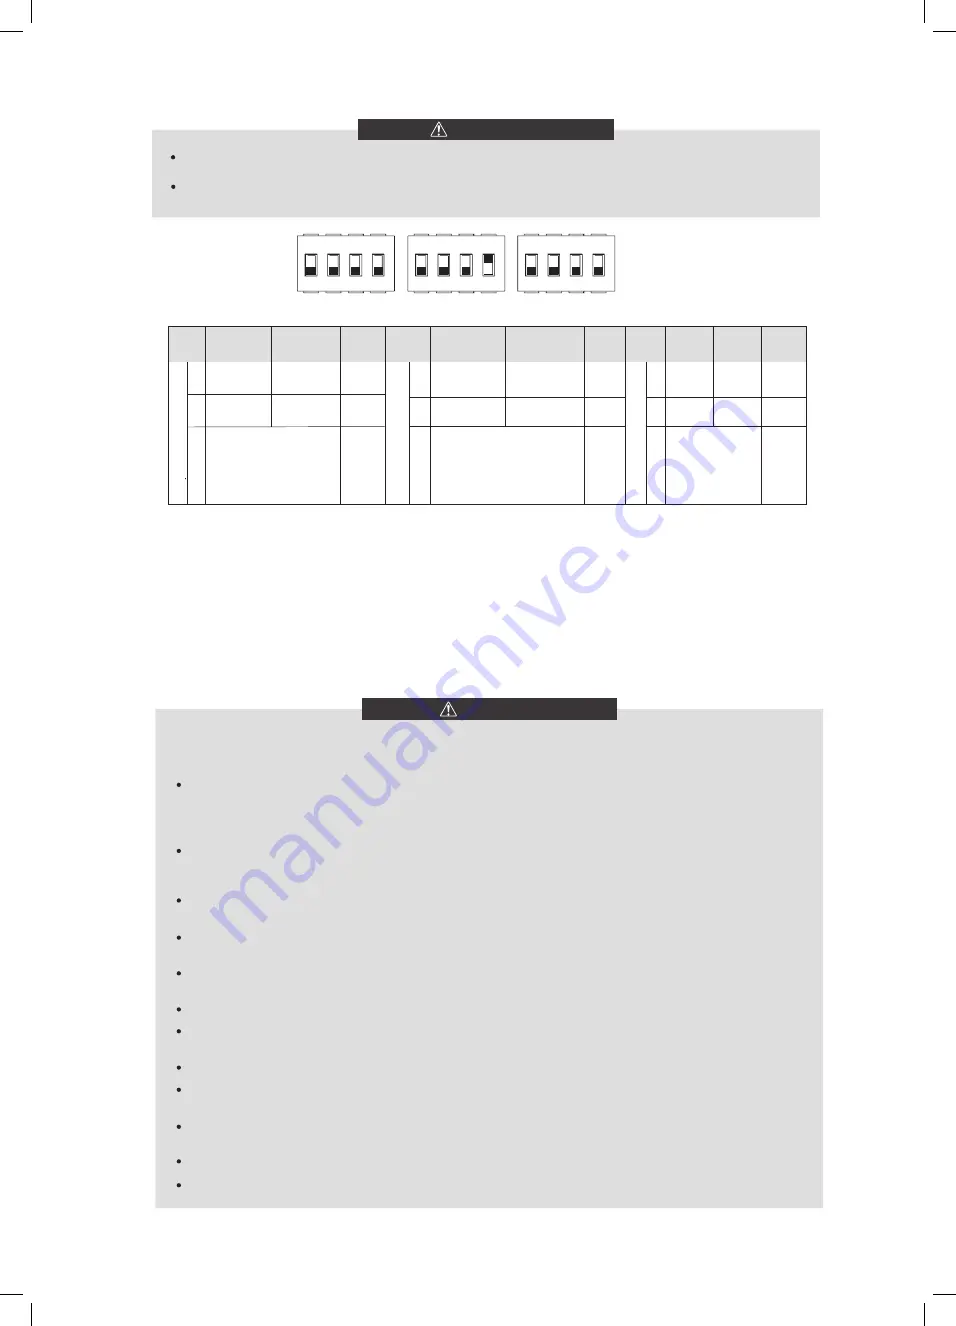
Switch off the power supply before opening the switch box service panel and making any changes to the DIP switch
settings.
Operate the switches with an insulated stick (such as a closed ball-point pen) to avoid electrostaric damage to the
components.
WARNING
During initial start-up and when water temperature is low, it is important that the water is heated gradually. Failure to do so may
result in concrete floors cracking due to rapid temperature change. Please contact the responsible cast concrete building
contractor for further details.
To do so, the lowest water flow set temperature can be decreased to a value between 25°C and 35°C by adjusting the FOR
SERVICEMAN. Refer to "FOR SERVICEMAN/special function/preheating for floor" .
DANGER
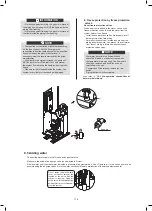
Switch off the power supply before making any connections.
After the installation of the unit, check the following before switching on the circuit breaker:
Field wiring
:
Make sure that the field wiring between the local supply panel and unit and valves (when applicable),
unit and room thermostat (when applicable), unit and domestic hot water tank, and unit and backup heater kit have
been connected according to the instructions described in the chapter 9.6 Field wiring, according to the wiring
diagrams and to local laws and regulations.
Fuses, circuit breakers, or protection devices Check that the fuses or the locally installed protection devices are of
the size and type specified in the chapter 14 Technical specifications. Make sure that no fuses or protection devices
have been bypassed.
Backup heater circuit breaker
:
Do not forget to turn on the backup heater circuit breaker in the switchbox (it
depends on the backup heater type). Refer to the wiring diagram.
Booster heater circuit breaker
:
Do not forget to turn on the booster heater circuit breaker (applies only to units with
optional domestic hot water tank installed).
Ground wiring
:
Make sure that the ground wires have been connected properly and that the ground terminals are
tightened.
Internal wiring
:
Visually check the switch box for loose connections or damaged electrical components.
Mounting
:
Check that the unit is properly mounted, to avoid abnormal noises and vibrations when starting up the
unit.
Damaged equipment
:
Check the inside of the unit for damaged components or squeezed pipes.
Refrigerant leak
:
Check the inside of the unit for refrigerant leakage. If there is a refrigerant leak, call your local
dealer.
Power supply voltage
:
Check the power supply voltage on the local supply panel. The voltage must correspond to
the voltage on the identification label of the unit.
Air purge valve
:
Make sure the air purge valve is open (at least 2 turns).
Shut-off valves
:
Make sure that the shut-off valves are fully open.
Checks before initial start-up.
10.3 Initial start-up at low outdoor ambient temperature
10.4 Pre-operation checks
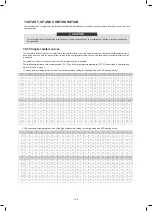
1 2 3 4
1 2 3 4
S1
S2
ON
OFF
1 2 3 4
S4
ON=1
OFF=0
1
Reserved
2
DIP
switch
2
0/0=Without IBH and AHS
1/0=With IBH
0/1=With AHS for heat mode
1/1=With AHS for heat mode
and DHW mode
3/4
1
3/4
ON=1
OFF=0
DIP
switch
S1
S2
Reserved
Factory
defaluts
OFF
OFF
OFF/OFF
Start pumpo after
six hours will
be invalid
Factory
defaluts
without TBH
with TBH
Start pumpo after
six hours will
be valid
0/0=
variable speed pump,
Max head: 8.5m
0/1=
constant speed pump
1/0=
variable speed pump,
Max head: 10.5m
1/1=
variable speed pump,
Max head: 9.0m
OFF
OFF
OFF/ON
DIP
switch
S4
1
2
3/4
Factory
defaluts
ON=1
OFF=0
Reserved Reserved
Reserved Reserved
Reserved
OFF
OFF
OFF/OFF
Reserved
Reserved
44
When power to the unit is turned on, "1%~99%" is displayed on the user interface during initialization. During this process the
user interface cannot be operated.
10.5 Powering up the unit
The pump speed can be selected by adjusting the red knob on the pump. The notch point indicates
pump speed.
The default setting is the highest speed (III). If the water flow in the system is too high the speed can
be set to low (I).
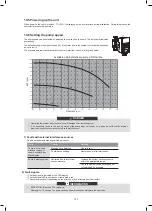
The available external static pressure function for water flow is shown in the graph below.
10.6 Setting the pump speed
DANGER
Operating the system with closed valves will damage the circulation pump!
If it's necessary to check the running status of the pump when unit power on. please do not touch the internal
electronic control box components to avoid electric shock.
0
10
20
30
40
50
60
70
80
90
100
110
120
0.0
0.5
1.0
1.5
2.0
2.5
3.0
3.5
4.0
4.5
5.0
5.5
6.0
ES
P
(
kP
a)
Flow rate
(m
3
/h)
Available external static presurre VS Flow rate
C2
C3
C1
.
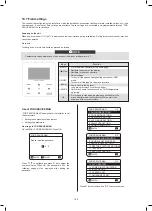
Only have faults remedied by qualified personnel.
1) Faults with external interference sources
Faults
Causes
Remedy
Pump is not running
although the power
supply is switched on.
Black display
Check fuses.
Electrical fuse defective
Pump has no voltage.
Restore power after interruption.
Pump is making noises.
Cavitation due to insufficient
suction pressure.
Increase the system suction pressure
within the permissible range.
Check the delivery head setting and set
to lower head if necessary.
2) Fault signals
•
The fault signal is indicated by the LED display .
•
The fault signal LED is continuously illuminated in red .
•
The pump switches off (depending on the error code), and attempts a cyclical restart.
EXCEPTION: Error code E10 (blocking)
After approx. 10 minutes, the pump switches off permanently and displays the error code.
INFORMATION
i
127
126
Summary of Contents for MONO KHC-22RX3
Page 1: ...INSTRUKCJA INSTALACYJNA INSTALATIONMANUAL POMPA CIEPŁA MONO MONO TYPE HEAT PUMP PL EN ...
Page 2: ......
Page 79: ...79 ...
Page 80: ......
Page 157: ...NOTE 157 ...
Page 158: ...NOTE ...
Page 159: ...16125300002403 V C ...
Page 160: ...kaisai com ...


