background image

BATTERY CHARGING

11 - ENG

To charge the Drone Battery


1. 

Pull the battery cover and remove the 
battery from the Drone by sliding it out of 
the Drone battery compartment. 

2. 

Connect the USB wall charger (not 
included) to the Micro USB charging port 
on the battery using the supplied charging 
cable. 

3. 

The USB Charging Cable features a red 
LED indicator light that will turn off when 
charging is complete. While it is charging 
the light will be ON. 

4. 

A full charge cycle will take approximately 
90 minutes by 1A charger adapter as the 
battery capacity is 600 mAh. 

Low Battery 

The Drone LED Lights will flash when the drone 
is in Low Power Mode. 

1

2

SET UP & INSTALLATION

12 - ENG

Ensure the Drone is OFF prior to installation 
of modules. 

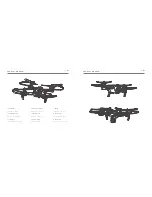
Rotor Blades Assembly 

It is important that only Kaiser Baas Seeker 
Drone Rotor Blades are fitted to the Seeker 
Drone. Never use any third-party accessories 
or tools. 

Your Drone will come ready to fly with Rotor 
Blades attached. If you need to replace them, 
please refer to the following guide:

Disassembly 

Use the provided screwdriver to untighten the 
screw in an anti-clockwise direction. 

Remove the Rotor Blade by pulling up and off 
the motor axis bar. 

Assembly 

Insert the Rotor Blade onto the motor axis bar. 

Only install the Rotor Blades to the 
corresponding clockwise/anti-clockwise motor. 
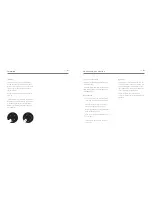
A letter is marked on each blade to indicate 
which motor it should go on. 

Incorrect installation will cause severe 
instability. Refer to the diagram. 

Use the provided screwdriver to tighten the 
screws in a clockwise direction. 

[WARNING] Never use Rotor Blades with any 
signs of damage or wear and tear. This includes 
chips, scratches and cracks. Damaged Rotor 
Blades can cause the Drone to fail in-flight and 
may result in damage to persons or property.

[WARNING] Never touch the Drone or the Rotor 
Blades when the motors are spinning. 

Rotor Guard

It is highly recommended to install the rotor 
blade guards before using the drone to ensure 
safety.

When the LEDs are flashing you should bring 
the Drone to a complete stop. Failure to land 
the Drone when the Low Battery signal starts 
flashing may cause a sudden loss of power 
endangering persons, property and the Drone.

Summary of Contents for Seeker

Page 1: ...Complete User Guide Visit kaiserbaas com for more information ...

Page 2: ...flight Checklist Product Features Product Diagram Battery Charging Setup Installation Remote Control Flight Operation Modes Trimming Using the App Combo Mode Operation FAQ Specifications Support 01 05 06 07 11 12 14 16 21 22 25 26 27 ...

Page 3: ...ow or hail Flying near electrical hazards such as power lines or towers Flying in or near fire floods tsunamis ice avalanche landslide earthquake etc Damage s or injuries incurred due to users under the influence of drugs or alcohol suffering dizziness fatigue nausea and any other condition physical or mental SAFETY PRECAUTIONS 02 ENG that could impair the Pilot s ability to fly responsibly and wi...

Page 4: ...e the battery near an open flame or heat source SAFETY PRECAUTIONS 04 ENG Do not immerse the battery in water Do not charge the battery in direct sunlight Never leave a charging battery unattended Only remove the battery from its supplied charger when the charging cycle is complete Do not reverse charge or over charge the battery Always charge the battery in a designated space away from people and...

Page 5: ...Pilot to properly research and familiarise themselves with the regulations surrounding the flying of their UAV This list serves as a guide only Australia casa gov au New Zealand caa govt nz UK caa co uk home Ireland iaa ie PRODUCT FEATURES 06 ENG The Seeker Drone makes the perfect travel companion for capturing all your adventures in HD The compact foldable design allows you to take your Drone eve...

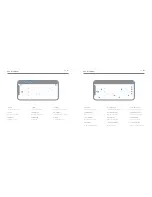
Page 6: ...TOR BLADES 3 Landing Feet STABLE LANDING TAKE OFF 4 720P Camera Module VIDEO PHOTO CAPTURE 5 Power ON OFF CLICK FOR 1 SECOND 6 Indication Lights BLINK RED GREEN 7 Battery PRESS PUSH TO OPEN 8 MicroSD Card VIDEO PHOTO STORAGE 9 Battery Latch PULL LANDING FOOT TO OPEN PRODUCT DIAGRAM 08 ENG 5 6 7 8 9 ...

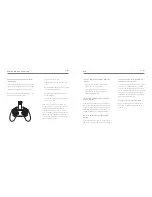
Page 7: ...2 Directional Controls ADJUST DRONE DIRECTION 4 Trim Right ADJUST ROTATION LEVELS 5 One Key Return RETURN TO ORIGIN 6 Headless Mode PRESS TO ACTIVATE 13 Roll Trim Right ADJUST ROLL LEVELS 14 Roll Trim Left ADJUST ROLL LEVELS 15 Speed Adjustment ACTIVATE SPEED MODES 7 Smartphone Holder PULL TO USE 8 Trim Forward ADJUST ELEVATION LEVELS 9 Trim Backward ADJUST ELEVATION LEVELS 1 7 10 16 11 5 6 9 8 2 ...

Page 8: ... refer to the following guide Disassembly Use the provided screwdriver to untighten the screw in an anti clockwise direction Remove the Rotor Blade by pulling up and off the motor axis bar Assembly Insert the Rotor Blade onto the motor axis bar Only install the Rotor Blades to the corresponding clockwise anti clockwise motor A letter is marked on each blade to indicate which motor it should go on ...

Page 9: ... the Remote Control flashing 4 Using the Left Throttle Yaw Stick move it to the maximum UP position and then to down position 5 You will hear two beeps from the Remote Controller and the Drone LED lights will stop flashing indicating the Drone is now paired to the Remote Controller Before every flight it is important to calibrate your Drone Calibration ensures the Gyroscopes are reset and the Dron...

Page 10: ...Button to arm the Drone Press once to arm Press again for take off Throttle Down Pitch Backward Throttle Up Pitch Forward Yaw Left Roll Left Yaw Right Roll Right REMOTE FLIGHT OPERATION 16 ENG You can also arm the drone by simultaneously pulling the left joystick to bottom left corner and right joystick to bottom right corner The Rotor Blades will start to spin indicating it is ready to fly Press ...

Page 11: ...perator To enable Headless Mode simply press the Headless Mode Button on the Remote Controller as indicated in the diagram You will hear a short beep and the drone light will start flashing To avoid confusion you should ensure the controls are correct from take off Headless Mode can be turned on while in flight You should arm the Drone while you are standing behind it so that you and Drone are bot...

Page 12: ...he diagram You will hear multiple beeps beep and the drone light will start flashing The Drone will fly backwards towards you Always keep control of the Drones altitude and speed using the Left Throttle Yaw Stick When it has reached your position or you want to stop simply move the Pitch Roll Right Stick Forward to cancel Return Mode Return Mode Short press To capture the video with the remote con...

Page 13: ...hone The Seeker Drone features WiFi and can record video take photosand be controlled using the KB SEEKER App How to connect 1 Turn on the Drone The indication lights at the bottom of the drone will start to blink 2 Open your phone and go into the Wi Fi settings turn the Wi Fi on if it is off 3 Wait for few seconds and select KB Seeker once it appears on the list 4 Once connected open the KB Seeke...

Page 14: ...IAGRAM 24 ENG 10 VR Mode FIRST PERSON VIEW MODE 11 Headless Mode ACTIVATE ON OFF 12 Gyro Calibration RESET GYRO ORIENTATION 13 Track Mode FOLLOW YOUR DRAWN PATH 14 Throttle Control INCREASE DECREASE THRUST 15 Directional Control FLIGHT MANOUVERING 16 Video Record START STOP RECORD 17 Take Off Landing BEGIN END FLIGHT 18 Forward Back Trim ADJUST ELEVATION LEVELS 19 Rotation Fine Tune ADJUST ROTATIO...

Page 15: ...s mean The Drone has insufficient battery power Please charge the Drone battery The Drone is not paired with a Remote Control Transmitter Refer to the Drone Setup Installation section The Drone s Rotor Blades spin but the Drone does not take off Insufficient Battery Power If the Drone LEDs are flashing and the Drone Rotor blades are spinning without any lift recharge the Drone battery The Rotor Bl...

Page 16: ...t us at www kaiserbaas com support Or send us an email at helpdesk kaiserbaas com Dimension 28 5 30 3 11 5CM Weight 140g Max Speed 15 km hour Battery 3 7V 600mAh Li po Flying time 8 mimutes Charging time 2 hours Charging port Micro USB Camera Resolution 720P Storage Micro SD Smartphone WiFi Range 30m Operating Frequency 2 4 Ghz ...

Page 17: ......

Reviews: