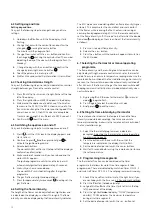


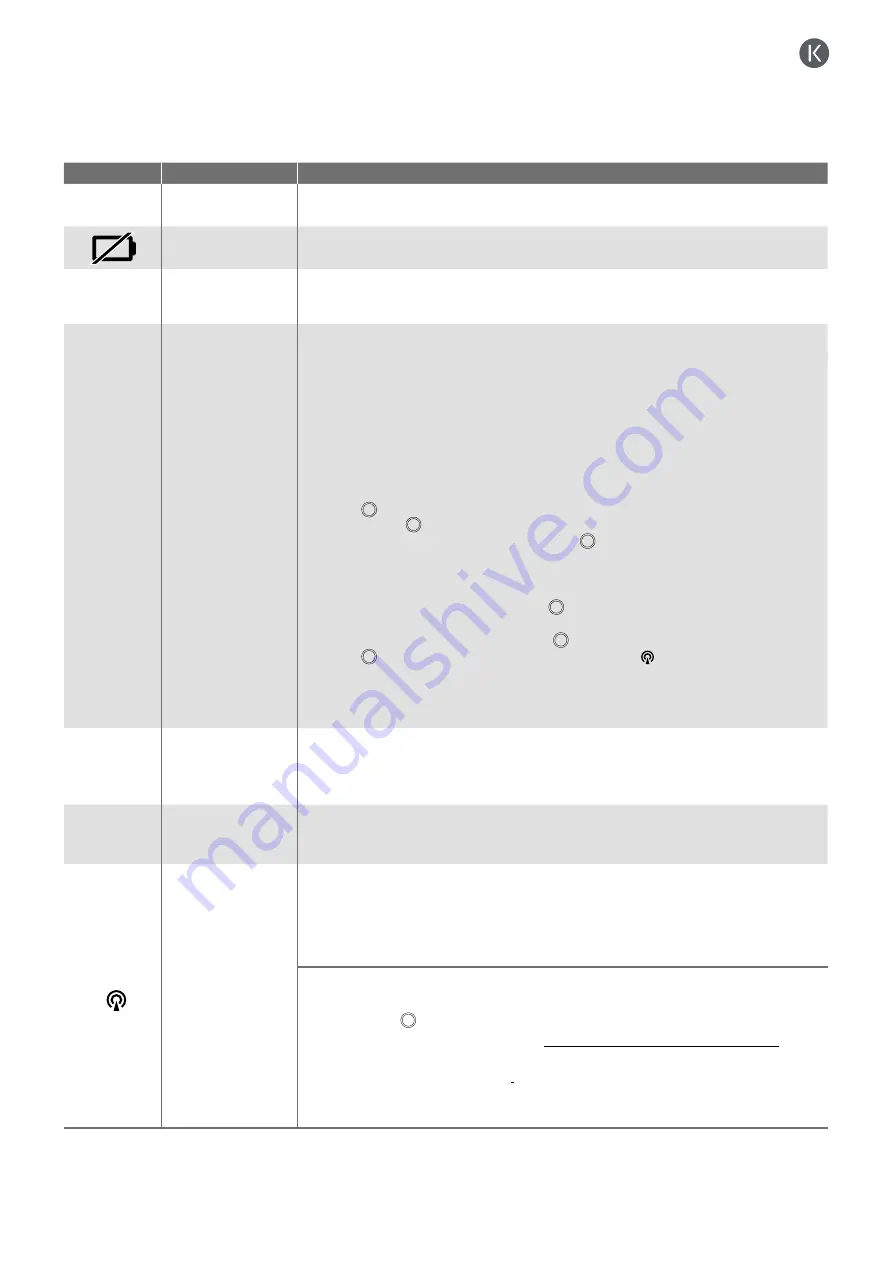
7.2.2 Error codes iMatch remote control
Error code
Cause
Solution
Entire display
flashing
Flat battery
Replacing battery.
Almost flat battery
Replacing battery.
NOLK 0 in the
middle of the
display
Control error
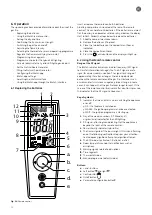
Briefly press >NOLK< will appear in the top left corner of the display.
NOLK
top left corner
of the display
No communication
between remote
control and fireplace
(for example in case
of a new remote
control)
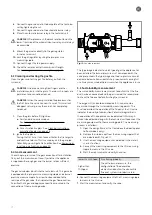
Synchronising remote control:
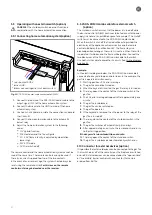
1. Open the hatch of the technical unit and carefully remove the automatic burner relay
so it is easily accessible.
2. Remove the batteries from the remote control and press (hereby discharging the
remote control). Next, replace the batteries into the remote control.
3. Isolate the automatic burner relay from power for 20 seconds, this will stimulate
the synchronisation speed. Supply power back to the cable.
The entire light will start flashing (once per second). Should the gas fire is provided
with a hybrid function and/or NSG: detach the HCB cable from the automatic burner
relay.
4. Press on the remote control until >NOLK 0< appears on the display.
Next, release
.
5. In case >NOLK 1< or >LINK 1< appear, press
again until >NOLK 0< appears.
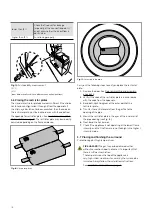
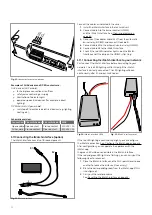
6. Press the black button in the automatic burner relay until the yellow light continuously
stops flashing, then immediately release the black button. The yellow light will start
flashing rapidly now.
7. Immediately (within 10 seconds) press
and hold it down until the word
>LINK<starts flashing on the display.
8. Wait until >LINK 1< appears and release
.
9. Press
. The normal display with a stationary RF icon
will appear once the
synchronisation is successful.
10. Reconnect the HCB cable (if applicable).
11. Place the automatic burner relay back into the technical unit and close the hatch.
02F
Temperature of the
circuit board is too
high
1. Turn off the fireplace for approximately 30 minutes.
2. Then turn on the fireplace.
3. In case the error reappears, there is insufficient ventilation in the chamber of the
fireplace.
04F
No mains voltage
supply (two-way
switch only)
Supply mains voltage.
06F
or
flashing
No communication
between remote
control and fireplace
In case the light on the automatic burner relay (in the technical unit) does not flash:
1. Check power supply on the mains (230VAC).
2. If this is correct, check/replace the VDC transformer and/or automatic burner relay.
In case the light on the automatic burner relay (in the technical unit) flashes:
1. Place the remote control as close to the fireplace as possible.
2. Briefly press
and wait approximately 60 seconds.
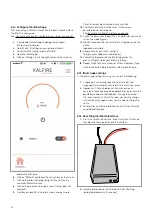
3. Check the transmission strength. See: Checking transmission strength page 24.
Carry out the following steps to check the transmission strength between the
fireplace and the remote control.
4. Check for objects that could jam the signal (for instance metal casings).
5. In case the signal keeps flashing -> synchronise
31
Summary of Contents for G Series
Page 1: ...Installation instructions BALANCED FLUE GAS FIRES DON T COMPROMISE EN...
Page 2: ......
Page 4: ...4...
Page 43: ...1 4 6 7 5 2 3 43...
Page 45: ...1 3 2 5 4 6 7 8 8 7 45...
Page 47: ...1 9 4 7 3 8 5 6 2 10 47...
Page 49: ...5 1 2 3 7 4 6 8 10 9 9 49...
Page 51: ...4 5 3 6 1 1 51...
Page 52: ...7 2 7 7 2 2 8 52...
Page 54: ...4 5 2 1 1 3 54...
Page 55: ...9 8 6 7 1 55...
Page 57: ...5 6 7 8 3 2 2 1 57...
Page 58: ...9 4 4 8 58...
Page 60: ...5 2 9 6 2 1 4 3 60...
Page 61: ...7 7 10 11 8 61...
Page 63: ...1 7 7 3 4 6 2 7 63...
Page 64: ...2 4 4 5 5 8 64...
Page 66: ...7 4 5 6 1 8 9 66...
Page 67: ...3 3 11 2 10 10 12 67...
Page 69: ...1 2 6 6 8 8 9 7 7 4 With gas type G30 log 4 to be placed at extreme right 3 4 5 11 69...
Page 72: ...10 2 1 9 11 3 3 4 5 5 7 6 72...
Page 73: ...13 12 12 12 8 73...
Page 76: ...3 1 6 5 4 2 13 76...
Page 77: ...14 7 10 11 8 12 12 Other side Divide 15 cryptonite and 16 ash 77...
Page 80: ...3 4 5 7 1 3 4 5 6 1 4 5 1 3 4 1 3 2 1 2 3 1 3 1 2 4 5 1 6 2 6 7 14 12 11 11 3 80...
Page 81: ...3 4 5 7 8 1 3 4 7 9 10 8 3 4 5 6 7 8 1 3 4 5 6 7 8 1 3 4 5 6 7 1 9 10 8 15 13 81...
Page 84: ...4 3 5 2 3 4 5 1 2 3 4 5 1 1 2 3 4 1 1 2 1 1 1 2 1 1 1 1 1 2 3 4 5 6 6 1 1 1 14 11 84...
Page 94: ...94...
Page 95: ...95...
Page 96: ...Gelo rveldweg 21 5951 DH Belfeld info kalfire nl KALFIRE COM DON T COMPROMISE REF V01 2019 EN...


