17
11.
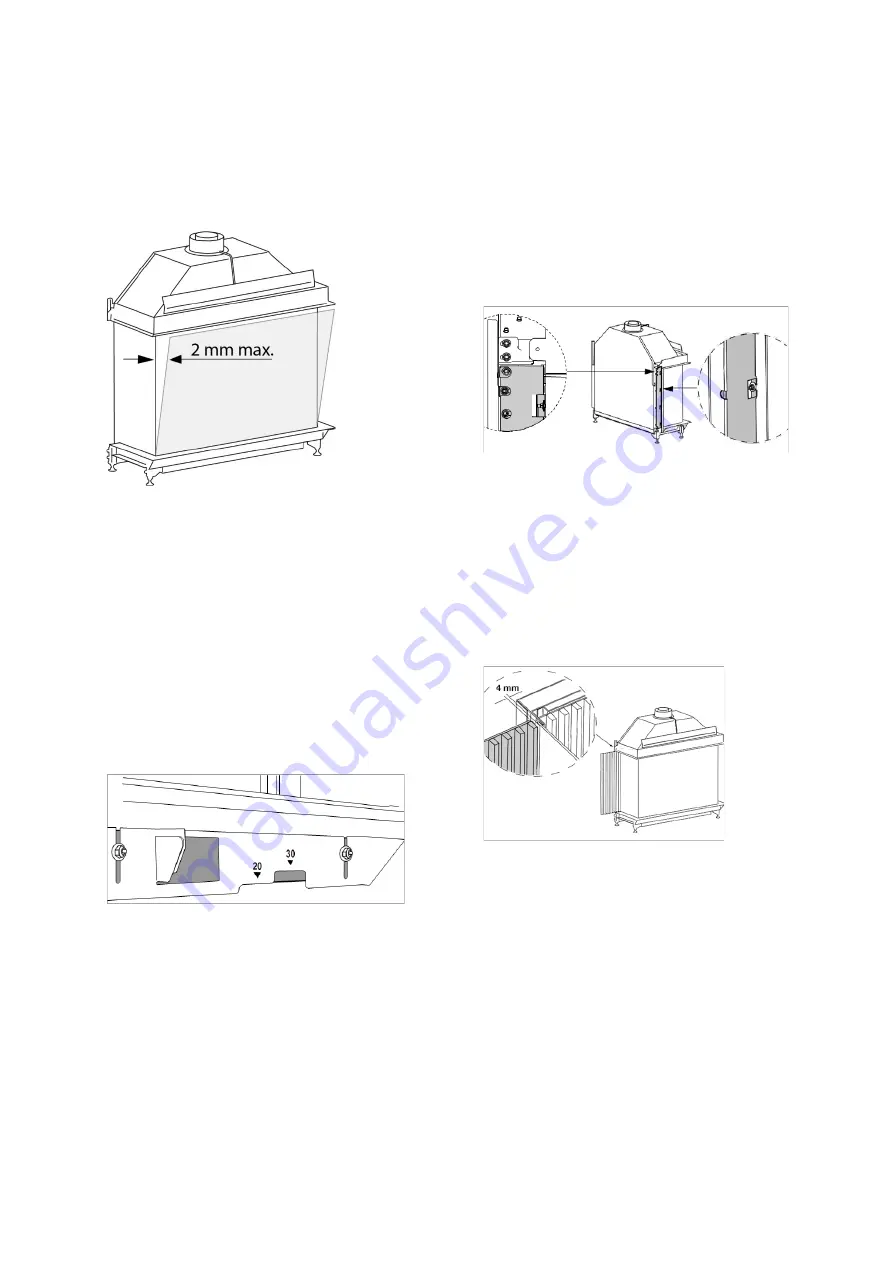
Check whether all four front glass corners
align with the side glass. The twisting and
turning that was necessary while setting and
adjusting the gas fire, may have caused the
front and the side glass to become
misaligned.
Figure 7: Check alignment front glass
12.
Set the gas fire accurately by adjusting the
legs, so the glass properly aligns.
5.2.2 Adjusting the stone support
The gas fire is equipped with stone support, so
tiles or other plateau-finishing materials can be
supported to the side of the fireplace.
The stone support can be adjusted without using
steps over a 30 mm distance. The stone support
is equipped with an indicator for a stone
thickness of 20 mm to 30 mm, as depicted. The
stone support can also be removed as one.
Figure 8: Stone thickness indicator
Carry out the following steps to adjust the stone
support;
1.
Unscrew the nuts at the bottom end of the
assembly strip.
2.
Set the desired height.
3.
Tighten the screws and place the stones.
4.
Leave a minimum of 4 mm between the
stone and the glass. See Installation
Instructions, paragraph 2.3.
5.
At the front, leave a minimum of 1 mm of
space between the glass support and the
finishing. Prevent excessive tension on the
glass caused by the glass support as a result
of heat expansion.
5.2.3 Continuous rear wall finishing (option)
When opted for a continuous real wall finishing,
the following steps should be carried out:
1.
Determine the side to which the rear wall is
to be continued.
2.
Remove the four nuts as depicted in the
figure.
Figure 9: Removing the strip
3.
Unscrew the upper and lower nuts.
4.
Remove the steel vertical strip.
5.
Place the panel (ceramic glass or design) that
you wish to continue outside of the fireplace
in the correct position.
6.
Always leave 4 mm space between the panel
and the glass frame, in order to keep it
accessible for service requirements.
Figure 1
0
:
Space between panel and fireplace (4 mm)
5.3
Connecting the gas fire
5.3.1 connecting the gas pipe
All necessary connections are located on the
right side of the E-box located under the
fireplace.
•
Fit the gas pipe and connect the fireplace
with a 3/8" female thread.
For the UK: use a straight connector brass
3/8”. You may order this from Kalfire (item
no. 520213: straight connector brass 3/8"
male iron x12mm)
Summary of Contents for Gi75/59F
Page 1: ...INSTALLATION INSTRUCTIONS Balanced flue gas systems...
Page 2: ......
Page 45: ...45...
Page 46: ...46...
Page 47: ...47...
Page 49: ...49...
Page 50: ...50...
Page 51: ...51...
Page 52: ...52...
Page 53: ...53...
Page 54: ...54...
Page 59: ...59...
Page 60: ...Gelo rveldweg 21 5951 DH Belfeld info kalfire com KALFIRE COM V12 2023 EN...


