KALI AUDIO IN-Series Studio Monitor User’s Guide
13
Dip Switches
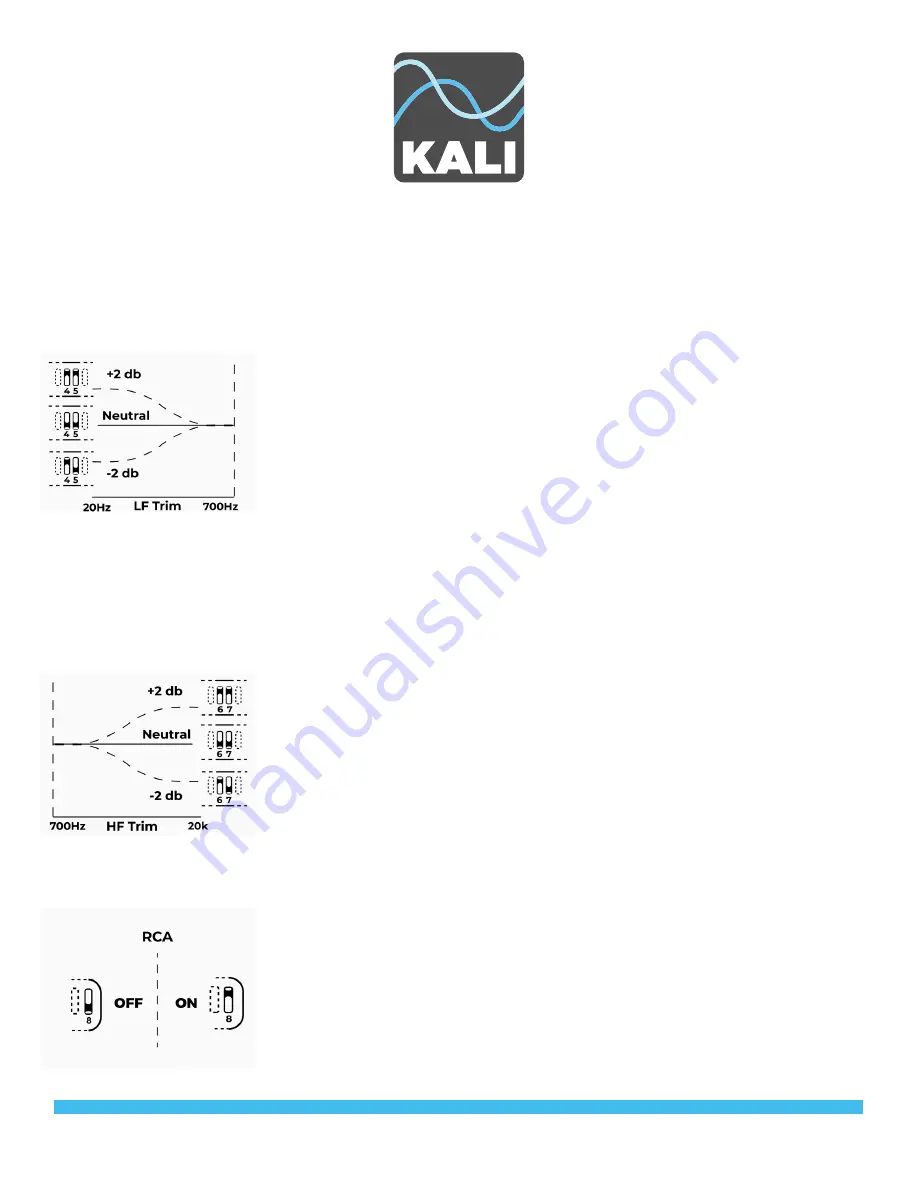
Switches 4&5: Low Frequency Trim
The Low Frequency trim will add or subtract 2 dB from the Low Frequency response of the speak-
er. This can be done as a matter of personal taste, or if the room you’re mixing in requires addi-
tional adjustment beyond what is offered by the boundary compensation EQs.
Switch 4: Engage LF Trim
DOWN: LF Trim Disengaged
UP: LF Trim Engaged
Switch 5: Adjust LF Trim:
DOWN: -2 dB in Low Frequencies
UP: +2 dB in Low Frequencies
Note: Switch 5 does not function independent of switch 4. If switch 4 is
DOWN, the LF trim will be DISENGAGED, and switch 5 will have no effect.
Switches 6&7: High Frequency Trim
The High Frequency trim will add or subtract 2 dB from the High Frequency response of the
speaker. This can be done as a matter of personal taste, or if the room you’re mixing in requires
additional adjustment beyond what is offered by the boundary compensation EQs.
Switch 6: Engage HF Trim
DOWN: HF Trim Disengaged
UP: HF Trim Engaged
Switch 7: Adjust HF Trim:
DOWN: -2 dB in High Frequencies
UP: +2 dB in Low Frequencies
Note: Switch 7 does not function independent of switch 6. If switch 6 is
DOWN, the HF trim will be DISENGAGED, and switch 7 will have no effect.
Switch 8: RCA
Switch 8 turns the RCA input on and off. By default, the RCA input on the
speaker is OFF. This is to prevent interference when that input is not being
used. When connecting to the RCA input, enable it by moving switch #8
on the dip switches UP to the ON position. If the RCA input is no longer
being used, be sure to move switch #8 back DOWN to the OFF position.


