Maintenance and Troubleshooting FineLine 200PC User’s Manual
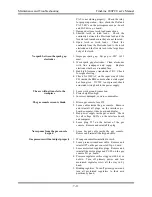
PAT is not closing properly. Check the relay
for proper operation. Also, check the PAR and
PAT LED’s on the microprocessor p.c. board
and PAT drive p.c. board.
7. Damaged or loose torch lead connections.
8. Shorted torch or torch leads. Check the
continuity between the Electrode lead and the
Nozzle lead to make sure they are not shorted.
9. Open torch or torch leads. Check the
continuity from the Electrode lead to the torch
electrode and the Nozzle lead to the large brass
body of the torch.
No spark between the spark gap
electrodes
1. Improper spark gap. Set gap to .025” (.635
mm).
2. Worn spark gap electrodes. Clean electrodes
with fine sandpaper and regap. Replace
electrodes that have a rounded face.
3. Bad high frequency transformer TR5. Check
for signs of arcing.
4. Check for 120VAC on the input side of filter
FL1 inside the RHF console after a start signal
has been given. If 120V is not present, check
associated wiring back to the power supply.
The arc will not transfer to the
workpiece
1. Loose work ground connection.
2. Pierce height too high.
3. Incorrect, damaged, or worn consumables.
The gas console screen is blank
1. Blown gas console fuse F10.
2. Loose cables inside the gas console. Remove
and reinstall all plugs on the interface p.c.
board, computer, video board, and display.
3. Bad power supply inside gas console. Check
for all voltage LED’s on the interface board
and computer.
4. Loose plug P17 on the bottom of the gas
console. Remove and reinstall the plug.
No response from the gas console
keypad
1. Loose keypad cable inside the gas console.
Remove and reinstall the keypad cable.
Gas pressures will not adjust properly
1. Wrong consumables installed in torch.
2. Loose pressure transducer cable. Remove and
reinstall P7 on the gas console I/O p.c. board.
3. Loose motorized regulator plugs. Remove and
reinstall the motor plugs and P3-P6 on the gas
console I/O p.c. board.
4. Pressure regulator orifice clogged with dirt or
debris. Turn off primary power and turn
motorized regulator screw all the way in by
hand.
5. Binding regulator. Turn off primary power and
turn all motorized regulators to their mid
positions by hand.
7-11
Summary of Contents for FineLine 200PC
Page 2: ...This page intentionally left blank ...
Page 10: ...This page intentionally left blank ...
Page 24: ...This page intentionally left blank ...
Page 31: ...Installation FineLine 200PC User s Manual Figure 3 3 Power Supply Output Connections 3 7 ...
Page 36: ...Installation FineLine 200PC User s Manual Figure 3 5 Torch Connections 3 12 ...
Page 42: ...This page intentionally left blank ...
Page 126: ...This page intentionally left blank ...
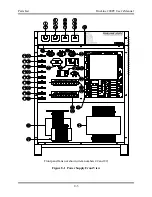
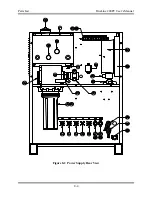
Page 130: ...Parts List FineLine 200PC User s Manual Figure 8 2 Power Supply Rear View 8 4 ...
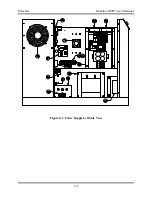
Page 131: ...Parts List FineLine 200PC User s Manual Figure 8 3 Power Supply Left Side View 8 5 ...
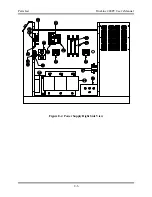
Page 132: ...Parts List FineLine 200PC User s Manual Figure 8 4 Power Supply Right Side View 8 6 ...
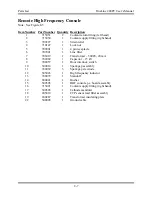
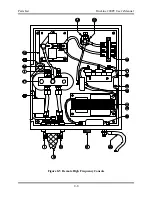
Page 134: ...Parts List FineLine 200PC User s Manual Figure 8 5 Remote High Frequency Console 8 8 ...
Page 146: ...Parts List FineLine 200PC User s Manual QUICK DATA Figure 8 16 Gas Console Exterior 8 20 ...
Page 147: ...Parts List FineLine 200PC User s Manual Figure 8 17 Gas Console Interior 8 21 ...
Page 157: ...Propylene Glycol MSDS FineLine 200PC User s Manual Appendix A Propylene Glycol MSDS A 1 ...
Page 158: ...Propylene Glycol MSDS FineLine 200PC User s Manual A 2 ...
Page 159: ...Propylene Glycol MSDS FineLine 200PC User s Manual A 3 ...
Page 160: ...Propylene Glycol MSDS FineLine 200PC User s Manual A 4 ...
Page 161: ...Propylene Glycol MSDS FineLine 200PC User s Manual A 5 ...
Page 162: ...Propylene Glycol MSDS FineLine 200PC User s Manual A 6 ...
Page 163: ...Propylene Glycol MSDS FineLine 200PC User s Manual A 7 ...
Page 164: ...Propylene Glycol MSDS FineLine 200PC User s Manual A 8 ...


