background image

76

GB

Menù programmazione

Menu 02 SET CLOCK

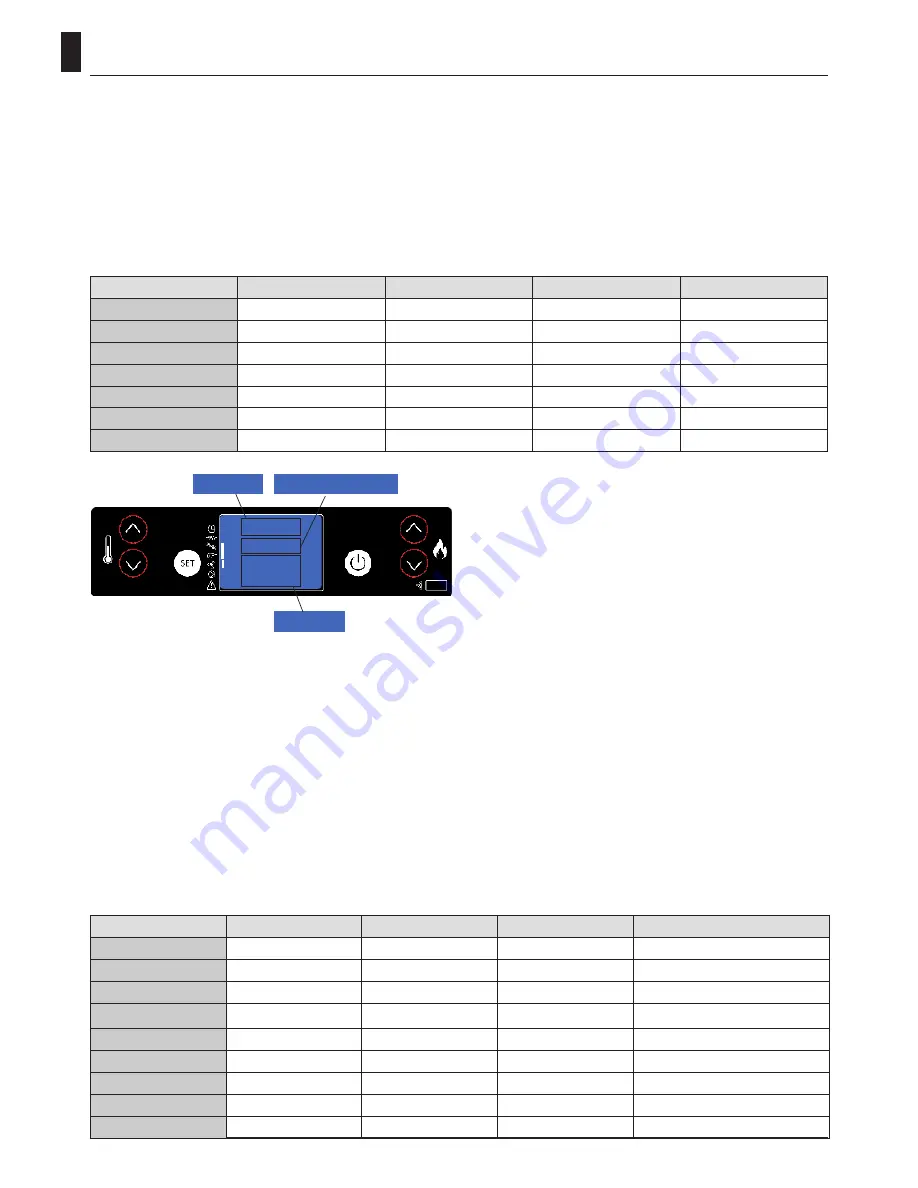
To access the set clock option, press the “SET” button (3), with the button - (5) scroll through the submenus until MENU 
02 - SET CLOCK and with buttons 1 and 2 select the current day. Press the “SET” button (3) to confirm.
Then use buttons 1 and 2 to set the time and press “SET” (3) to advance to the minutes setting by pressing buttons 1 and 
2. By pressing set again it’s possible to access various submenus in order to set the date, day, month, and year. To do so, 
repeat the steps indicated above, using buttons 1, 2, and 3.
The following table briefly describes the structure of the menu, focusing only on those selections which are available to 
the user.

Set the current time and date. The device comes equipped 
with a lithium battery that allows the internal clock to 
operate autonomously for over 3-5 years.

Menu 03 SET CHRONO

Press the “SET” button (3) and then button 5 to arrive at the desired menu; press “SET” (3) to enter.
Enter menu M-3-1 and with buttons 1 and 2 select whether or not to activate the thermostat (on/off), which allows you 
to program the automatic ignition of the stove. 
Once the thermostat is activated/deactivated, press button “4” (OFF) and continue scrolling though the submenus using 
button 5. Select which submenu you wish to enter in order to access the daily, weekly, and weekend programmes.
To set the ignition times and days repeat the previous steps:
- access the submenu using “SET” (3)
- adjust the days, times, and activation status (on/off) with buttons 1 and 2
- confirm by pressing the “SET” button (3)
- exit from the submenu/menu with button 4 to turn it off
The following table briefly describes the structure of the menu, focusing only on those selections which are available to 
the user.

livello 1

livello 2

livello 3

livello 4

valore

03 - set crono

01 - abilita crono

01 - abilita crono

on/off

02 - program. giorno

01 - crono giorno

on/off

02 - start 1 giorno

ora

03 - stop 1 giorno

ora

04 - start 2 giorno

ora

05 - stop 2 giorno

ora

06

Menu 02

mese
orologio

livello di menù

input

dialogo

level 1

level 2

level 3

level 4

value

02 - set clock

01 - day

day of the week

02 - hour

hour

03 - minutes

minutes

04 - day

day of the month

05 - month

month

06 - year

year

Summary of Contents for Alessia

Page 1: ...USER MANUAL Alessia Mara 14B Boiler Stove Instructions for the correct use and maintenance of your Kalor wood pellet stove Distribution and warranty in Ireland by...

Page 2: ...of the stove door handle sides can reach high temperatures Therefore pay attention and use the proper precautions above all in the presence of children elderly or disabled persons and animals Assembly...

Page 3: ...fact regulates the lighting phase 5 power levels and the shut down stage guaranteeing the safe operation of the stove The basket used for combustion allows most of the ash produced by the combustion...

Page 4: ...le and tubes become very hot during operation do not touch these parts without adequate protection Keep the fuel and other inflammable materials off the thermostove Charge pellet Fuel is loaded from t...

Page 5: ...ch the thermostove with wet hands the thermostove has electrical components that could produce sparks if handled incorrectly Never open the glass door of the pellet stove while the thermostove is in o...

Page 6: ...le maintain a minimum distance of 10 cm at the rear A of 20 cm at the side B and 100 cm at the front If the room contains objects which are be lieved to be particularly delicate such as drapes sofas a...

Page 7: ...nless steel pipe must not be used At the bottom of the flue pipe provide an inspection cap to allow periodic checking and cleaning which must be done annually Make a gas tight connection to the flue p...

Page 8: ...in any case be well insulated It must be constructed to prevent rain snow and extraneous bodies from entering the flue and so that the discharge of the products of combustion is not inhibited by wind...

Page 9: ...he collective type Should these devices be located in adjacent rooms communicating with the installation and prohibited the simultaneous use of the heat generator where there is a risk that one of the...

Page 10: ...30 30 120 120 400 400 1000 0 1 0 3 0 2 0 5 METRICHE ISO 0 8 FILETTATURE 1 ANGOLI FORI Maschio Femmina 7H 6g 0 1 progettazione meccanica Descrizione Materiale Trattamento Codice Sostituisce Modifiche D...

Page 11: ...93 54 Reduced efficiency 96 29 Pellet consumption min max Kg h 1 067 3 017 Heated surface mc 270 Flue gas flow rate min max g s 4 3 8 5 Draft min max Pa 10 12 Flue gas temperature min max C 63 124 8 B...

Page 12: ...e the hydraulic diagram press the SET key and then scroll to the Technical settings menu with the power key PPress the SET key again to enter the menu and enter the access key in possession of only th...

Page 13: ...IZED TECHNICIAN How to select the type of Stand by OPERATION BY A SPECIALIZED TECHNICIAN Press the SET button press button to go to menu 09 Press the SET button again Enter the access key and confirm...

Page 14: ...g the probe on the board press the key Increase or decrease degrees with the and keys c To set the work power press the key and adjust it with the e Reaction from the stand by state is when a heat inc...

Page 15: ...25 STAND BY IF PROBE H2O SET H2O a HEATING SANITARY HEALTH CALL ON 02 H2O WINTER ON IF H2O PARAM 25 MODULE IF PROBE H2O 80 C HEATING SANITARY SANITARIO NON CHIAMA OFF 03 TERM ES WINTER ON IF H2O PARAM...

Page 16: ...trictly connected to the system and to allow slighht movement These are as helpful as the supply and return piping system if the heating system is on a higher floor than the boiler The exhaust pipe pr...

Page 17: ...oom using the probe on the board press the key Increase or decrease degrees with keys and c To set the work power press the key and adjust it with the and keys The rinsing from the stand by state occu...

Page 18: ...SET H2O a HEATING ACS IN CONTACT SANITARY IN CALL ON 02 H2O WINTER ON IF H2O PARAM 25 MODULE IF PROBE H2O 80 C HEATING ACS IN CONTACT SANITARY IN CALL OFF 03 TERM ES WINTER ON IF H2O PARAM 25 MODULE I...

Page 19: ...with the and b To set the desired temperature in the room using the probe on the board press the key Increase or decrease degrees with the and keys c To set the work power press the key and adjust it...

Page 20: ...RK AND IF H2O PROBE 80 MODULE CONTACT PUFFER LOW THERMOSTAT DOES NOT CALL AND HIGH CALL OFF 01 02 03 WINTER SUMMER ON IF H2O PARAM 25 WORK AND IF H2O PROBE 80 MODULE CONTACT PUFFER LOW AND HIGH THERMO...

Page 21: ...c To set the work power press the key and adjust it with the and keys d To adjust the working power the desired temperature inside the DHW tank press the button Increase or decrease the desired degre...

Page 22: ...02 H2O WINTER ON SE H2O SON ACS AND IF H2O PR PUMP ON MODULE IF PROBE H2O SET ACS 10 d HEATING DHW WITH PROBE PROBE ACS SET ACS OFF 03 TERM ES WINTER ON SE H2O PARAM 25 MODULA IF THERMOSTAT EXTERNAL S...

Page 23: ...uffer press the key Use the and keys to select the desired degrees b To set the temperature on the bottom of the puffer press the key and use the e and B keys to select the desired degrees c To set th...

Page 24: ...ODULE AND IF H2O PROBE 80 STAND BY FORCE 2 SIDE PUFFER 4 S1 E S2 SET PUFFER OFF 01 02 03 WINTER SUMMER ON ON IF H2O S1 AND S2 AND IF H2O PR PUMP ON H2O PROBE 80 MODULE 2 SIDE PUFFER 4 S1 E S2 SET PUFF...

Page 25: ...trol unit a To set the temperature in the DHW tank press the key Use the and keys to select the desired degrees b To set the temperature in the technical water puffer press the key and use the and key...

Page 26: ...AND BY PUFFER DHW PROBE BOILER DHW PROBE DHW SET AND PUFFER PROBE SET PUFFER ON 01 02 03 WINTER ON IF H2O PROBE DHW AND IF H2O PR PUMP ON WORK AND MODULATE H2O PROBE 80 PUFFER DHW PROBE BOILER DHW PRO...

Page 27: ...e used to adjust temperature for displays and for the programming functions Buttons and are used to adjust heating power Button e is used to adjust temperature and programming functions The upper and...

Page 28: ...fume extractor and the cochlea engine are active FIRE PRESENT In this phase of the ignition process the stove starts loading the pellets into the brazier The fume extractor and the cochlea engine are...

Page 29: ...e water sensor is not connected There is a short circuit on the water sensor Check the water sensor is connected Contact an Authorized Assistance Center ALAR HOT TEMP The smokes temperature exceeds 28...

Page 30: ...nd 2 select whether or not to activate the thermostat on off which allows you to program the automatic ignition of the stove Once the thermostat is activated deactivated press button 4 OFF and continu...

Page 31: ...9 saturday prog 1 on off 10 sunday prog 1 on off 11 start program 2 hour 12 stop program 2 hour 13 monday progr 2 on off 14 tuesday progr 2 on off 15 wednesday prog 2 on off 16 thursday prog 2 on off...

Page 32: ...according to the following table where the OFF setting tells the clock to ignore the command The weekly programmer has 4 independent programmes whose final effect is composed of the combination of the...

Page 33: ...AY PROGR 1 on off 02 03 08 FRIDAY PROGRAM 1 on off 02 03 09 SATURDAY PROGR 1 on off 02 03 10 SUNDAY PROGR 1 on off PROGRAMME 2 menu level selection meaning possible values 03 03 11 START PROGRAM 2 act...

Page 34: ...g until the pellets left in the brazier ends You will then read the words Alar No Fire on the display and the boiler switches off Press the key On Off to reset the alarm Wait until the cooling phase i...

Page 35: ...of incrustation and limescale especially in the domestic water heat exchanger 25 French Installation of a water softener if water hardness 25 French Filling the system with treated water demineralise...

Page 36: ...ards themselves Reduction motor if the motor stops the thermostove continues to function until the flame goes out for lack of fuel and until It has cooled down to the minimum level Automatic vent valv...

Page 37: ...the tank or because the motor reducer for pellets loading got broken The thermostove continues working until the pellets left in the brazier ends You will then read the words Alar No Fire on the disp...

Page 38: ...5 days Every 30 days Every 60 90 days Every 1 year Brazier Cleaning the ash collection compartment with suction device Cleaning ash tray Cleaning the door and glass Exchanger turbulators Cleaning the...

Page 39: ...r to be used to remove it Only if the ash is completely cold you can also use a canister vacuum cleaner suitable for picking up particles of a certain size Cleaning ash and combustion chamber includin...

Page 40: ...eck every year Compartment ventilation flue gas cleaning Remove the fixing screws and remove the smoke fan for cleaning of the same Perform the task with the greatest care not to bend the fan blades C...

Page 41: ...on the basis of how the thermostove is used We recommend that an annual maintenance service is carried out preferably under a programmed service contract The essential part of this service is a visual...

Page 42: ...ater will ap pear on the lower display the word SERV please contact your Authorized Service Center for cleaning and routine maintenance Warnings for cleaning All cleaning of all parts must be carried...

Page 43: ...o the device and the replacement of parts with other non original The operations marked in bold type must be carried out by specialised personnel Problems and solutions PROBLEM POSSIBLE CAUSE REMEDY P...

Page 44: ...ns in the manual 9 Clean the smoke duct 10 Check the motor and replace if necessary 11 Replace the pressure The stove runs for a few minutes and then goes out 1 Lighting cycle not completed 2 Temporar...

Page 45: ...SE REMEDY No increase in temperature with stove in operation 1 Incorrect combustion adjustment 2 Boiler system dirty 3 Insufficient stove power 1 Check parameters 2 Check and clear the boiler 3 Check...

Page 46: ...ranty covering manufacturing defects and defects in material declines for unauthorized personnel work for damage caused by transport or for causes not attributable to the manufacturer for incorrect in...

Page 47: ...93 GB NOTES Cod 001143...

Page 48: ...nd maintained as recommended by the manufacturer Your first point of contact for warranty issues is your Authorised Kalor Dealer where you purchased your stove PLEASE NOTE Commissioning of your stove...

Reviews: