


www.KALORIK.com
9
CMM 39732 - 200528
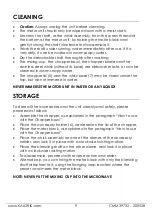
CLEANING
•
Caution:
Always unplug the unit before cleaning.
•
The motor unit should only be wiped down with a moist cloth.
•
Unscrew the shaft, or the whisk assembly, from the screw thread at
the bottom of the motor unit, by holding the motor block and
gently turning the shaft clockwise to dis-assemble it.
•
Wash the shaft under running water immediately after use. If it is
very dirty, it can be washed in warm soapy water.
•
Dry the detachable shaft thoroughly after washing.
•
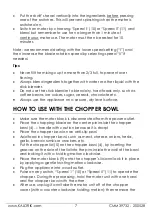
The mixing cup, the chopper bowl, the chopper blade and the
stainless-steel whisk (without its base) are dishwasher safe, or can be
cleaned in warm soapy water.
•
The chopper lid (5) and the whisk base (7) may be rinsed under the
tap, but do not immerse in water.
NEVER IMMERSE THE MOTOR UNIT IN WATER OR ANY LIQUID!
STORAGE
To store all the accessories and the unit cleanly and safely, please
proceed as follows:
•
Assemble the chopper, as explained in the paragraph “How to use
with the Chopper bowl”.
•
Place the accessory holder (6), centered on the lid of the chopper.
•
Place the motor block, as expl
ained in the paragraph “How to use
with the Chopper bowl”.
•
Place the whisk assembly on one of the domes of the accessory
holder, and lock it in place with a clockwise twisting motion.
•
Place the blending shaft on the other dome, and lock it in place
with a clockwise twisting motion.
•
To disassemble, proceed with reverse action and order.
•
Alternatively, you can hang the motor block with only the blending
shaft attached to it, using the hanging loop located where the
power cord meets the motor block.
NOTE: NEVER PUT THE MIXING CUP INTO THE MICROWAVE


