background image


Copies  of  the  I/B.  Please  reproduce  them  without  any 
changes  except  under  special  instruction  from  Team 
International  BELGIUM.  The  pages  must  be  reproduced 
and folded in order to obtain a booklet A5 (+/- 148.5 mm 
width  x  210  mm  height).  When  folding,  make  sure  you 
keep  the  good  numbering  when  you  turn  the  pages  of 
the  I/B.  Don’t  change  the  page  numbering.  Keep  the 
language integrity. 


20 

TKG DAT 1000 - 121017 


Assembly page 20/36 


Fax +32 2 359 95 50 


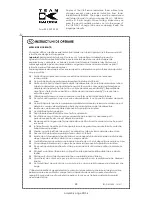
Antes da primeira utilização, retire do ferro tudo o que o proteja ou nele esteja colado. Leia 
atentamente as instruções de utilização do ferro de passar os tecidos. 
 
ENCHIMENTO DO DEPÓSITO DA ÁGUA 

 
Pode utilizar água destilada ou água da torneira. Caso utilize água da torneira, aconselhamos 
a que regularmente faça a descalcificação da base do ferro. A frequência da 
descalcificação depende da dureza da água  do local da utilização do ferro de passar 
tecidos. Se utilizar a função vapor, ponha água no depósito da água: 
1)


Com o aparelho desligado, a ficha do cabo da alimentação retirada da tomada 
eléctrica e a base do ferro fria e assente na horizontal em cima de uma superfície plana 
e sólida. 

2)


Rode o botão regulador da temperatura para a posição “MIN”. 

3)


Utilize um copo graduado e encha o depósito da água através do orifício de 
enchimento, sem nunca ultrapassar a marca do nível máximo. 


NO ENCHIMENTO DO DEPÓSITO DA ÁGUA, SE O FERRO ESTIVER A SER UTILIZADO, DESLIGUE O 
FERRO E REIRE A FICHA DO CABO DA ALIMENTAÇÃO DA TOMADA ELÉCTRICA. PONHA A ÁGUA 
NO DEPÓSITO DA ÁGUA PELA ABERTURA PARA TAL EFEITO, COM A BASE DO FERRO NA 
HORIZONTAL E ASSENTE NUMA SUPERFÍCIE PLANA, SÓLIDA E RESISTENTE A ALTAS TEMPERATURAS.   


BOTÃO REGULADOR DA TEMPERATURA 


Este botão permite posicioná-lo na temperatura exigida para a passagem dos tecidos 
conforme a temperatura  indicada na etiqueta fixa aos tecidos. 


Para começar a passar rode o botão no sentido dos ponteiros do relógio, até à posição 
da temperatura indicada na etiqueta fixa aos tecidos. 


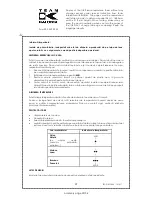
INFORMAÇÃO PARA A PASSAGEM DE TECIDOS 
 

Tipo de tecido 

Regulação da temperatura 

Nylon 
Sintetico

 (cetim, acrilico, 

viscose, polymide ou 
polyester) 


MIN 


Seda  
Lã  


|


Algodão 
Linho 


MAX


Encha o depósito da água. 


Ligue o aparelho e coloque a ficha do cabo da alimentação na tomada eléctrica. 


Rode o botão da temperatura, no sentido dos ponteiros do relógio, até à temperatura de 
passar o tecido – verifique sempre a etiqueta fixa aos tecidos. 


Ponha o ferro na vertical e espere que o sinalizador da temperatura se apague, 
assinalando que a temperatura está alcançada. 

Summary of Contents for TKG DAT 1000

Page 1: ...you keep the good numbering when you turn the pages of the I B Don t change the page numbering Keep the language integrity Front cover page first page Assembly page 1 36 Fax 32 2 359 95 50 Reisedampf...

Page 2: ...148 5 mm width x 210 mm height When folding make sure you keep the good numbering when you turn the pages of the I B Don t change the page numbering Keep the language integrity 2 TKG DAT 1000 121017...

Page 3: ...opening 2 Stoomstootknop 3 Thermostaat 4 Controlelampje temperatuur 5 Strijkzool 6 Waterreservoir 7 Ontgrendelingsknop voor handvat SP 1 Orificio de entrada de agua 2 Doble vapor 3 Regulador de temper...

Page 4: ...vor Sie das Ger t reinigen Warten Sie bis das Ger t vollst ndig abgek hlt ist bevor Sie es reinigen wegstellen oder mit Wasser f llen Benutzen Sie das Ger t nicht im Freien und bewahren Sie es an eine...

Page 5: ...sser mit einem Messbecher in die Einf ll ffnung ohne den Wassertank zu berf llen 4 W hrend des B gelns ziehen Sie den Netzstecker und f llen Sie den Wassertank ohne das B geleisen auf die hei e Sohle...

Page 6: ...Steckdose und lassen Sie das Ger t abk hlen bevor Sie es reinigen Reinigen Sie das Geh use des B geleisens mit einem feuchten Tuch Verwenden Sie keine Schleifmittel um die Sohle zu reinigen sondern ve...

Page 7: ...Before cleaning always unplug the appliance from the power supply Never use the appliance outside and always place it in a dry environment Never use accessories that are not recommended by the produce...

Page 8: ...by holding the appliance in horizontal position without putting down the hot sole plate unless you have a heat resistant base TEMPERATURE SETTINGS You can choose the temperature setting according to...

Page 9: ...e sure you use a product made especially for this purpose Never use abrasive products WHEN YOU HAVE FINISHED IRONING Turn the temperature dial to MIN and unplug the iron from electrical outlet Empty t...

Page 10: ...pour son nettoyage ni pour toute autre raison N utilisez pas l appareil pr s de sources de chaleur La fiche doit tre d branch e avant de remplir le r servoir de votre appareil de le nettoyer et de le...

Page 11: ...adapt Attention de ne pas d border 4 En cours de repassage d branchez votre appareil et remplissez le r servoir en maintenant le fer horizontalement sans le poser sur sa semelle sauf si vous disposez...

Page 12: ...ttoyer les parties plastiques faites usage d un chiffon doux l g rement humide Pour nettoyer la semelle n utilisez aucun produit ou tampon abrasif mais faites usage de nettoyants sp ciaux que vous tro...

Page 13: ...model met spray en of stoom Verwijder de stekker uit het stopcontact vooraleer u het toestel reinigt Gebruik het toestel niet buiten en berg het op in een droge ruimte Gebruik geen toebehoren die niet...

Page 14: ...l op een voldoende stabiel werkvlak 2 Zet de thermostaat op MIN 3 Vul het reservoir met water met behulp van een maatbeker zonder dat het reservoir overloopt 4 Om het waterreservoir tijdens het strijk...

Page 15: ...zing aandachtig ONDERHOUD EN REINIGING Trek de stekker uit het stopcontact en laat het toestel volledig afkoelen vooraleer u het reinigt Reinig de buitenkant met een licht vochtige doek Gebruik geen s...

Page 16: ...limpieza ni por cualquier otra raz n No lo introduzca nunca en el lavavajillas No utilice el aparato cerca de fuentes de calor La clavija el ctrica debe ser desenchufada antes de limpiar el aparato P...

Page 17: ...locando la plancha en posici n horizontal no la coloque sobre su suela o h galo nicamente si su la superficie sobre la que la coloque sea capaz de soportar la temperatura de su suela sin estropearla c...

Page 18: ...limpieza desenchufe el aparato y d jelo enfriar Limpie las partes pl sticos con un pa o suave humedecido Nunca utilice productos abrasivos para limpiar la suela Utilice productos especiales que venden...

Page 19: ...r ximo de fontes de calor O aparelho ao ser limpo tem de ter o cabo de alimenta o retirado da tomada fornecedora da corrente el ctrica O aparelho n o deve ser utilizado fora de casa e deve ser guardad...

Page 20: ...gulador da temperatura para a posi o MIN 3 Utilize um copo graduado e encha o dep sito da gua atrav s do orif cio de enchimento sem nunca ultrapassar a marca do n vel m ximo NO ENCHIMENTO DO DEP SITO...

Page 21: ...nta o retirado da tomada el ctrica Para limpar as partes pl sticas utilize um esfreg o macio e ligeiramente h mido Para limpar a base n o utilize produtos abrasivos mas sim produtos aconselhados para...

Page 22: ...istruzioni Non immergere mai l apparecchio in acqua o in qualsiasi altro liquido n per pulirlo n per qualsiasi altra ragione Mai metterlo in una lavastoviglie Non usare l apparecchio in prossimit di s...

Page 23: ...il il serbatoio 4 Durante la stiratura scollegare il ferro e riempirlo d acqua tenendolo in posizione orizzontale appoggiandolo ad una superficie che sopporti l alta temperatura per es la griglia in f...

Page 24: ...e con prodotti concepiti apposta per questo scopo QUANDO SI HA FINITO DI STIRARE Mettere il termostato in posizione MIN e staccare la spina dalla presa di corrente Svuotare l acqua dal serbatoio Siste...

Page 25: ...ywaj w pobli u r de ciep a Przed czyszczeniem lub przechowywaniem wy cz urz dzenie z sieci i pozostaw a ca kowicie ostygnie Nie u ywaj na zewn trz zadbaj aby urz dzenie pracowa o w suchym otoczeniu Ni...

Page 26: ...ji MIN 3 Wlej wod do zbiornika przez otw r za pomoc specjalnej miarki Nie przepe niaj zbiornika 4 W czasie prasowania przed ponownym nape nieniem od cz urz dzenie od sieci elektrycznej Nape niaj je w...

Page 27: ...omoc specjalnych preparat w Nie u ywaj preparat w ciernych ani ostrych narz dzi PO ZAKO CZENIU PRASOWANIA Ustaw pokr t o temperatury w pozycji MIN i wy cz urz dzenie z sieci Nie kieruj c stopy w swoja...

Page 28: ...si nu il puneti in masina de spalat vase Nu lasati aparatul pe sau in apropierea suprafetelor incinse sau surselor de caldura ce pot deteriora carcasa elementele din plastic ale carcasei sau cablul de...

Page 29: ...o suprafata dreapta si stabila 2 Rotiti selectorul de temperatura pe pozitia MIN 3 Pentru a umple rezervorul turnati cu paharul gradat de plastic apa in gura de alimentare Nu umpleti peste limita tanc...

Page 30: ...au chiar la pulverizare cu apa INTRETINERE SI CURATARE Deconectati intotdeauna aparatul si latati l sa se raceasca inainte de curatare Pentru curatarea partilor de plastic ale fierului de calcat folos...

Page 31: ...o in ch tekut n i u kv li isteniu alebo in mu elu Nikdy ned vajte pr stroj do um va ky riadu Zariadenie nikdy nepou vajte v bl zkosti hor cich pl ch Pred isten m v dy odpojte pr stroj zo z suvky Zaria...

Page 32: ...ed naplenen m Napl te n dr ku tak e dr te ehli ku v horizont lenj polohe bez toho aby ste ju pokladali na podstavec NASTAVENIE TEPLOTY M te si vybra teplotu pod a oble enia ktor potrebujete o ehli Za...

Page 33: ...ehliacej plochy pou ite produkt na to peci lne ur en Nikdy nepou vajte abraz vne prostriedky KE SKON TE SO EHLEN M Nastavte teplotu do polohy MIN a odpojte ehli ku z elektrickej siete Vypr dznite n dr...

Page 34: ...o pr stroja inou osobou ako osobou nami poverenou servisom Ak sa vyskytne na Va om pr stroji z vada za lite alebo odovzdajte elektrospotrebi s kompletn m pr slu enstvom s uveden m Va ej adresy a tel s...

Page 35: ...ELGIUM The pages must be reproduced and folded in order to obtain a booklet A5 148 5 mm width x 210 mm height When folding make sure you keep the good numbering when you turn the pages of the I B Don...

Page 36: ...n a booklet A5 148 5 mm width x 210 mm height When folding make sure you keep the good numbering when you turn the pages of the I B Don t change the page numbering Keep the language integrity Back cov...

Reviews: