background image


Copies  of  the  I/B.  Please  reproduce  them  without  any 
changes  except  under  special  instruction  from  Team 
International USA. The pages must be reproduced and folded 
in order to obtain a booklet A5 (+/- 148.5 mm width x 210 mm 
height).  When  folding,  make  sure  you  keep  the  good 
numbering when you turn the pages of the I/B. Don’t change 
the  page  numbering.  Keep  the  language  integrity. 

Print  only 

what is inside the frame.


14


 FHG 30035 - 140407 


Assembly page 14/32 


Fax +1 305 430 9692 


tiempo. Cuando su plancha se calienta por primera vez, puede 
emitir un poco de humo o el olor. Es algo normal que ocurre con 
muchos aparatos de calor.  Esto no afecta a la seguridad de su 
aparato. 


PUESTA EN MARCHA 


Coloque el aparato en sobre una superficie lisa, seca y resistente 
al calor.  


Con el termostato ajustado a "Min", enchufe su aparato a la 
corriente eléctrica. La  luz roja se enciende. 


Coloque el recipiente de recogida de grasa cerca de la boquilla 
situada en el lado del aparato. 


Gire el termostato al nivel de temperatura deseado. Le 
recomendamos el nivel  “Max” para asar las carnes, para los 
paninis y sándwiches el nivel medio, y  para recalentar el nivel 
bajo.   


Precaliente la plancha hasta llegar  a llegar a la temperatura 
deseada. Cuando el aparato alcanza la esta temperatura, el 
piloto verde se encenderá. Para precalentar rápidamente, 
mantenga el aparto cerrado.  Una vez alcanzada la 
temperatura abra las rejillas para evitar el sobrecalentamiento.  


Aplique un poco de aceite o un spray de aceite antiadherente 
para cocinar  en la placa de cocción si necesario.  El alimento 
puede entonces, ser colocado en la grill.  


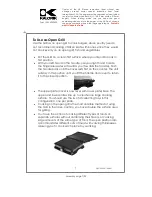
Para uso como parrilla de contacto   

Utilice la plancha de esta forma para hamburguesas, trozos 
deshuesados de carne o verduras. 


Ajuste la plancha a la temperatura deseada. Al principio,  ponga 
el termostato de temperatura en “Max”, luego  puede ajustarlo a 
una temperatura inferior o superior de acuerdo a su preferencia. 


Preparar las hamburguesas, trozos deshuesados de carne y 
cortes finos de carne o de otros alimentos y colóquelos sobre la 
placa inferior, use guantes de cocina  y utensilios de madera o 
de plástico resistentes al calor. 


Cierre la placa superior, esta cuenta con una bisagra flotante 
diseñada para presionar hacia debajo de manera uniforme los 

Summary of Contents for USK FHG 30035

Page 1: ...let A5 148 5 mm width x 210 mm height When folding make sure you keep the good numbering when you turn the pages of the I B Don t change the page numbering Keep the language integrity Print only what...

Page 2: ...any appliance is used by or near children 6 Unplug from outlet when not in use and before cleaning Allow to cool before putting on or taking off parts and before cleaning the appliance 7 DO NOT opera...

Page 3: ...s on the cooking plate as they will scratch the non stick coating 21 DO NOT operate without the drip tray s SAVE THESE INSTRUCTIONS HOUSEHOLD USE ONLY POLARIZED PLUG INSTRUCTIONS This appliance is equ...

Page 4: ...accessories See Cleaning and Care It is recommended to heat the Grill for about 10 minutes without any foodstuff on its surfaces This helps to eliminate any grease that may have adhered during manufa...

Page 5: ...rheating of the unit Apply a little oil or a non stick cooking spray on the cooking plate if needed The food can then be placed on the grill To Use as a Contact Grill Use the Grill as a contact grill...

Page 6: ...e thermostat knob to your desired setting At first try a medium setting You may later adjust it lower or higher according to your preference Prepare the sandwiches and using oven mitts and heat resist...

Page 7: ...position With your left hand on the handle use your right hand to slide the hinge release lever towards you towards the handle Push the handle back until the cover rests flat on the counter The unit...

Page 8: ...s no need to treat the grill prior to cooking CLEANING AND CARE Put in MIN position pull the plug from the power socket and let the appliance cool down completely before cleaning it Clean the grill pl...

Page 9: ...oduct upon inspection by KALORIK is proven defective it will be repaired or replaced at Kalorik s option without charge to the customer If a replacement product is sent it will carry the remaining war...

Page 10: ...nt back to the warranty center along with proof of purchase and a return authorization number indicated on the outer package given by our Customer Service Representatives Send to the authorized KALORI...

Page 11: ...por ni os 6 Desconecte el aparato de la toma de corriente cuando el aparato no se encuentre en uso y antes de limpiarlo Deje enfriar el aparato antes de limpiarlo 7 No opere este y ning n aparato si e...

Page 12: ...FF 19 NO toque la tapa de acero inoxidable durante el uso SUPERFICIE CALIENTE 20 No utilice utensilios met licos Pueden da ar el revestimiento anti adhesivo de la placa de cocci n 21 No opere por medi...

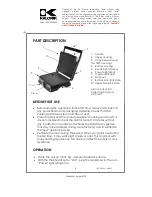
Page 13: ...tal que los ni os no puedan jalarlo o tropezar con l Que no arrastre nunca por el suelo El cable debe ser un cable de tres hilos con toma de tierra PARTES ANTES DE UTILIZAR POR PRIMERA VEZ EL APARATO...

Page 14: ...s el nivel Max para asar las carnes para los paninis y s ndwiches el nivel medio y para recalentar el nivel bajo Precaliente la plancha hasta llegar a llegar a la temperatura deseada Cuando el aparato...

Page 15: ...as placas de cocinar Nota Las ranuras en la placa junto con el ca o en la esquina de esta permite escurrir la grasa de la carne y de las placas Cocine con menos grasa Si usted quiere cocinar con menos...

Page 16: ...e metal o un cuchillo ya que estos pueden causar da o a la capa antiadherente de las placas Para garantizar una utilizaci n uniforme de la parrilla al cocinar m s de una partida de alimentos en esta e...

Page 17: ...alimentos La posici n abierta se adapta a diferentes cortes de carne con diferentes espesores lo que le permite cocinar cada pieza a su gusto CONSEJOS PR CTICOS Descongele les alimentos antes de pone...

Page 18: ...ague con agua caliente sobre una esponja o una toalla y seque las placas con cuidado La limpieza es m s eficiente cuando las placas est n todav a un poco calientes Limpiar las partes exteriores del as...

Page 19: ...aplicaci n de la garant a Durante este per odo si el producto KALORIK despu s de una inspecci n por parte de KALORIK se manifiesta defectuoso ser reparado o remplazado seg n lo que decida KALORIK sin...

Page 20: ...l servicio post venta m s pr ximo Si fuera el caso traiga el producto o env elo correctamente franqueado con la prueba de compra que mencione el n mero de autorizaci n de devoluci n indicado por nuest...

Page 21: ...de la prise murale lorsqu il n est pas utilis ou avant de le nettoyer 6 Ne faites pas fonctionner l appareil si son cordon ou sa fiche est endommag ou si l appareil a pr sent un dysfonctionnement ou e...

Page 22: ...s la surface en acier inoxydable durant ou imm diatement apr s la cuisson SURFACE BRULANTE 20 N utilisez pas d ustensiles en m tal sur les plaques de cuisson car ils endommageraient le rev tement anti...

Page 23: ...isson sont propres et sans poussi res Nettoyez le grill et les accessoires r f rez vous la rubrique Nettoyage et Entretien et placez l appareil sur une surface plane s che et r sistante la chaleur Il...

Page 24: ...ffer ou garder au chaud une temp rature plus basse est recommand e Pr chauffer l appareil jusqu atteindre la temp rature d sir e Quand cette temp rature est atteinte le t moin lumineux vert s allume P...

Page 25: ...graisse de glisser le long de la plaque et d tre vacu e vers le collecteur de graisses Cuisson sans graisses Si vous d sirez une cuisson avec le moins de graisses possible et vacuer le surplus de mati...

Page 26: ...tie sup rieure presse uniform ment sur les aliments cuire Utilisation comme grill ouvert plaque de cuisson L utilisation du grill en position ouverte 180 est id ale pour la cuisson d une grande quanti...

Page 27: ...la plus appropri e Pour cuire des l gumes du poisson ou de la viande maigre il est recommand d ajouter un peu de mati re grasse huile ou spray de cuisson au pr alable Pour de la viande moins maigre ou...

Page 28: ...what is inside the frame 28 FHG 30035 140407 Assembly page 28 32 Fax 1 305 430 9692 Prenez soin ce qu aucun liquide ne p n tre l int rieur de corps de l appareil Ne mettez jamais l appareil dans le la...

Page 29: ...n de la garantie Durant cette p riode le produit KALORIK qui apr s inspection par KALORIK s av re d fectueux sera r par ou remplac au choix de KALORIK sans frais pour le consommateur Si un produit de...

Page 30: ...z le produit ou envoyez le d ment affranchi ainsi qu une preuve d achat en mentionnant le num ro d autorisation de retour indiqu par notre service client le au service apr s vente KALORIK agr e visite...

Page 31: ...be reproduced and folded in order to obtain a booklet A5 148 5 mm width x 210 mm height When folding make sure you keep the good numbering when you turn the pages of the I B Don t change the page num...

Page 32: ...ed and folded in order to obtain a booklet A5 148 5 mm width x 210 mm height When folding make sure you keep the good numbering when you turn the pages of the I B Don t change the page numbering Keep...

Reviews: