background image


Copies  of  the  I/B.  Please  reproduce  them  without  any 
changes  except  under  special  instruction  from  Team 
International  BELGIUM.  The  pages  must  be  reproduced  and 
folded in  order  to  obtain  a  booklet  A5  (+/-  148.5  mm  width  x 
210 mm height). When folding, make sure you keep the good 
numbering when you turn the pages of the I/B. Don’t change 
the  page  numbering.  Keep  the  language  integrity. 

Print  only 

what is inside the frame.


17 

USK MCH 33526 - 110815


Assembly page 17/28 


Fax +32 2 359 95 50 

Cleaning plastics parts 


All plastics parts should be cleaned after each operation. 


Rinse them (except the base Unit) thoroughly and remove any 
food residues. 


Hand-wash them with a little mild liquid detergent or neutral 
detergent. 


Rinse thoroughly and dry immediately. 


Cleaning the blending container 


Rinse it thoroughly and remove any food residues after each use.  

Note:

 the filter/steam hole is now embedded on a 

sliding tab

 that 

enables an easier access and cleaning of the steam chamber, 
and of the filter itself. 


Make sure the steam hole/filter (l) has no residues stuck, clean by 
using the brush. 


Hand-wash the Container (m) with a little mild liquid detergent or 
neutral detergent. 


Rinse it thoroughly and dry it immediately. 


Make sure there are no residues inside the steam chamber. 
Repeat steps 3 and 4 if necessary. 


Note: Dishwashing safety 

The blending container, steam container, milk container, spatula, 
measuring beaker, brush and top cover have also passed the 
dishwashing safety test, so alternatively to hand-washing, you can 
safely wash all plastic parts in the dishwasher too.

Summary of Contents for USK MCH 33526

Page 1: ...booklet A5 148 5 mm width x 210 mm height When folding make sure you keep the good numbering when you turn the pages of the I B Don t change the page numbering Keep the language integrity Print only...

Page 2: ...Unplug from outlet when not in use before cleaning and before putting on or taking off parts or before cleaning Allow to cool before putting on or taking off parts Do not operate any appliance with a...

Page 3: ...Always close the bowl with the lid before starting the operation Install blades properly and cautiously Injury can result if moving blades accidentally become exposed Blades are sharp handle with car...

Page 4: ...tempt to modify the plug or socket in any way SHORT CORD INSTRUCTIONS A short power supply cord is provided to reduce the hazards resulting from becoming entangled in or tripping over a longer cord Ex...

Page 5: ...ou turn the pages of the I B Don t change the page numbering Keep the language integrity Print only what is inside the frame 5 USK MCH 33526 110815 Assembly page 5 28 Fax 32 2 359 95 50 Do not place i...

Page 6: ...I B Don t change the page numbering Keep the language integrity Print only what is inside the frame 6 USK MCH 33526 110815 Assembly page 6 28 Fax 32 2 359 95 50 PART DESCRIPTION 1 Rotary Switch Knob 2...

Page 7: ...in a booklet A5 148 5 mm width x 210 mm height When folding make sure you keep the good numbering when you turn the pages of the I B Don t change the page numbering Keep the language integrity Print o...

Page 8: ...de PP Polypropylene material and specially formulated plastics it offers a BPA and phthalates free appliance that protects your baby from harmful chemicals Easy cleaning Double Thermal cut off protect...

Page 9: ...boiler cap from the base unit by turning it anti clockwise to and lift it as shown in fig a Check the boiler is empty by turning the Base Unit upside down and found no water comes out Clean the boiler...

Page 10: ...irmly on the base unit The blending container lid is locked How to steam cook food Refer to the Pouring water to Boiler pour right amount of water in boiler Place the blending container into the base...

Page 11: ...minutes if necessary Remove the Blending Container from Base Unit fig f Open the Lid Warning Take care when opening the lid as steam can be scalding hot Remove the food container food is ready to eat...

Page 12: ...unit Hold the blade unit carefully and insert it on the roller rod fig g Make sure the blade unit is in the right position until hearing a click sound Place the cooked food in the blending container...

Page 13: ...r food with bones or hard parts How to warm up and defrost food Follow How to steam cooking food to warm up and defrost food Important information regarding the steaming time it is only for reference...

Page 14: ...it in the direction as shown in fig c and n Place the milk container in the blending container Repeat the steps explained in How to steam cook food Remove the milk container the contents are ready for...

Page 15: ...rning Always unplug the unit and make sure it is cold before cleaning it Switch off the appliance and disconnect from supply before changing accessories or approaching parts which move during use Clea...

Page 16: ...mentioned steps if necessary Warning Always unplug the unit and make sure it is cold before cleaning the boiler Routine Maintenance of the boiler Mineral deposit will settle down inside the boiler in...

Page 17: ...etergent or neutral detergent Rinse thoroughly and dry immediately Cleaning the blending container Rinse it thoroughly and remove any food residues after each use Note the filter steam hole is now emb...

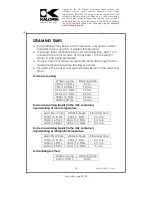
Page 18: ...to start being generated Always check that food is cooked and drinks are brought to the desired temperature before feeding your baby Fill water in the beaker and use the tables below for the steaming...

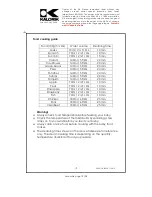
Page 19: ...140ml 5 Fl Oz 20 min Cauliflower 140ml 5 Fl Oz 20 min Green beans 140ml 5 Fl Oz 20 min Peas 140ml 5 Fl Oz 20 min Potatoes 140ml 5 Fl Oz 20 min Turnips 140ml 5 Fl Oz 20 min Pumpkin 140ml 5 Fl Oz 20 mi...

Page 20: ...nd lid are locked correctly in place Micro switches will prevent operation if not 3 Please make sure the lid is not deformed and presses on the upper part of the Roller Rod with security switch If foo...

Page 21: ...to obtain warranty performance During this period the KALORIK product that upon inspection by KALORIK is proved defective will be repaired or replaced at Kalorik s option without charge to the custom...

Page 22: ...or send it postage prepaid by the user all Kalorik customers are responsible for the initial shipment back to the warranty center along with proof of purchase and indicating a return authorization num...

Page 23: ...la aplicaci n de la garant a Durante este per odo si el producto KALORIK despu s de una inspecci n por parte de KALORIK se manifiesta defectuoso ser reparado o reemplazado seg n lo que decida KALORIK...

Page 24: ...bajo garant a y dirigirle al servicio post venta m s pr ximo Si fuera el caso traiga el producto o env elo correctamente franqueado con la prueba de compra que mencione el n mero de autorizaci n de d...

Page 25: ...hat originelle Une preuve d achat est exig e pour obtenir l application de la garantie Durant cette p riode le produit KALORIK qui apr s inspection par KALORIK s av re d fectueux sera r par ou remplac...

Page 26: ...t vous rediriger vers notre centre de r paration Le cas ch ant ramenez le produit ou envoyez le d ment affranchi ainsi qu une preuve d achat en mentionnant le num ro d autorisation de retour indiqu pa...

Page 27: ...st be reproduced and folded in order to obtain a booklet A5 148 5 mm width x 210 mm height When folding make sure you keep the good numbering when you turn the pages of the I B Don t change the page n...

Page 28: ...uced and folded in order to obtain a booklet A5 148 5 mm width x 210 mm height When folding make sure you keep the good numbering when you turn the pages of the I B Don t change the page numbering Kee...

Reviews: