background image


20


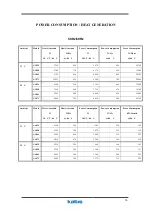
POWER CONSUMPTION / HEAT GENERATION


50Hz/60Hz 


Ambient 

Model 

Heat Generated 

30


C

à

-86


Heat Generated 

W/Hr 

@-86


Power Consumption 

30C

à

-86


Power Consumption 

W/Hr 

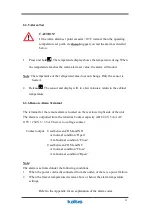
@-86


Power Consumption 

W/Mont 

@-86


AV039 

7250 

608 

3470 

490 

14700 

AV050 

8700 

730 

4170 

520 

15600 

AV061 

9152 

826 

4490 

690 

20700 

32


AV073 

10023 

910 

4540 

780 

22800 

AV039 

6524 

550 

3120 

440 

13200 

AV050 

7920 

660 

3750 

470 

14100 

AV061 

8242 

689 

4040 

620 

18600 

25


AV073 

9060 

745 

4430 

690 

20700 


Ambient 

Model 

Heat Generated 

30


C

à

-86


Heat Generated 

W/Hr 

@-86


Power Consumption 

30C

à

-86


Power Consumption 

W/Hr 

@-86


Power Consumption 

KW/Month 

@-86


AA039 

4350 

320 

1105 

220 

158 

AA050 

5220 

380 

1470 

235 

169 

AA061 

5490 

440 

1658 

310 

223 

32


AA073 

6010 

470 

2200 

350 

252 

AA039 

3910 

290 

940 

198 

143 

AA050 

4750 

340 

1240 

210 

151 

AA061 

4950 

360 

1500 

280 

201 

25


AA073 

5440 

390 

1870 

310 

224 

Summary of Contents for AA 039 M

Page 1: ...T LOW ULTRA LOW FREEZERS PRIME AND MERIT SERIES 40 C GA AA DA 039 P M GA AA DA 050 P M GA AA DA 061 P M GA AA DA 073 P M 86 C GV AV DV 039 P M GV AV DV 050 P M GV AV DV 061 P M GV AV DV 073 P M User M...

Page 2: ...of this manual without prior notice ______________________________________________ No part of this manual may be reproduced in any form or translated into other languages without the expressed writte...

Page 3: ...luctuations high ambient temperatures and heavy traffic in and out of the freezer and are designed to perform in demanding environments Both low and high cascade compressors feature a high compression...

Page 4: ...t Models 7 6 Operation 8 6 1 Prime Series Control Panel Features 8 6 2 Merit Series Control Panel Features 12 6 3 Start Up 13 7 Maintenance 16 7 1 Condenser Maintenance 16 7 2 Gasket Maintenance 17 7...

Page 5: ...uld result in injury to personnel and damage to the product and to property Please keep this manual in a place accessible to users of this product Electrical Housing Label This label is found on the c...

Page 6: ...r circulation around the unit This is essential for proper performance of the unit A space of 70mm should surround the unit Connect the unit to a power source as printed on the data plate located on t...

Page 7: ...In case of high ambient temperatures the cabinet front may heat up after the freezer is used for the first time This is normal and does not indicate a malfunction 3 General Recommendations The refrig...

Page 8: ...at the set point for eight hours The set point may than be lowered in increments no greater than 10o C Allow a stabilizing period of eight hours for every ten degrees until the desired set point is ac...

Page 9: ...learance for the door or lid to open at least 90 degrees Do not position the equipment in direct sunlight or near sources of heat such as diffusers radiators etc The ambient temperature range at the s...

Page 10: ...e of the unit If possible it is preferable to connect the freezer to a dedicated separate power supply Each freezer is equipped with a service cord and plug designed to connect it to a power outlet wh...

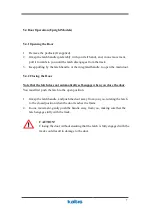
Page 11: ...2 Closing the Door Note that the latch does not automatically self engage when you close the door You must first push the latch to the open position 1 Grasp the latch handle and push the door away fro...

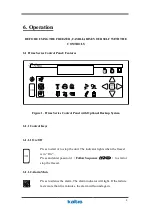
Page 12: ...Optional Backup System 6 1 1 Control Keys 6 1 1 1 On Off Press to start or to stop the unit The indicator lights when the freezer is in On Press and enter password Follow Sequence to start or stop th...

Page 13: ...emperature Increment and Decrement Use these keys to increase or decrease the temperature value 6 1 1 6 Enter Escape After entering the password press the key to return to setting mode After setting p...

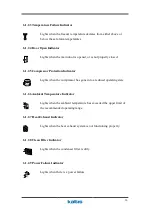
Page 14: ...ion Indicator Lights when the compressor has gone into a reduced operating state 6 1 2 6 Ambient Temperature Indicator Lights when the ambient temperature has exceeded the upper limit of the recommend...

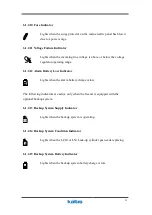
Page 15: ...larm Battery Low Indicator Lights when the alarm battery charge is low The following indicators are active only when the freezer is equipped with the optional backup system 6 1 2 13 Backup System Supp...

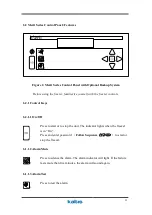
Page 16: ...6 2 1 Control Keys 6 2 1 1 On Off Press to start or to stop the unit The indicator lights when the freezer is in On Press and enter password Follow Sequence to start or stop the freezer 6 1 1 2 Alarm...

Page 17: ...e or decrease the temperature value 6 2 1 6 Enter Escape After entering the password press the key to return to setting mode After setting press to return to monitoring mode 6 2 2 Indicators 6 2 2 1 O...

Page 18: ...ssword Sequentially Press then press The temperature can be increased or decreased by pressing and holding or 4 Press to return to the monitoring mode 6 3 3 Setting the Alarm 1 Press or until WARM ALA...

Page 19: ...6 3 6 Remote Alarm Terminal The terminal for the remote alarm is located on the rear lower right side of the unit The alarm is outputted from the terminal Contact capacity is DC 24V 5A or AC 115V 230...

Page 20: ...an the condenser at least every six months but more frequently in dusty environments To clean the condenser 1 Pull open the grill cover situated on the front of the compressor housing 2 Remove the fil...

Page 21: ...interior to warm to room temperature This is faster if the door is left open during the warm up process 3 Allow all ice to melt and remove all the water from the bottom of the cabinet Dry the interio...

Page 22: ...een the cabinet and door gasket may be preventing the door from sealing properly 3 The air intake grill is blocked 4 The condenser filter is clogged 5 The operating temperature set point is not been c...

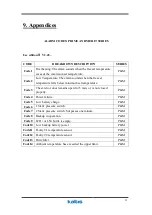
Page 23: ...perature P M Code3 The exterior door remains open for 5 min or is not closed properly P M Code4 Power failure P M Code5 Low battery charge P M Code6 1 Static pressure switch P M Code7 2 Static pressur...

Page 24: ...22800 AV039 6524 550 3120 440 13200 AV050 7920 660 3750 470 14100 AV061 8242 689 4040 620 18600 25 C AV073 9060 745 4430 690 20700 Ambient Model Heat Generated W 30 C 86 C Heat Generated W Hr 86 C Po...

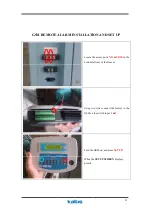
Page 25: ...TION AND SET UP Locate the access ports NO COM in the bottom left rear of the freezer Using two wires connect the freezer to the GSM on the switch input 1 2 Turn the GSM on and press SETUP When the SE...

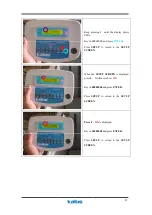
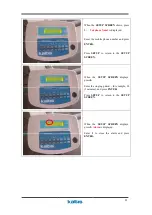
Page 26: ...Press SETUP to return to the SETUP SCREEN When the SETUP SCREEN is displayed press 2 It will now show OP Key in 00000000 and press ENTER Press SETUP to return to the SETUP SCREEN Press r IPA is displ...

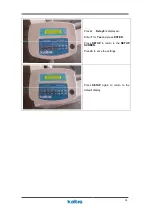
Page 27: ...press ENTER Press SETUP to return to the SETUP SCREEN When the SETUP SCREEN displays press 4 Enter the ringing period for example 03 3 minutes and press ENTER Press SETUP to return to the SETUP SCREEN...

Page 28: ...24 Press r Relay8 is displayed Enter 1 for Yes and press ENTER Press SETUP to return to the SETUP SCREEN Press 6 to save the settings Press SETUP again to return to the default display...

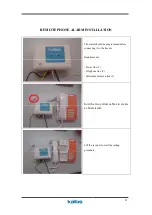
Page 29: ...alarm should be programmed before connecting it to the freezer Requirements Power line 1 Telephone line 2 Telecommunication line 3 Join the two yellow cables to create a short circuit Lift the receive...

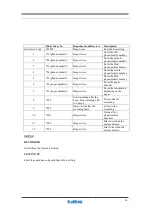
Page 30: ...e Enter the fifth phone mobile number 6 26 pager number Beeps twice Enter the pager number 7 27 pager number Beeps twice Enter the information displaying on the pager 8 01 Start recording after the be...

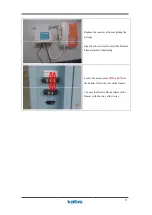
Page 31: ...g the settings Open the short circuit to test if the Remote Phone Alarm is functioning Locate the access ports COM and NC at the bottom left on the rear of the freezer Connect the Remote Phone Alarm t...

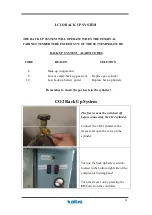
Page 32: ...as cylinder 10 Low back up battery power Replace back up battery Remember to check the gas levels in the cylinder CO2 Back Up System The freezer must be switched off before connecting the CO2 cylinder...

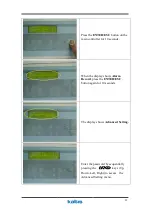
Page 33: ...oller for 10 seconds When the display shows Alarm Record press the ENTER ESC button again for 10 seconds The display shows Advanced Setting Enter the password by sequentially pressing the keys Up Down...

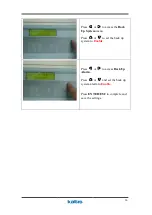
Page 34: ...o access the Back Up System menu Press or to set the back up system to Enable Press or to access Back Up Alarm Press or and set the back up system alarm to Enable Press ENTER ESC to complete and save...

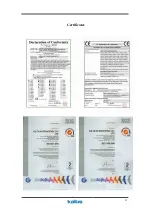
Page 35: ...31 Certificates...
Reviews: