background image

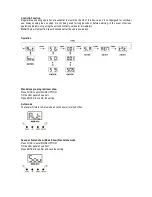
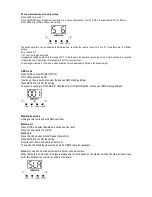
Sound activated mode sensitivity setting      

Press FUNC till to see S **. 
Press UP/DOWN to set microphone sensitivity. S 0 is no sound activation, from S1 to S9 is sound activated, S1 min S9 max.  
Press ENTER to confirm and save the setting. 


The sound sensitivity can be adjusted to determine how sensitive the laser is to sound. In the S** mode there are 10 different 
options.   
Zero = sound off 

1-9 = from low to high sensitivity 
A suggested setting would be in the range of 5-7. If this range is too sensitive reduce the value, if more sensitivity is required 
increase the value. Remember to press enter to confirm your selection.  
This setting will remain in the memory when powered off (and permanently stored in the flash memory). 
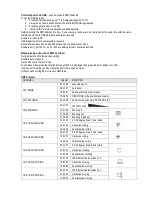


DMX mode      

Press FUNC to enter MODE OPTION.  
Till to LED panel shows 001. 
Use the up / down buttons to select the desired DMX starting address 
Press ENTER to confirm the setting. 
The laser is working in “DMX MODE”. With the help of UP/DOWN button, choose your DMX starting address.  


Master/slave mode      

Linking several units without a DMX controller 
 

Master unit 

Press FUNC and select desired auto option sound or auto 
Press the enter button to confirm 

Slave unit 

Press the mode button until LED panel shows SLA 
Press ENTER to confirm the setting. 
All units set to SLA will follow the master unit  
These must be linked together using a 3pin XLR DMX cable (not supplied) 
 

Note:

 only one unit must be set to master all other units set to slave. 

When linking this unit to other iLink lasers always use the iLink Green as the master unit and the other units as slave 
units, this will allow the remote to control all the lasers. 


Summary of Contents for iLINK GREEN

Page 1: ...N U A L V E R S I O N 1 0 2 8 0 6 1 2 For the latest instruction manual updates and information on the entire Kam range visit www kam co uk Kam products are manufactured by Lamba plc Unit 1 Southfiel...

Page 2: ...e sure that the power supply voltage of the area where this unit is to be used meets the required written on the unit The lightning flash symbol inside a triangle is intended to alert the user to the...

Page 3: ...LE FIXTURE IS OPERATING 4 Power Switch Switch ON and OFF the fixture 5 Fuse Holder Replace fuse with correct value if required 6 Main Power Input IEC socket and integrated fuse holder 7 Interlock For...

Page 4: ...unit and contact your dealer immediately Note There will output from laser 5 seconds after the unit is powered on Operation Standalone pre program laser show Press FUNC to enter MODE OPTION Till the L...

Page 5: ...ory DMX mode Press FUNC to enter MODE OPTION Till to LED panel shows 001 Use the up down buttons to select the desired DMX starting address Press ENTER to confirm the setting The laser is working in D...

Page 6: ...on for 2 seconds will activate the REM mode Auto Auto running slow Music Sound Activated show The blue music LED indicator is flashing when sound signal is detected Sound sensitivity In Sound Activate...

Page 7: ...ton until SLA is displayed then press the enter button to confirm Only one unit must be set as a master and all other units as a slave Connect each unit together via a 3pin DMX lead DMX Protocol CHANN...

Page 8: ...1 168 175 232 239 048 055 112 119 176 183 240 247 056 063 120 127 184 191 248 255 Specifications Mains Input AC100 240V 50 60Hz Fuse 250V 1 A slow blow 20mm Glass Total Power 12W Music Control Interna...

Reviews: