


12
18.
Slightly loosen the securing
screw located on the back
of the fan blades so you can
insert the blades onto the motor
shaft. Make sure the blades are
inserted onto the motor shaft
with the securing screw side
facing the rear grille.
19.
Align the screw with the groove
in the motor shaft. Tighten the
screw making sure the fan
blades are secure to the motor
shaft and the blades are able to
move freely (See Fig. 14 & 15).
Fig. 14
Fig. 15
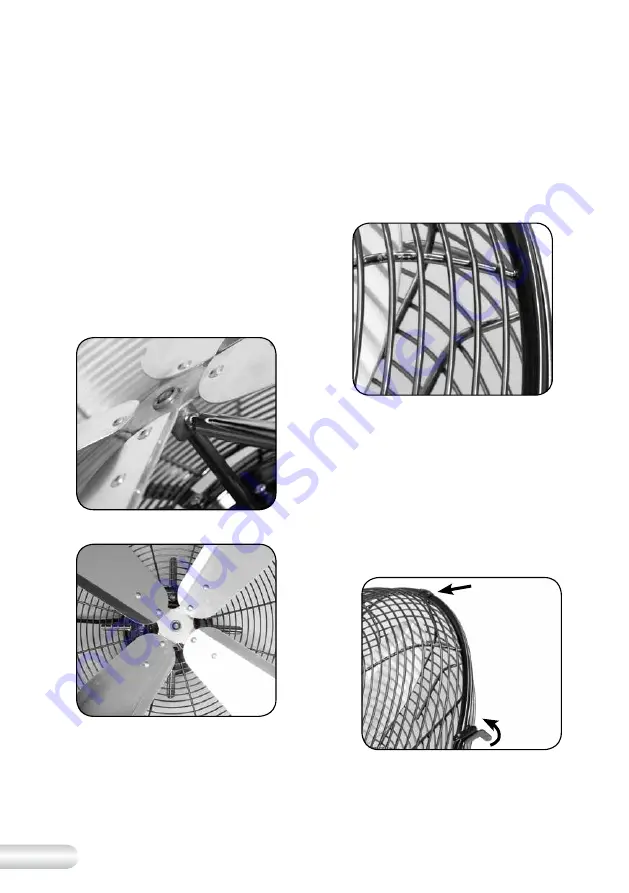
20.
Loosen the small screw and
nut assembly at the bottom of
the front grille by hand. Locate
the positioning tab on the top
end of the front grille and slot
into the top of the rear grille
See Fig. 16).
Fig. 16
21.
Thread the screw through the
small holes at the bottom of both
the front and rear grilles and
loosely secure the screw using
the nut provided.
22.
Secure the front and rear grille
by snapping shut the securing
clips over the edges of both
grilles (See Fig. 17).
Fig. 17
Using Your Kambrook Pedestal Fan
Continued...
Summary of Contents for KPF445GUN
Page 1: ...Suits all KPF445GUN models INSTRUCTION BOOKLET...
Page 15: ...15 Notes...


