background image

 4 


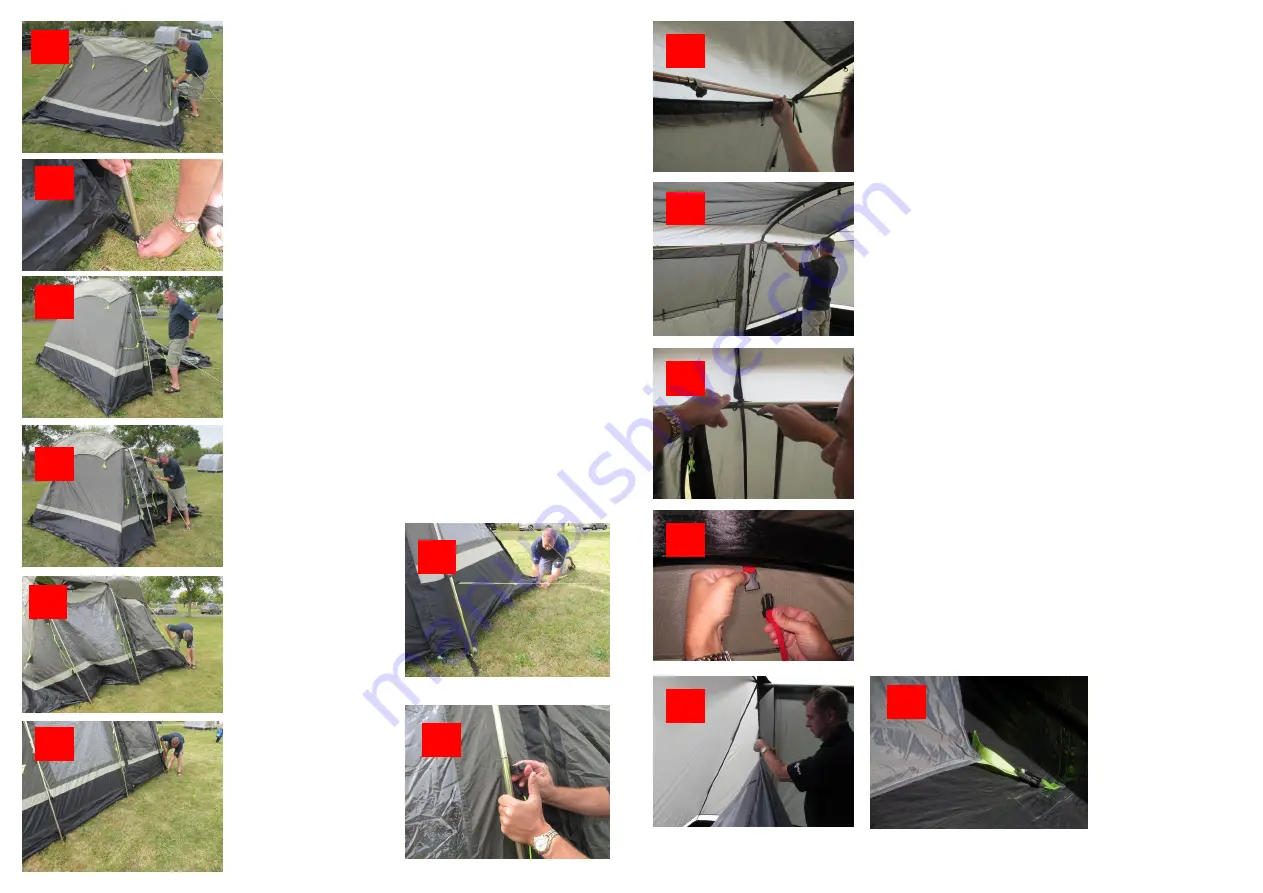
Ensure  that  the front  door is  open  and  then  stand  the 
two  rear  legs  upright  (8).    Locate  the  pin,  on  the  key 
ring  at  the  base  of  the  tent,  into  the  bottom  of  each 
steel  leg  (9).    The  key  ring  is  on  an  adjustable  strap 
that can be loosened to make this easier.  Remember 
to tighten the straps afterwards (10). 
 
Repeat with the intermediate set of legs (11) and then 
with the front legs (12). 
 
Close all doors and entrances. 
 
Pull the front of the awning out tensioning both sides of 
the awning (13) Peg the front corners ensuring that  it 
is square (14).  You may have to re-peg this later. 
 
Attach  all  the  plastic  clips  onto  the  respective  steel 
legs (15). 
 
Check that the whole awning is square, It is necessary 
to  pull  each  corner  pegging  point  diagonally  to  create 
tension  in  the  awning.    Peg  the  intermediate  pegging 
points, pegging the points either side of doorways first.  
These  doorways  should  be  cross  pegged  -  the  points 
should  be  pulled  across  each  other.  Once  completed 
the awning should look taut without too many creases - 
if necessary readjust the pegging. 


10 

11 

13 

15 

14 

12 

 5 


16 

17 

20 

21 

18 

Take  the    steel    stretcher  poles  into  the  awning.    Put 
one end in the pocket at the front  corner of the awning 
(16)  and  the  other  end  in  the  pocket  in  the  opposite 
corner.    Tension  and  tighten  the  thumbscrew  (17).  
Repeat with the other stretcher bars.  Tie the interme-
diate  tie  tapes  around  the  stretcher  bars  to  support 
them (18). 
 
 
Take  the  inner  tent  inside  the  awning  and  hang  from 
the suspension points, ensuring the door is at the front 
(19/20).    Some  of  the  suspension  points  are  colour 
coded.  Attach the base of the inner to the correspond-
ing  buckles  on  the  groundsheet  (21).   It  will  be  easier 
to  attach  the  rear  points  before  fully  suspending  the 
inner tent. 

19 

Summary of Contents for Camper Pod Maxi

Page 1: ...heet should be made by a company recommended by Kampa or your supplying dealer Repairs and alterations made by an unauthorised company may invalidate your warranty UPRIGHT POLES Two upright poles are supplied with this awning They can be used to hold up the rear tunnel or as canopy poles to hold the front door open as a canopy Use guy lines to support the poles Kampa UK Limited Witham CM8 3EU mcl ...

Page 2: ...nt should also be applied to areas where the taping is damaged or has peeled away through wear and tear It can also be applied to areas where a leak may have developed Seam sealant is available through your dealer We recommend McNett Seamsure SUITABILITY This awning is designed for use in light to moderate weather During strong winds or snowfall we recommend that you take your awning down The awni...

Page 3: ...l the tunnel to the vehicle by attaching guy lines ropes not supplied to the top corners of the tunnel throwing these over the vehicle and tying them to the wheels or pegging them down Take care that the guy lines ropes do not damage the vehicle The Camper Pod is a universal fit awning designed to fit camper vans up to 1 90 me tres high maximum vehicle or rail height The fit is universal and is no...

Page 4: ... Peg the intermediate pegging points pegging the points either side of doorways first These doorways should be cross pegged the points should be pulled across each other Once completed the awning should look taut without too many creases if necessary readjust the pegging 8 9 10 11 13 15 14 12 5 16 17 20 21 18 Take the steel stretcher poles into the awning Put one end in the pocket at the front cor...

Reviews: