background image

KS

Lüftungskomponenten, Kombinationsschlitzdurchlass

Assembly, installation and operating instructions

7

3

Transport, storage and packaging

3.1

General transport instructions

Check on delivery for completeness and transport damage.

Proceed as follows in the event of visible damage:

Do not accept delivery or only accept with reservations.
Record any transport damage on the transportation documents or on the transport company's delivery note.
Submit a complaint to the freight forwarder.

IMPORTANT NOTE!

Warranty claims can only be made within the applicable period for complaints. (More information is avail-
able in the 

T&Cs

 on the Kampmann website)

IMPORTANT NOTE!

2 people are needed to transport the unit. Wear personal protective clothing when transporting the unit.
Only lift the unit on both sides and not by the pipes / valves.

IMPORTANT NOTE!

Material damage caused by incorrect transport!

Units being transported can drop or topple over if transported wrongly. This can cause serious material
damage.

Proceed carefully when unloading the equipment on delivery and when transporting it on site and note
the symbols and instructions on the packaging.
Only use the holding points provided.
Only remove packaging shortly before assembling the unit.

3.2

Scope of delivery

IMPORTANT NOTE!

Check the scope of delivery!

Check the delivery for damage.
Check that the articles and type numbers are correct.
Is the delivery and number of items delivered correct?

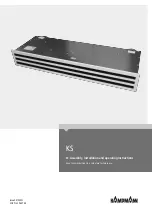
Summary of Contents for KS

Page 1: ...KS Assembly installation and operating instructions Keep these instructions in a safe place for future use Issue02 22EN SAP No 1562744...

Page 2: ......

Page 3: ...torage 8 3 4 Packaging 8 4 Construction and function 9 4 1 Overview 9 4 2 Brief description 9 4 3 Dimensions Nominal lengths 10 5 Installation and wiring 11 5 1 Requirements governing the installation...

Page 4: ...instructions contained in this manual In addition all local occupational health and safety at work regulations apply as do general safety provisions governing the use of the equipment Illustrations in...

Page 5: ...dge if they are supervised or have been instructed in the safe use of the unit and the resulting dangers Do not allow children to play with the unit Do not allow children to clean and maintain the uni...

Page 6: ...y and accident prevention regulations Guidelines and recognised technical regulations i e Association of German Electricians VDE regulations DIN and EN standards VDI 6022 maintenance personnel must be...

Page 7: ...on the Kampmann website IMPORTANT NOTE 2 people are needed to transport the unit Wear personal protective clothing when transporting the unit Only lift the unit on both sides and not by the pipes valv...

Page 8: ...e place Do not expose to aggressive media Protect from direct sunlight Avoid mechanical vibrations and shocks IMPORTANT NOTE Under certain circumstances packages can carry storage instructions that ex...

Page 9: ...class B1 5 Partition between supply air and extract air 6 Eccentric rollers in supply air 7 Nozzle rollers in extract air 4 2 Brief description The KS is a combined diffuser for use in and behind dry...

Page 10: ...B A Fig 2 Views of KS All figures in mm Dimensions Nominal length 550 mm Nominal length 750 mm Nominal length 950 mm Nominal length 1150 mm A air outlet front 550 750 950 1150 B width of junction box...

Page 11: ...the unit Technical data Make sure that the ceiling is sufficiently load bearing to take the weight of the unit Technical data Make sure that the unit is securely suspended standing Ensure that the air...

Page 12: ...dry wall element before installing the KS A B Fig 4 Dimensions of the installation opening mm Dimensions Nominal length 550 mm Nominal length 750 mm Nominal length 950 mm Nominal length 1150 mm A 521...

Page 13: ...13 Fig 6 Note the installation areas Do not screw the installation brackets into the areas marked with a Fig 7 Installing the air outlet front When installing the KS pay attention to the correct insta...

Page 14: ...s shown on the diagram below using a slot head screw driver C D 4 3 B C A B 1 A 3 2 2 1 D E E F F 6 6 5 5 4 A B C D E F 6 1 2 3 4 5 min max Reading area Volumetric flow Air stream directions Fig 8 Con...

Page 15: ...tions have been met so that the unit can function safely and properly Structural tests Check that the unit is securely standing and fixed Check the horizontal installation suspension of the unit Check...

Page 16: ...unit outlet elements etc for dirt or deposits dur ing maintenance and use a commercially available product to remove Fig 10 Dismantling the air outlet front Dismantle the air outlet front for cleanin...

Page 17: ......

Page 18: ......

Page 19: ......

Page 20: ...produkte luftdurchlaesse ks Country Contact Great Britain Kampmann UK Ltd Dial House Govett Avenue Shepperton Middlesex TW17 8AG T 44 1932 228592 F 44 1932 228949 E info kampmann co uk W Kampmann co u...

Reviews: