Nesis III — Installation Manual
2.4
Mounting Procedure
1
2
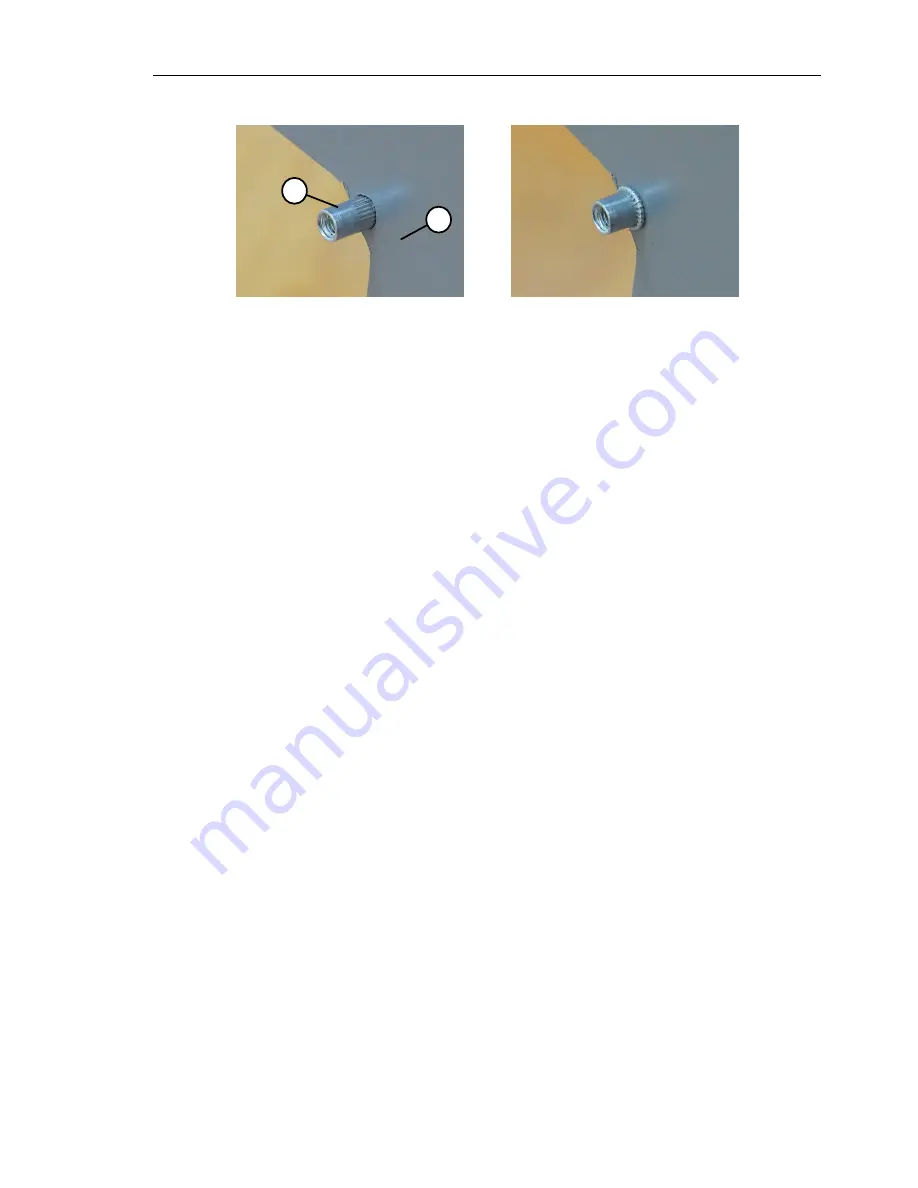
Figure 7:
Example of rivnuts inserts.
Left: a rivnut before compressing.
Right: a compressed rivnut.
1
O
– instrument panel,
2
O
– rivnut.
2.4.4
Fixation with Spacer Stud and Epoxy
As another alternative, a M3 nut can be epoxied to the back of the instrument
panel. Standard M3 nut is a bit too small to be epoxied successfully. Thus a
M3 spacer stud at least 6 mm in length may be used instead.
1. The spacer surface shall be made rough using coarse sandpaper.
If
spacer is coated, the coat shall be removed. A dremel tool comes handy.
2. Sand the back side of the panel where epoxy will be applied. Surface
must be dull.
3. Mix a small batch of epoxy together with some cotton flox or with milled
glass fibers. These add strength and also increase viscosity, which makes
epoxy application easier.
4. Apply a small amount of oil or grease on bolt thread. This will prevent
strong bond between epoxy and thread if epoxy is applied over the bolt
thread by accident.
5. Fix spacers in place using M3 bolts and apply the epoxy mix around
the spacers.
6. Wait for epoxy to cure.
This fixation principle is a bit messy, but works very well in practice.
17
©
Kanardia
2018


