3
PROGRAMMING
A MESSAGE
INSTRUCTIONS
1. Make sure the controller is o and connect the USB cord to the
controller and your PC.
2. Hold the “
Power
” button until the LCD Screen on the
controller comes on.
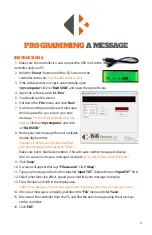
(You should see this screen)
3. If the software does not open automatically, open
“
my computer
” click on “
K&K SIGN
”, and open the sign software.
4. Open the software and click “
Run
”.
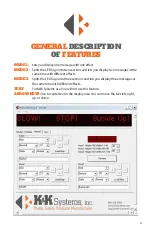
5. You should see this screen
6. Pull down the “
File
” menu and click “
New
”
7. A window with previously saved messages
should appear for you to save your new
message.
** If the correct window does not
appear:
Click on “
my computer
” and click
on “
K&K SIGN
”
8. Name your new message the next available
double digit number.
(Example: if the last number listed is 09.led,
your new message will be saved as 10.led.)
Make sure not to duplicate numbers - this will cause neither message to display.
Also be sure to name your message two digits:
(ex. 01.led, 05.led, 10.led, 19.led, etc.)
9. Click “
Save
”
10. A screen will appear that says “
File save ok
”. Click “
Okay
”.
11. Type your message in the text box labeled “
Input TXT
”. (Delete the text “
Input TXT
” first)
12. Select what font, size, effect, speed you would like your message to display.
13. Press Preview and click in the display area.
**NOTE: Your message will not preview until you click in the display area where you message is shown.
14. Once your message is complete, pull down the “
File
” menu and click “
Save
”.
15. Disconnect the controller from the PC, and find the new message using the arrow keys
on the controller.
16. Click “
ENT
”
Summary of Contents for Mini Messenger
Page 1: ......


