background image

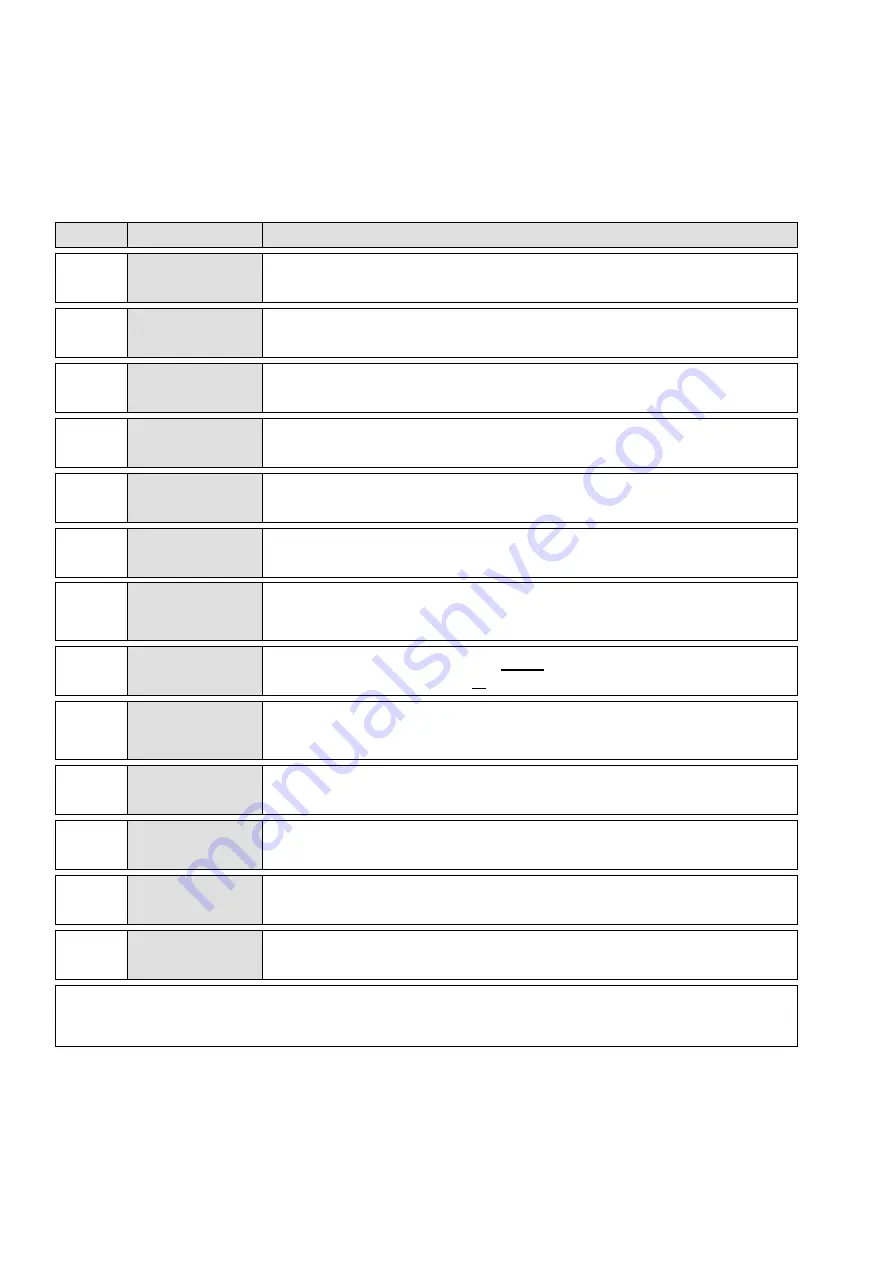
5.  LET-BY and TIGHTNESS TESTING 


(only applies to KANE3500-1/UK and KANE3500-2/UK) 


Switch the meter ON 

with no hose connected

 and wait for the 10 second countdown to finish. 


STEP 

DISPLAY 

COMMENTS / ACTIONS 


P        0.00 

mbar 

Press 


 to enter the let-by/stabilisation/tightness test sequence. 

This test sequence can also be entered via menu/pressure/report/test 


LET BY? 

YES 

Use 

 and 

 to select ‘YES’ or ‘NO’ then press 


If ‘NO’ is selected go to straight to step 6, the stabilisation period. 


CONNECT 

P1    10.00 

Connect a pressure hose from the ‘+’ connection to the test point. 
Manually set the let-by pressure as usual.  Press 


 to start the test. 


TIME     59 

P2    10.00 

The let-by test counts down in seconds.  Duration can be set via menu. 
P2 = ‘live’ pressure reading during the let-by test. 


P1    10.00 
P2    10.00 

P1 = pressure at the start of the let-by test. 
P2 = pressure at the end of the let-by test.  Press 


 to continue. 


SET PS 

PS    20.00 

Manually set the stabilisation pressure as usual. 
When PS is correct press 


 to start the stabilisation period. 


TIME     59 

PS    20.00 

The stabilisation test counts down in seconds.  Duration is set via 
menu. 
PS = ‘live’ pressure reading during the stabilisation period. 


TIME     00 

PS    20.00 

End of the stabilisation period.  Either press 

 to return to step 6 and 

repeat the stabilisation test or press 


 to continue to the tightness test. 


SET P3 

P3    20.00 

Manually adjust the tightness test pressure if necessary. 
P3 = pressure at the start of the tightness test.  Press 


 to start the 

test. 


10 

TIME   119 

P4    20.00 

The tightness test counts down in seconds.  Duration is set via menu. 
P4 = ‘live’ pressure reading during the tightness test. 


11 

P3    20.00 
P4    20.00 

P3 = pressure at the start of the tightness test. 
P4 = pressure at the end of the tightness test.  Press 


 to continue 


12 

LOG     0? 


This is the log number of the let-by/stabilisation/tightness test that has 
just been completed.  Memory capacity is 20 complete tightness tests. 


13 

PRINTING 

  ===== 

To print the complete test press the PRINT key with the bottom of the 
instrument pointing at the printer and approximately 150mm apart. 


  To exit the test sequence press MENU 

  Previously logged tests can be viewed and printed via menu/pressure/report/view/

 or 


  Previously logged tests can be deleted via menu/pressure/report/delete all/yes/


Summary of Contents for KANE3500 Series

Page 1: ...KANE3500 PRESSURE METER Stock No 18965 2 June 2014 Kane International Ltd ...

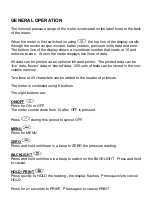
Page 2: ...n be live data frozen data or stored data 255 sets of tests can be stored in the non volatile memory Two lines of 20 characters can be added to the header of printouts The meter is controlled using 8 buttons The eight buttons are ON OFF Press for ON or OFF The meter counts down from 10 after OFF is pressed Press during this period to cancel OFF MENU Press for MENU ZERO Press and hold until there i...

Page 3: ...The button is also a shortcut to the let by stabilization tightness test Only applies to KANE3500 1 UK and KANE3500 2 UK BOTTOM LINE OPTIONS The buttons change the bottom line of the display The bottom line can display Maximum Pressure Minimum Pressure Time Date Pressure Units Battery Status Instrument Internal Temp MAXIMUM PRESSURE is displayed as P 1 3 1 9 MINIMUM PRESSURE is displayed as P 1 3 ...

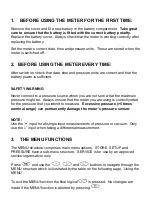
Page 4: ...not sure what the maximum pressure might be Always ensure that the meter you are using is correctly rated for the pressure that you intend to measure Excessive pressure 5 times nominal range can permanently damage the meter s pressure sensor NOTE Use the input for all single input measurements of pressure or vacuum Only use the input when taking a differential measurement 3 THE MENU FUNCTIONS The ...

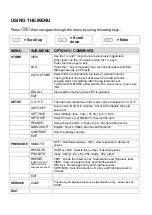
Page 5: ... can be displayed in C or F AUTO OFF Auto power off timer in minutes Set at 00 to disable the auto power off SET TIME Uses Military time 7am 07 00 7pm 19 00 SET DATE Select format e g DD MM YY then set the date HEADER Sets printout header 2 lines of up to 20 characters per line LANGUAGE English French Italian German and Spanish CONTRAST Sets the display contrast EXIT PRESSURE SMOOTH OFF standard r...

Page 6: ...the meter in the orientation that it is being used This eliminates gravity effects on the very sensitive pressure transducer It is also recommend that the meter is switched on for at least five minutes and then re zeroed before taking such sensitive measurements If the pressure being measured exceeds the meter s design range the display will show OR for over range Differential Port Port 1 IR Print...

Page 7: ...EXAMPLE PRINTOUTS The standard printout is The MAX and MIN readings are those observed since last switch on NOTE Printouts of stored readings will also include the TEST NO below the header ...

Page 8: ...PS 20 00 The stabilisation test counts down in seconds Duration is set via menu PS live pressure reading during the stabilisation period 8 TIME 00 PS 20 00 End of the stabilisation period Either press to return to step 6 and repeat the stabilisation test or press to continue to the tightness test 9 SET P3 P3 20 00 Manually adjust the tightness test pressure if necessary P3 pressure at the start of...

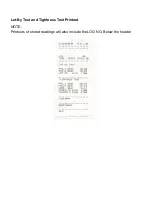
Page 9: ...Let By Test and Tightness Test Printout NOTE Printouts of stored readings will also include the LOG NO Below the header ...

Page 10: ...er should be re calibrated and serviced annually by a Kane approved service centre Local regulations may require more frequent re calibration Calibration is performed in firmware and there are no user accessible adjustments or user serviceable parts ...

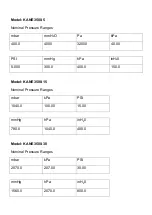
Page 11: ...minal Pressure Ranges mbar mmH2O Pa kPa 80 00 800 0 8000 8 000 PSI mmHg hPa inH20 1 000 60 00 80 00 30 00 Model KANE3500 2 Nominal Pressure Ranges mbar mmH2O Pa kPa 160 00 1600 0 16000 16 000 PSI mmHg hPa inH20 2 000 120 00 160 00 60 00 ...

Page 12: ...2000 40 00 PSI mmHg hPa inH20 5 000 300 0 400 0 150 0 Model KANE3500 15 Nominal Pressure Ranges mbar kPa PSI 1040 0 100 00 15 00 mmHg hPa inH20 780 0 1040 0 400 0 Model KANE3500 30 Nominal Pressure Ranges mbar kPa PSI 2070 0 207 00 30 00 mmHg hPa inH20 1560 0 2070 0 800 0 ...

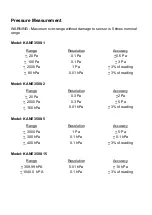
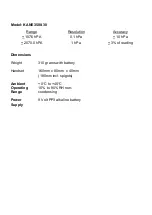
Page 13: ...2000 Pa 1 Pa 3 of reading 80 hPa 0 01 hPa 3 of reading Model KANE3500 2 Range Resolution Accuracy 20 Pa 0 3 Pa 2 Pa 2000 Pa 0 3 Pa 5 Pa 160 hPa 0 01 hPa 3 of reading Model KANE3500 5 Range Resolution Accuracy 3000 Pa 1 Pa 5 Pa 300 hPa 0 1 hPa 0 1 hPa 400 hPa 0 1 hPa 3 of reading Model KANE3500 15 Range Resolution Accuracy 309 99 hPA 0 01 hPa 10 hPa 1040 0 hPA 0 1 hPa 3 of reading ...

Page 14: ...1076 hPA 0 1 hPa 10 hPa 2070 0 hPA 1 hPa 3 of reading Dimensions Weight 310 grams with battery Handset 160mm x 80mm x 40mm 180mm incl spigots Ambient 0 C to 45 C Operating 10 to 90 RH non Range condensing Power 9 Volt PP3 alkaline battery Supply ...

Page 15: ... appropriate to check the meter before use by Use the normal start up sequence in the location where the meter will be used Switch on all localized electrical equipment capable of causing interference Check all readings are as expected A level of disturbance is acceptable If not acceptable adjust the meter s position to minimize interference or switch off if possible the offending equipment during...

Page 16: ...t Specification EC EMC KI KANE3500 details the specific test configuration performance and conditions of use Please Note Batteries used in this instrument should be disposed of in accordance with current legislation and local guidelines At the end of its life the meter should be sent to the appropriate recycling centre in accordance with current legislation and local guidelines ...

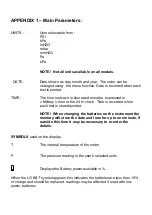
Page 17: ...me is recorded when each test is stored printed NOTE When changing the batteries on the instrument the memory will store the date and time for up to one minute if outside this time it may be necessary to re enter the details SYMBOLS used on the display T The internal temperature of the meter P The pressure reading in the user s selected units Displays the Battery power available in When the LO BAT...

Page 18: ...L71JG Sending your KANE3500 Once the meter has been securely packed then your package is ready for shipment back to Kane If you do not have an account with a courier company you can take your package to your local Post Office It is advisable to send the package by Special Delivery so that it is insured and traceable while in transit When we receive your KANE3500 On receipt of your package our Serv...

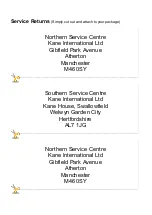
Page 19: ...e Kane International Ltd Gibfield Park Avenue Atherton Manchester M46 0SY Southern Service Centre Kane International Ltd Kane House Swallowfield Welwyn Garden City Hertfordshire AL7 1JG Northern Service Centre Kane International Ltd Gibfield Park Avenue Atherton Manchester M46 0SY ...

Page 20: ......

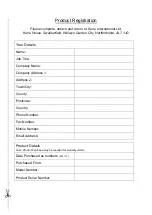
Page 21: ...ordshire AL7 1JG Your Details Name Job Title Company Name Company Address 1 Address 2 Town City County Postcode Country Phone Number Fax Number Mobile Number Email Address Product Details Note Proof of Purchase may be required for warranty claims Date Purchased as numbers 05 01 10 Purchased From Model Number Product Serial Number ...

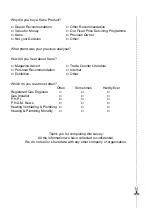
Page 22: ...out Kane Magazine Advert Trade Counter Literature Personal Recommendation Internet Exhibition Other Which do you read most often Often Sometimes Hardly Ever Registered Gas Engineer Gas Installer P H P I P H A M News Heating Ventilating Plumbing Heating Plumbing Monthly Thank you for completing this survey All the information we have collected is confidential We do not sell or share data with any o...

Page 23: ......

Page 24: ...Thank you for buying this pressure meter Before use please register on our website www kane co uk or complete detach and return the Product Registration page ...

Reviews: