QUICK INSTALLATION GUIDE
KANNAD 406 AF-COMPACT
PAGE 8
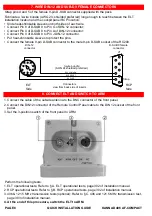
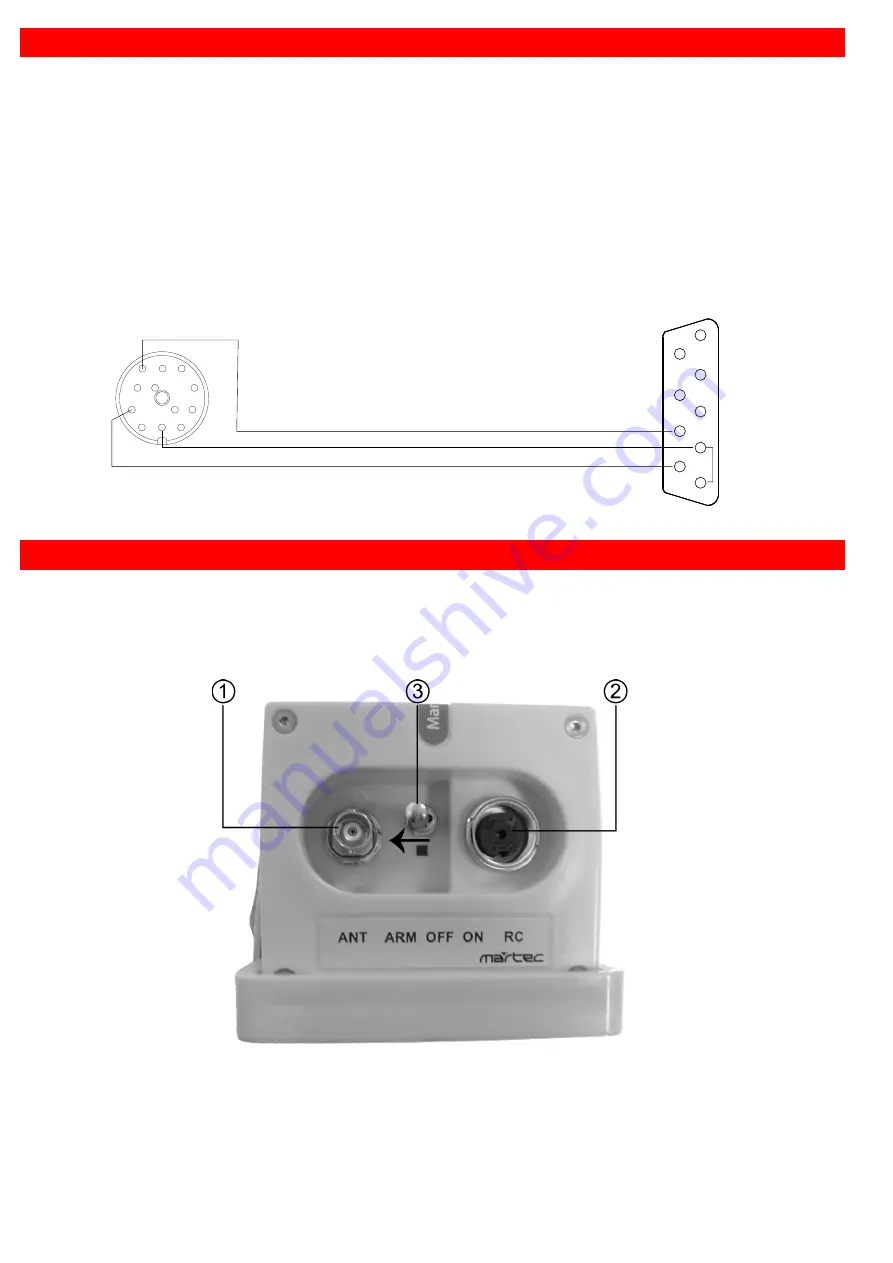
Strap pins 4 and 5 of the female 9-pin D-SUB connector supplied with the pack.
Fabricate a 3-wire bundle (AWG 24, shielded preferred) long enough to reach between the ELT
installation location and the cockpit panel RCP location:
• Slide heat-shrinkable sleeves on both sides of each wire.
• Connect Pin 8 of D-SUB 9 to Pin G of DIN-12 connector;
• Connect Pin 4 of D-SUB 9 to Pin A of DIN-12 connector;
• Connect Pin 9 of D-SUB 9 to Pin J DIN-12 connector.
• Put heat-shrinkable sleeves to protect the pins.
• Connect the female 9-pin D-SUB connector to the male 9-pin D-SUB socket of the RC200.
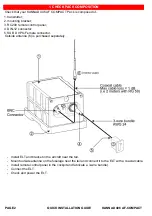
1. Connect the cable of the outside antenna to the BNC connector of the front panel.
2. Connect the DIN12 connector of the Remote Control Panel cable to the DIN 12 socket of the front
panel.
3. Set the 3-position switch of the front panel to ARM.
Perform the following tests:
1. ELT operational tests: Refer to § A. ELT operational tests, page 302 of installation manual.
2. RCP operational tests: Refer to § B. RCP operational tests, page 302 of installation manual.
3. 406 & 121.5 MHz transmission tests (optional): Refer to § C. 406 and 121.5 MHz transmission test,
page 303 of installation manual.
4. At the end of this procedure, switch the ELT to ARM.
A
K
B
J
L
C
H
M
D
G
F
E
RCP
Side
DIN-12
connector
D-SUB 9 female
connector
Connectors
view from back side of inserts
ELT
Side
3-wire bundle
(AWG 24 shielded preferred)
J1
RCP LED
5
9
3
7
2
6
1
RCP RESET
4
RCP COMMON
8
Strap
7. WIRE DIN-12 AND SUB-D 9 FEMALE CONNECTORS
8. CONNECT ELT AND SWITCH TO ARM
Summary of Contents for 406 AF-COMPACT
Page 1: ...DOC07089A 0144618A...

