background image


Overview 


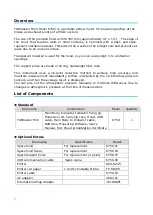
TABmaster Mini (Model 6750) is a portable airflow meter for measuring airflow at the   

intake and exhaust points of a HVAC system. 


The size of the provided hood is 355×355 mm (approximately 14” x 14”).  The edge of 

the hood,  that  touches  walls or other surfaces, is hemmed with a  dust-  and stain- 

repellent urethane material. This aids in the creation of an airtight seal and prevents air 

leaks due to an uneven surface.   


Transparent material is used for the hood, so you can easily align it to ventilation   

openings. 


The support poles are made of strong, lightweight fiber rods. 


This instrument uses  a  16-point  detection method to  achieve  high accuracy and 

maintain measurement repeatability. Airflow is detected by the 16 individual pressure 

sensors, and then the average result is displayed. 

You can also  set the atmospheric pressure manually to minimize  differences  due to 

changes in atmospheric pressure at the time of measurement. 


List of Components 


Standard   

Item name 

Composition 

Model 

Quantity 

TABmaster Mini   

Main Body, Indicator, Indicator fixing jig,   

Extension rod, Carrying case, Hood, USB 

cable, Main Body to Indicator cable, 

Batteries, Measuring software, User's 

Manual, Test Sheet & Calibration Certificate 

6750 


Optional Extras 

Item name 

Specification 

Model 

Spare hood 

For replacement 

6750-01 

Spare hood fabric 

For replacement 

6750-04 

Spare Support poles 

For replacement (4 poles) 

6750-07 

USB communication cable 

Spare cable 

6750-09 

Printer 


DPU-S245 

Printer roll paper 

1 roll for Portable Printer 

TP-5RLPK 

Printer cable 


6750-10 

AC adaptor 


3887-01 

International Plug Adapter 


301ADAPT 


Summary of Contents for TABmaster Mini

Page 1: ...TABmaster Mini Model 6750 User s Manual...

Page 2: ...flow is detected by the 16 individual pressure sensors and then the average result is displayed You can also set the atmospheric pressure manually to minimize differences due to changes in atmospheric...

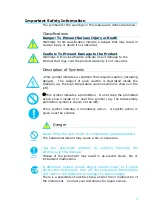
Page 3: ...l indicates a prohibition Do not take the prohibited action shown inside of or near this symbol e g the disassembly prohibition symbol is shown on the left This symbol indicates a mandatory action A s...

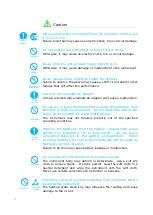
Page 4: ...he instrument may not function properly out of the specified operating conditions Remove the batteries from the battery compartment when storing the instrument for a long period Do not leave exhausted...

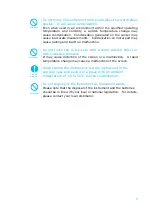
Page 5: ...creen with a sharp pointed object or with excessive pressure It may cause distortion of the screen or a malfunction A rapid temperature change may cause a malfunction of the screen When storing the in...

Page 6: ...ing the Power ON OFF 12 Operating the Instrument 13 Chapter 4 Taking a Measurement 14 Main Screen 14 Taking a Measurement and Storing the Data 14 Chapter 5 Menu Operation 16 Displaying the Menu Screen...

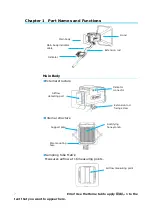
Page 7: ...Body External structure Internal structure Sampling Tube Matrix Measures airflow at 16 measuring points Main body Indicator Hood Support pole Rectifying honeycomb Pole mounting hole Airflow detecting...

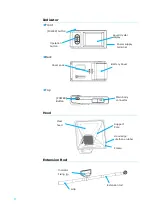
Page 8: ...sion Rod Liquid crystal display Operation button Battery Cover Cover Lock Main body connector POWER Button Frame Support Pole Clear hood Hood edge urethane rubber Extension rod Indicator Fixing jig Gr...

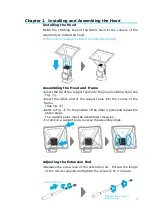
Page 9: ...the pole mounting hole see Fig Insert the other end of the support pole into the corner of the frame See Fig Refer to Fig for the position of the other 3 poles and repeat the above steps The support...

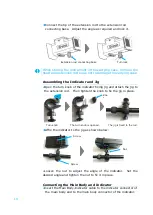
Page 10: ...h the jig to the extension rod Then tighten the knob to fix the jig in place Affix the indicator to the jig as shown below Loosen the nut to adjust the angle of the indicator Set the desired angle and...

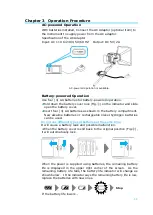
Page 11: ...A batteries as shown in the battery compartment New alkaline batteries or rechargeable nickel hydrogen batteries can be used Do not use different types of batteries at the same time It will cause a ba...

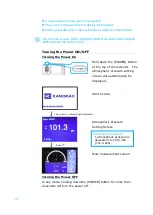
Page 12: ...urning the Power On Hold down the POWER button at the top of the indicator The atmospheric pressure setting screen will automatically be displayed Start Screen Atmospheric Pressure Setting Screen Main...

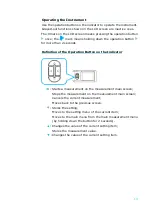
Page 13: ...finition of the Operation Button on the Indicator Starts a measurement on the measurement main screen Stops the measurement on the measurement main screen Cancels the current measurement Moves back to...

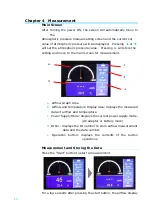
Page 14: ...screen for measurement a Airflow Graph Area b Airflow and Temperature Display Area displays the measured data of airflow and temperature c Power Supply Mode displays the current power supply mode AC...

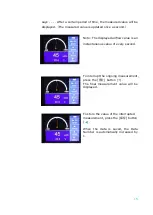
Page 15: ...ond Note The displayed airflow value is an instantaneous value of every second To interrupt the ongoing measurement press the button The final measurement value will be displayed To store the value of...

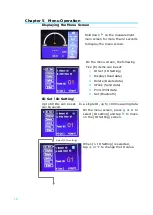
Page 16: ...can be set 1 ID Set ID Setting 2 Display Read data 3 Delete Delete data 4 UPlink Send data 5 Print Print data 6 Set Bluetooth ID Set ID Setting Up to 60 IDs can be set In a single ID up to 100 measur...

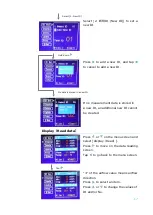
Page 17: ...nal new ID cannot be created Display Read data Press or on the menu screen and select display Read Press to move on the data reading screen Tap to go back to the menu screen of the airflow value means...

Page 18: ...ete by No are available Tap to go back to the Delete screen Tap to go back to the menu screen Delete Delete All This function deletes all IDs and measurement data under the all IDs Press or to select...

Page 19: ...number to be deleted Press or to select the Data number to be deleted Hold down for 2 seconds to display the confirmation message Press to delete the selected data Press to cancel to delete UPlink Se...

Page 20: ...the connection between the main body and the PC If an error occurs in a process of connection the Error Connect Error as shown lower left will be displayed Print Setting In prior to printing confirm...

Page 21: ...by ID Print by ID Entry Press to go back to the setting screen Set the Start ID number by pressing or Hold down for 2 seconds to display the Print message Press to cancel Print by Data Entry Select 2...

Page 22: ...ng screen Hold down for 2 seconds to display the Model name serial number Hold down for 2 seconds to cancel To connect from OS device iPhone iPad to 6750 can operate 6750 from OS device and it can sen...

Page 23: ...plied a Airflow unit setting m3 h CFM Default unit m3 h b Temperature unit setting F Default unit c Atmospheric pressure unit setting kPa inHg Default unit kPa d factor setting 0 500 to 1 500 Default...

Page 24: ...ist of kPa and inHg The currently selected unit is highlighted in white as shown in the lower right figure Press or to select the unit and press to store the setting of the unit Pressing will cancel t...

Page 25: ...of settable K factor is from 0 500 to 1 500 at 0 001 intervals Note If is pressed when displaying 1 500 the setting will be changed to 0 500 if is pressed wen displaying 0 500 the setting will be chan...

Page 26: ...tion Bluetooth Digital Output USB Power Supply AA Battery x 4 AC adaptor Option Dimension of the hood 355 355 mm Weight 1 5 kg Accessories Indicator Indicator Fixing Jig Extension Rod Carrying Case Ho...

Page 27: ...cannot be created The ID has already been a new one Use the current ID to measure and store the data ID numbers are fully assigned If the number of the IDs has reached 60 delete some IDs Printed data...

Page 28: ...NTIONED ABOVE GIVEN BY ANY PERSON OR ENTITY WITH RESPECT TO THE PRODUCT SHALL BIND KJI KJI SHALL NOT BE LIABLE FOR LOSS OF STORAGE CHARGES LOSS OR CORRUPTION OF DATA OR ANY OTHER SPECIAL INCIDENTAL OR...

Page 29: ...anomax usa com JAPAN KANOMAX JAPAN INC 2 1 Shimizu Suita City Osaka 565 0805 Japan TEL 81 6 6877 0183 FAX 81 6 6879 5570 URL http www kanomax co jp E Mail sales kanomax co jp CHINA Shenyang Kano Scien...

Page 30: ...30...

Reviews: