2
【
3
】
TIMING OF THE LOOPER TO THE NEEDLES
3333----1 Angle and height for installing the looper
1 Angle and height for installing the looper
1 Angle and height for installing the looper
1 Angle and height for installing the looper
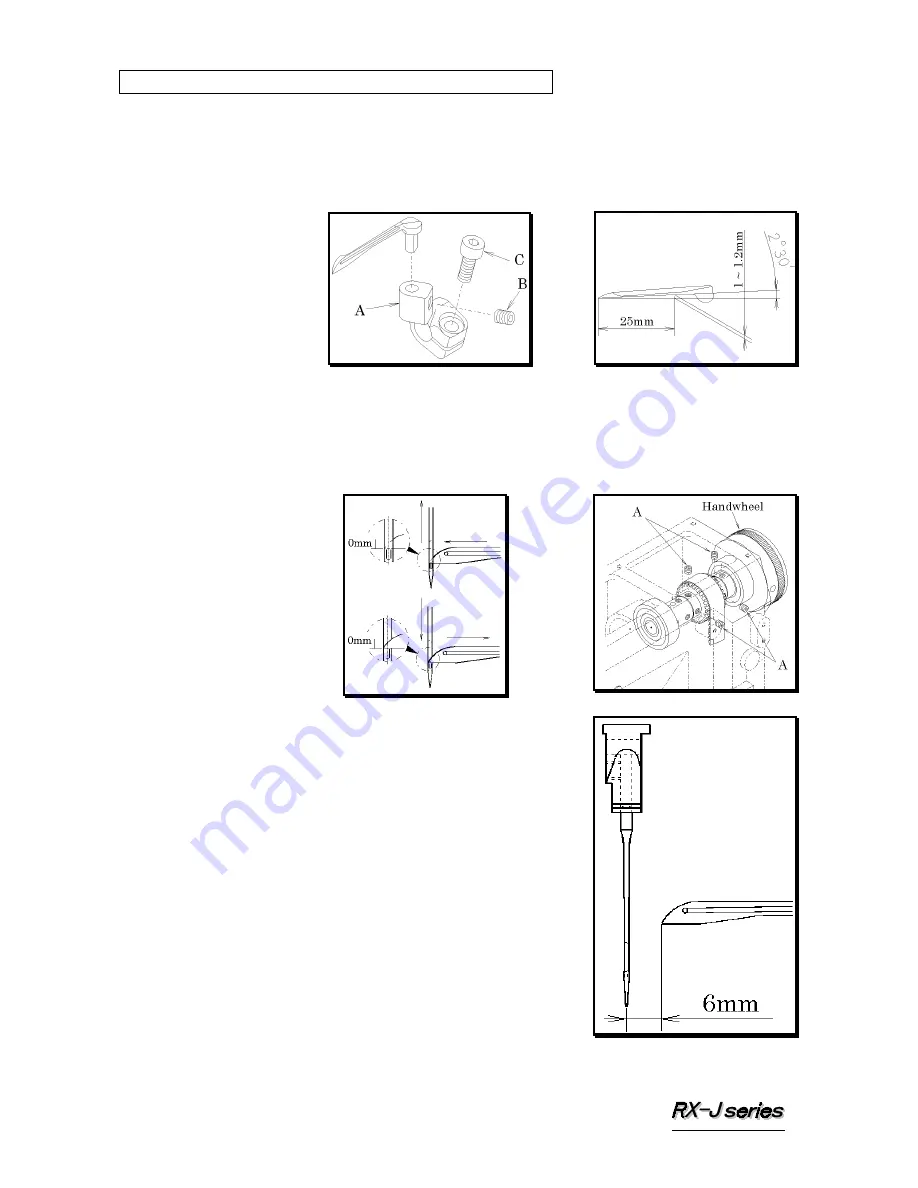
To obtain the proper angle and height, insert the looper fully into looper holder A and
then tighten screw B. The proper angle for the looper is 2º 30’. Distance at 25mm from
the point of the looper between the bottom of the looper blade and the extension line from
the point of the looper : Approximately 1.1mm
3333----2 Looper left
2 Looper left
2 Looper left
2 Looper left----to
to
to
to----right movement
right movement
right movement
right movement
When the point of the looper, moving to the left or right, has reached the left side of the
needle, distance as from the top of the needle's eye to the point of the looper should be the
same (0mm). See the illustration on the below. To adjust the timing of the looper to the
needles, remove the machine cover, loosen screws A on the timing pulley (upper), and
shift the timing pulley (upper) by turning the handwheel while holding the timing pulley
(upper) by hand.
3333----3 Looper setting distance
3 Looper setting distance
3 Looper setting distance
3 Looper setting distance
The distance from the point of the looper to the center of
the needle bar should be 6mm when the looper is at its
farthest position to the right. To make this adjustment,
loosen screw C (see 3-1) on the looper holder.


