W E B T U N E R
125
125
125
125
•
The
actions
page allows you to define the way infected
and suspicious objects must be processed. Options on
this page are similar to those described in
subchapter 9.5.2.3.
•
The
options
page allows you to define the advanced
scanning tools to be used. Options on this page are
similar to those described in subchapter 9.5.2.4.
3. Buttons located in this window allow you to do the following:
•
accept
– applies the defined settings to the selected
directory.
•
save as…
– allows application of the defined settings to
a new directory to be added to the location to be
checked. When you press the button, the appropriate
window will appear on your screen.
Use the window to
add the required directory to the list of directories on the
objects
page. The directory will be added to the list and
prefixed with "
+
".
•
cancel
– allows you to go back to the
objects
page
without saving the changes you made.
$"
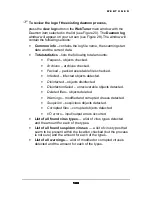
To change an item’s status within the list of directories to be
checked,
you must use the
change stat
button. You may select one of the
following options for the item:
•
item must be skipped during the check (prefixed with
"
–
").
•
item must be checked for viruses (prefixed with "
+
").
•
item must be neutral (no prefix). This status allows you
to KEEP an item in the list even when you do not want
to use it during the check.
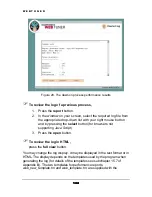
$"
To add a directory to the list,
1. Press
the
add
button.
2. Select the required directory from the drop-down list in the
window on your screen with your right mouse button and by

