


English
15
Note
The fuel cock is supplied from the factory
open. If the machine has been out of use for
a longer period of time, open the fuel cock.
Î
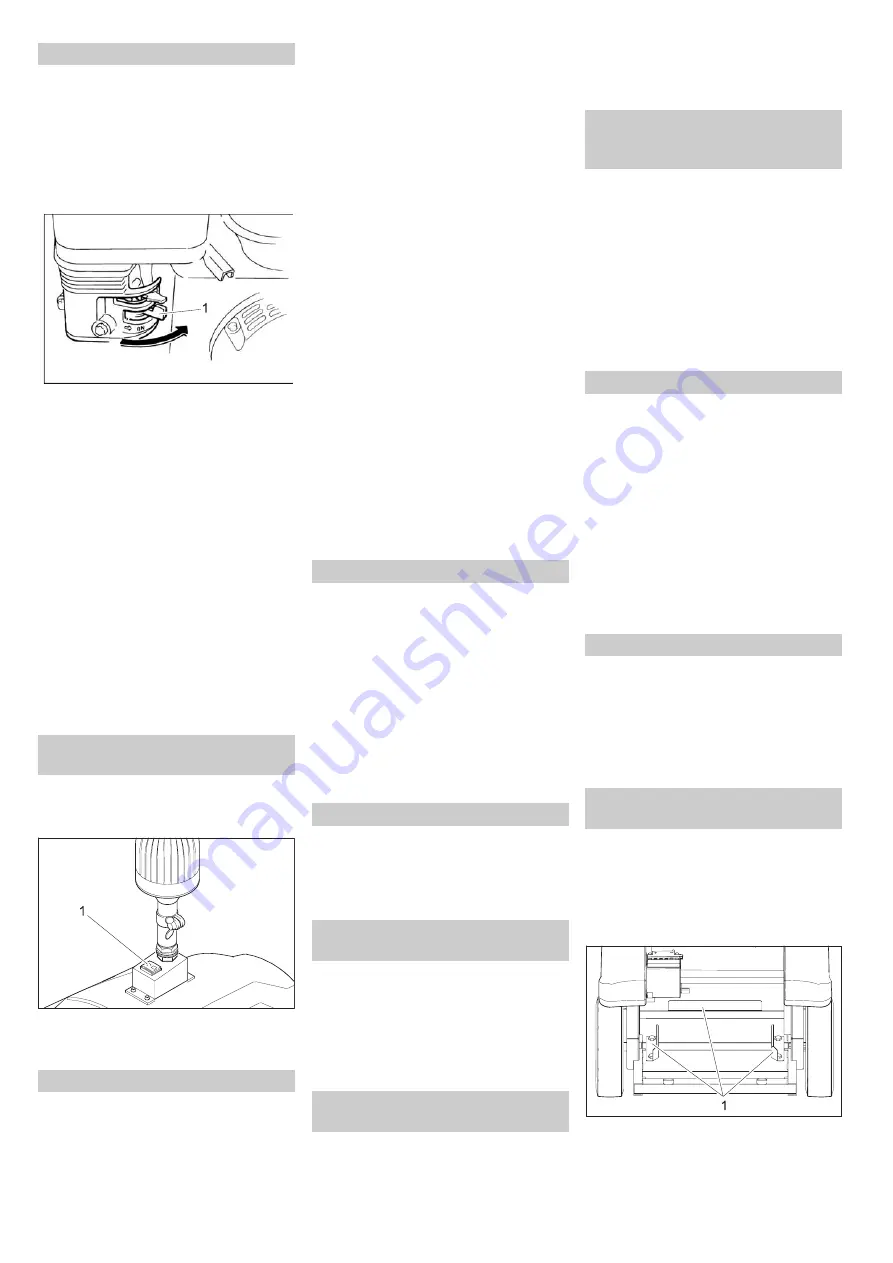
Open the device hood and secure it us-
ing the hood support.
1
Fuel tap
Î
Push lever in "ON" direction.
Î
Close cover.
Î
Release the drawbar.
Î
Pull out the choke lever.
Î
Turn ignition key past position 1.
Î
If the machine starts, release the igni-
tion key.
Î
Once the engine is running, re-insert the
choke lever.
Note
Never operate the starter motor for longer
than 10 seconds. Wait at least 10 seconds
before operating the starter motor again.
Î
You can use the accelerator to regulate
the engine speed.
The beacon light increases the attention of
others in the traffic towards the appliance
and the operator.
1
Switch
Î
Switch on the beacon light.
Î
Pull the unlock/ brake lever and move
the drawbar cautiously towards the
front.
Î
Pull the unlock/ brake lever and move
the drawbar cautiously towards the rear.
Note
Driving method
–
You can release the unlock/ brake lever
if the drawbar is not in the central posi-
tion.
–
The drawbarl can be used to regulate
the driving speed infinitely.
–
Avoid pressing the drawbar suddenly as
this may damage the hydraulic system.
–
In the event of power loss on inclined
surfaces, slightly reduce the pressure
on the drawbar.
Î
Direct the device in the desired direction
using the drawbar.
Î
Release the drawbar; the machine
brakes automatically and stops.
Driving over fixed obstacles which are 50
mm high or less:
Î
Drive forwards slowly and carefully.
Driving over fixed obstacles which are more
than 50 mm high:
Î
Only drive over these obstacles using a
suitable ramp.
Note
During operations, the waste container
must be emptied at regular intervals or re-
placed through an empty waste container.
Î
In appliances with the leaf blower at-
tachment set: Open Exhaust openings
for vacuuming.
Î
Pull the suction pipe from the holder and
hold it at the handle.
Î
Suck off dirt using the suction pipe.
Î
Insert the suction pipe back into the
holder after vacuuming.
Garbage that is too big for the suction pipe
can be thrown into the bulk waste flap.
Î
Tilt the bulk waste flap upwards and
throw in the garbage.
Î
Close the bulk waste flap.
Î
Close exhaust openings for vacuuming.
Î
Pull the blower pipe out of the holder.
Î
Use the air jet from the blower pipe to
blow the leaves in the desired direction.
Î
Insert the blower pipe back into the
blower after vacuuming and open the
ventilation louvers for suction operation.
The fine dust filter must be cleaned when
the vacuuming performance diminishes
and before removing the waste container.
Î
Move the filter cleaning handle back
and forth and couple of times and wait
till the dust has settled down in the
waste container.
Note
Wait till the dust has settled down before re-
moving the garbage sack.
Î
Stop the machine.
Î
Turn the ignition key to 0 position.
Î
Tilt the suction head upward.
Î
Pull out the cover from the garbage
sack by holding it at the two holder
loops.
Î
Close the mouth of the garbage sack
and take it out of the garbage container.
Note
Wait till the dust has settled down before re-
moving the waste container.
Î
Stop the machine.
Î
Turn the ignition key to 0 position.
Î
Tilt the suction head upward.
Î
Close the waste container lid.
Î
Pull the waste container backwards out
of the device.
Note
You can remove the waste container, emp-
ty it and re-insert it or replace it through an-
other, empty waste container.
Î
Tilt the suction head upward.
Î
Insert the waste container into the appli-
ance.
Î
Open the waste container lid.
Î
Tilt down the suction head.
Î
Check whether the washers of the suc-
tion head are sealing properly.
Note
You can use all standard waste containers
according to DIN EN 840-1 with 240 litre ca-
pacity. It may be necessary to slightly adjust
the intake due to the manufacturer's toler-
ances.
1
Stopper
Î
Loosen the fastening screws of the
stopper.
Starting the machine
Open fuel cock
Turning on the Appliance
Setting the motor rpm
Switch on beacon light (only with
accessory beacon light kit)
Drive the machine
Drive forward
Reverse drive
Steering
Brakes
Driving over obstacles
Vacuuming
Throwing in bulk waste
Blowing (only using the Leaf Blower
attachment set)
Cleaning the fine dust filter (only
Fine dust filter attachment set)
Removing the garbage sack (only
with the garbage sack accessory
kit)
Removing the waste container
Insert waste container
Adjusting the intake for the waste
container
Summary of Contents for IC 15/240 W
Page 1: ...Deutsch 3 English 12 IC 15 240 W 5 962 627 0 2018690 08 07...
Page 2: ...2...
Page 21: ......


