


English
17
Preparation:
Î
Park the machine on an even surface.
Î
Lock the parking brakes by releasing
the drawbar.
Î
Turn ignition key to "0" and remove it.
Danger
Risk of injury due to engine overrun. Once
the engine has been switched off, wait for 5
seconds. Stay well clear of the working area
for this time.
Î
Allow the machine sufficient time to cool
down before carrying out any mainte-
nance and repair work.
Do not touch any hot parts, such as the
drive motor and exhaust system.
Please observe the following warning notes
when handling batteries:
Danger
Risk of explosion! Do not put tools or similar
on the battery, i.e. on the terminal poles and
cell connectors.
Danger
Risk of injury! Ensure that wounds never
come into contact with lead. Always clean
your hands after having worked with batter-
ies.
Î
Tilt the suction head upward.
Î
Close the waste container lid.
Î
Pull the waste container backwards out
of the device.
Î
Insert battery in battery mount.
Î
Lay the holder belt around the battery
and tighten it.
Î
Connect pole terminal (red cable) to
positive pole (+).
Î
Connect pole terminal to negative pole
(-).
Note
Before removing the battery, make sure
that the negative pole lead is disconnected.
Check that the battery pole and pole termi-
nals are adequately protected with pole
grease.
Danger
Risk of injury! Comply with safety regula-
tions on the handling of batteries. Observe
the directions provided by the manufacturer
of the charger.
Î
Disconnect battery.
Î
Connect positive terminal cable from
the charger to the positive pole connec-
tion on the battery.
Î
Connect negative terminal cable from
the charger to the negative pole con-
nection on the battery.
Î
Plug in mains connector and switch on
charger.
Î
Charge battery using lowest possible
level of charging current.
몇
Warning
Regularly check the fluid level in acid-filled
batteries.
Î
Unscrew all cell caps.
Î
Where fluid level is too low, top up cells
to the mark provided with distilled water.
Î
Charge battery.
Î
Screw in cell caps.
Danger
Risk of injury!
Î
Park the machine on an even surface.
Î
Lock the parking brakes by releasing
the drawbar.
Î
Remove ignition key.
Î
When carrying out repairs on public
highways, wear warning clothing when
working close to passing traffic.
Î
Check stability of ground. Also secure
the machine with wheel chock(s) to pre-
vent it rolling away.
Check tyres
Î
Check tyre contact face for foreign ob-
jects.
Î
Remove objects found.
Î
Use suitable, commercially available
materials to carry out tyre repairs.
Note
Observe the manufacturer's recommenda-
tions. The journey may be resumed provid-
ing that the directions supplied by the
product manufacturer have been observed.
The tyre/wheel change should nonetheless
be carried out as soon as possible.
Î
Loosen wheel nuts.
Î
Position vehicle jack at the appropriate
mounting point for the front or rear
wheel.
Î
Raise machine using vehicle jack.
Note
Use a suitable commercially available vehi-
cle jack.
Î
Remove the wheel nuts; unscrew the
axle at the front wheel.
Î
Remove wheel.
Î
Mount spare wheel.
Î
Screw on wheel nuts.
Î
Lower machine using vehicle jack.
Î
Tighten wheel nuts.
몇
Warning
The engine is equipped with an oil deficien-
cy switch. When the fill level is insufficient,
the engine switches off and can only be re-
started once the engine oil has been replen-
ished.
Danger
Risk of burns!
Î
Allow engine to cool down.
Î
Wait for at least 5 minutes after switch-
ing off the engine before checking the
engine oil fill level.
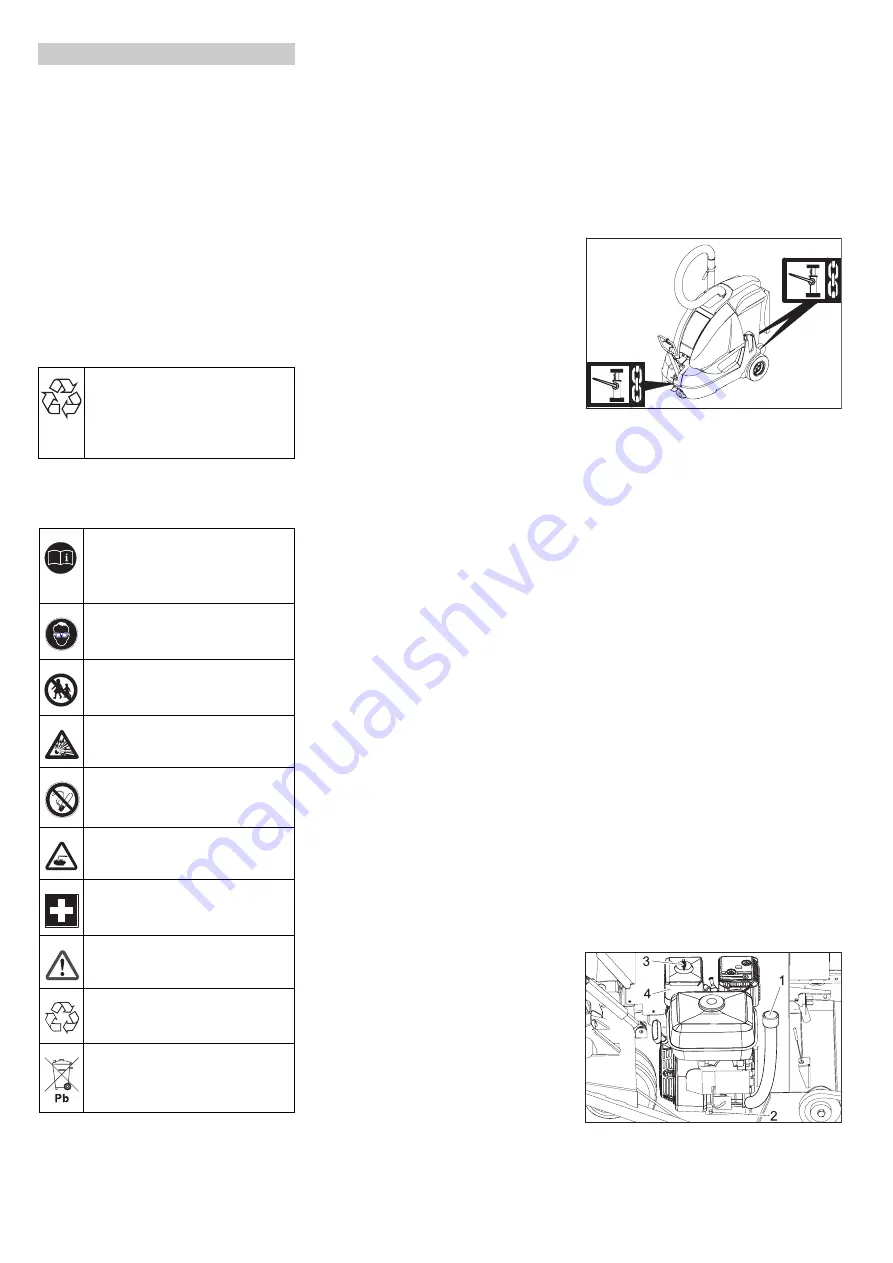
Î
Open the device hood and secure it us-
ing the hood support.
1
Oil dipstick
2
Oil drain screw
3
Wing nut
4
Air filter
Maintenance Works
General notes on safety
Please do not release engine oil,
fuel oil, diesel and petrol into the
environment Protect the ground
and dispose of used oil in an en-
vironmentally-clean manner.
Safety notes regarding the batteries
Observe the directions on the bat-
tery, in the instructions for use
and in the vehicle operating in-
structions
Wear eye protection
Keep children away from acid and
batteries
Danger of explosion
Fire, sparks, naked flames and
smoking must be strictly avoided
Danger of chemical burns
First aid
Warning note
Disposal
Do not throw the battery into the
regular waste
Installing and connecting the battery
Charging battery
Check fluid level in the battery and ad-
just if required
Replacing wheel
Check engine oil level and top up, if re-
quired
Summary of Contents for IC 15/240 W
Page 1: ...Deutsch 3 English 12 IC 15 240 W 5 962 627 0 2018690 08 07...
Page 2: ...2...
Page 21: ......


