background image

 Operating instructions

KM 100/100 R / KM 100/100 R P

English

25

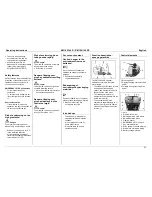
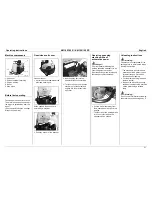
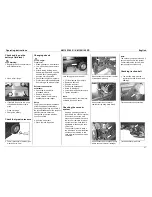
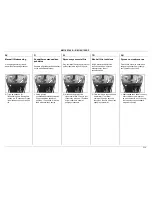
Battery discharging

warning

Green

Battery is charged

Yellow

Battery is almost dead

!

  Stop sweeping and charge

battery

Red

Battery flat

 Sweeping system switched off by

control

!

  Charge the battery

see chapter on "Maintenance"

Flashing red

 Discharge limit reached

 3 more min. driving possible,

then the sweeper turns itself off

!

  Then the sweeper cannot be

restarted any more, the battery
must be recharged for at least
3 hours

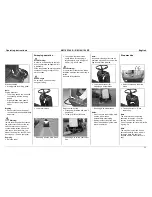
Decommissioning

Please heed the following if
sweeper is not to be used for a
lengthy period:

!

  Stand sweeper on a flat surface

!

  Turn key switch to "0" and

remove key

!

  Safeguard the sweeping machine

from rolling away

!

  Clean inside and outside of

sweeper

!

  Turn off the machine on a

protected and dry place

!

  Charge the battery and recharge

it at intervals of approx. every two
months

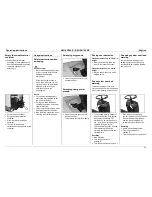
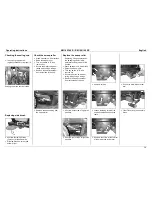
Transport

Transport instructions

!

  Turn key switch to "0" and

remove key

!

  Secure the machine with wedges

on the wheels

!

  Secure the machine with stretch

belts or ropes

Fastening areas

Notes:

Observe markings for fastening
areas on base frame! (chain
symbols)
For loading or unloading the
machine may be operated on slopes
of only up to a max. of 18 %

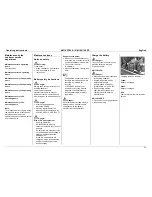
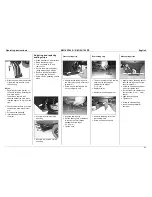
Cleaning and maintenance

!

  Stand sweeper on a flat surface

!

  Turn key switch to "0" and

remove key

Internal cleaning

 Danger!

Wear dust mask!
Wear safety goggles!

!

  Open unit cover, engage stay bar

!

  Clean with a rag

Note:

The filter cartridge can be cleaned
with water.
Prior to re-inserting it the filter must
be completely dried.

External cleaning

Clean with a damp cloth previously
soaked in mild suds

Note:

Do not use any aggressive cleaning
agents!

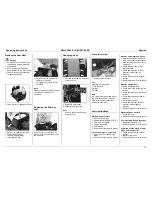
Maintenance intervals

Elapsed-time meter

Elapsed-time meter indicates
maintenance interval times.

Maintenance by the

customer

Daily maintenance

!

  Check the tyre air pressure

!

  Check roller and side brush for

wear and trapped straps

!

  Check the function of all

operating controls

Maintenance weekly

!

  Checking the battery acid level

!

  Check freedom of movement of

Bowden cables and moving parts

!

  Check setting and wear of

sealing strips in sweeping area

!

  Checking the vacuum system

Maintenance every 100 operating
hours

!

  Check operation of seat contact

switch

!

  Check tightness, wear and

operation of drive belts (V-belts
and round belts)

Maintenance according to degree
of wear

!

 Replace sealing strips

!

  Replacing the sweep roller

!

  Replacing the side broom

See maintenance tasks chapter for
description

Note:

All service and maintenance work
must be performed by qualified and
skilled personnel.
A Kärcher specialist dealer can be
consulted whenever support is
necessary.

Summary of Contents for KM 100 / 100 R

Page 1: ...www kaercher com 5 960 294 A2008261 05 04 KM 100 100 R KM 100 100 R P 1 280 101 1 280 111...

Page 2: ...vicio 80 Anexo Limpieza manual del filtro 238 Lista de piezas de requesto 240 Manual de instru es 96 Anexo Limpeza manual do filtro 238 Lista de pecas sobresselentes 240 112 238 240 Driftsvejledning 1...

Page 3: ...op machine 23 Empty the swept material container 24 Usage instructions 24 Safety instructions when sweeping 24 Sweeping dry ground 24 Sweeping damp or wet ground 24 Driving over obstacles 24 Drive sys...

Page 4: ...tended as long as the motor is running The operator may not leave the appliance until the motor is turned off the appliance is safeguarded against unintentional motion if necessary the parking brake a...

Page 5: ...g over given a sideways incline that is too large Danger The machine can tip over given an incline of more than 15 For our environment Caution danger to the environment from used batteries Do not disp...

Page 6: ...acket in the unit cover Operating sweeping machine without automotive power Danger Prior to manually releasing the parking brake the sweeper is to be secured against movement After the parking brake i...

Page 7: ...sting range is insufficient Unscrew the 4 screws at the seat contact switch plate Remove the plate Turn the seat forward Unscrew 4 screws of seat mounting Shift seat and refasten with screws Remount s...

Page 8: ...main brush The coarse dirt flap must be briefly raised for sweeping in largish objects up to a height of 60 mm e g drinks cans Warning It is possible for debris to be thrown forwards when the coarse d...

Page 9: ...seat Sweeping damp or wet ground Open the bypass cover on left behind the seat This protects the filter from damp Driving over obstacles Fixed obstacles of up to 50 mm in height Slowly and carefully...

Page 10: ...8 Cleaning and maintenance Stand sweeper on a flat surface Turn key switch to 0 and remove key Internal cleaning Danger Wear dust mask Wear safety goggles Open unit cover engage stay bar Clean with a...

Page 11: ...ies Do not place any objects or tools on the battery because voltage is always present between the battery poles Areas in which batteries are charged must be well ventilated as highly explosive gas fo...

Page 12: ...served Change the tyre or the wheel as soon as possible Unscrew wheel bolt Place the jack in position Jack fixing point rear wheels Lift the machine with the jack Remove wheel bolt Slide the wheel off...

Page 13: ...m both sides of the unit Remove tapes and string from the sweep roller Replace the sweep roller Replacing it is necessary when the sweeping effect visibly deteriorates due to wear of the bristles Stan...

Page 14: ...ides Unscrew front screw of side panelling Unscrew rear screws of side panelling Front sealing strip Slightly loosen fastening nut at the front sealing strip unscrew it to replace it Screw on new seal...

Page 15: ...r sales service station or an authorised specialist Fault instructions Machine does not move Sit on the driver seat Disable the EMERGENCY STOP Switch ON key switch Charge the battery Check fuses Notif...

Page 16: ...anent magnet motor for forward driving and reversing Voltage 24 V Rated current 37 A Rated power 750 W Protection class IP44 Speed infinitely variable Fan and main brush motor Type direct curent perma...

Page 17: ...60 335 2 29 DIN EN 60 335 2 72 DIN EN 55 014 1 2000 A1 2001 DIN EN 55 014 2 1997 DIN EN 61 000 3 2 2000 DIN EN 61 000 3 3 1995 A1 2001 Applied national standards Applied conformity valuation method A...

Page 18: ...es importantes nettoyer r guli rement le filtre antipoussi re Appuyer bri vement sur la touche nettoyage du filtre Le filtre antipoussi re est nettoy pendant env 15 secondes Ne pas ouvrir le capot de...

Page 19: ...mir a tecla de limpeza do filtro durante um curto espa o de tempo O filtro de poeira limpo durante aprox 15 segundos Durante este per odo n o abrir a tampa do aparelho EL 15 DK Manuel filterreng ring...

Page 20: ...tta P lysuodattimen puhdistus kest n 15 sekuntia l avaa t n aikana laitteen kantta PL R czne czyszczenie filtra Przy zamiataniu du ych powierzchni nale y regularnie czy ci filtr py u Kr tko nacisn prz...

Page 21: ...KM 100 100 R KM 100 100 R P 240...

Reviews: