-
12
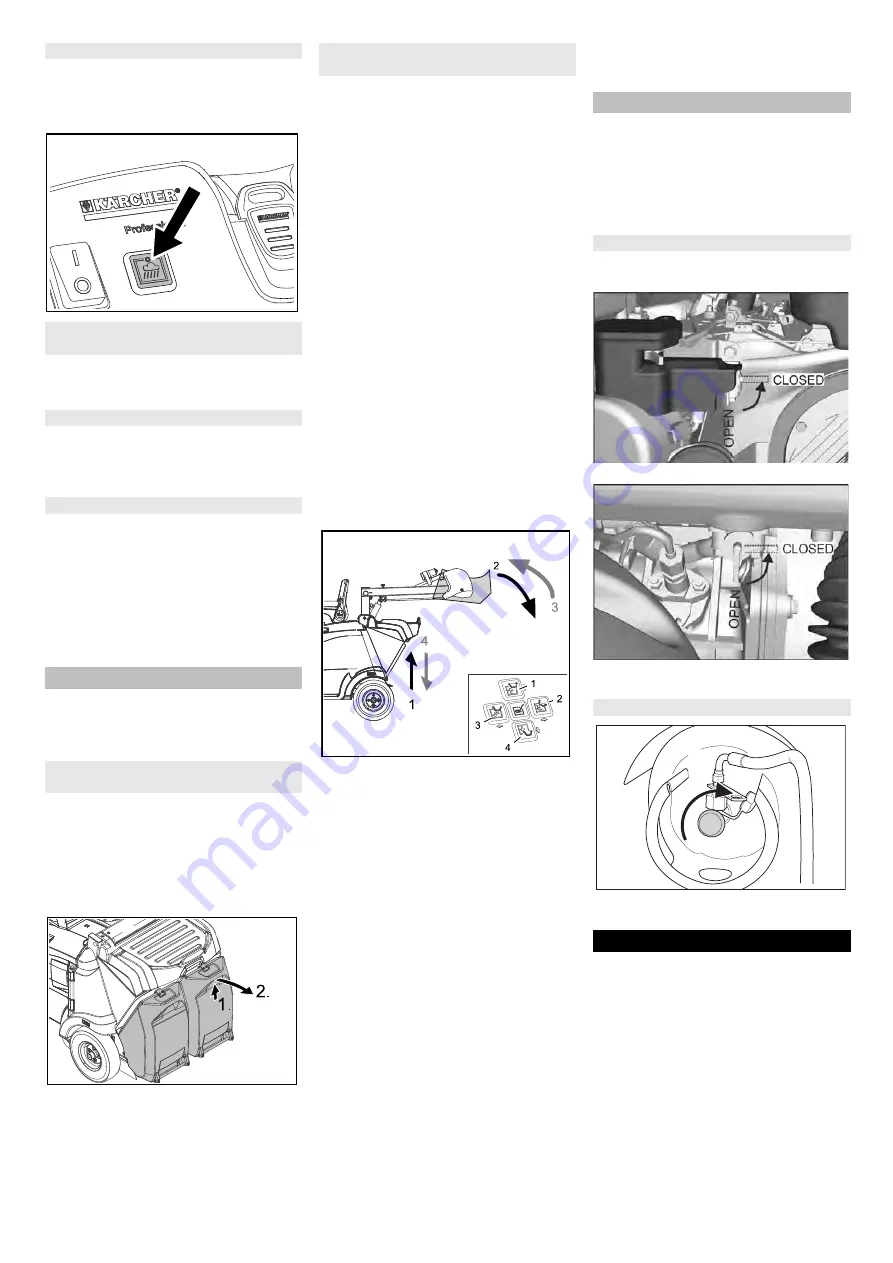
To protect the filter from moisture:
Switch the suction blower off using the
button on the control panel.
Note
: The indicator lamp is illuminated.
To avoid clogging of the filter system:
Switch the suction blower off using the
button on the control panel.
Work with suction blower switched on.
Note
: The suction blower is activated
by default when switching on a sweep-
ing programme.
The appliance is equipped with an auto-
matic filter cleaning system.
The cleaning takes place automatically ap-
prox. every 15 seconds. In the process a
short blow-off sound can be heard.
Check the installed dust filter for con-
tamination every once in a while. Re-
place a heavily contaminated or defec-
tive filter.
Note:
After parking the appliance, wait at
least 1 minute before opening or emptying
the waste container. This way the dust can
settle.
DANGER
It is prohibited to remove the waste contain-
er while the engine is running (third per-
son).
Slightly lift the waste container and
swivel it downwards to the rear, then
unhinge the waste container.
Empty waste container.
Slide the waste container in and lock it
in place, check for proper seating of the
waste container
Risk of crushing hands!
Empty the second waste container.
The high emptying system of the appliance
allows the direct disposal of the waste in
the waste container into a refuse container
(for maximum unloading height see Chap-
ter "Technical data").
DANGER
Danger of tipping!
Place the device on an even surface
during the emptying process.
Risk of injury!
During the emptying process, persons
and animals must not stay within the
swivelling range of the waste container.
Risk of crushing!
Never reach into the rod assembly for
the drainage mechanism. Do not stay
under the raised container.
몇
CAUTION
Risk of accident, risk of injury!
Do not switch into the sweeping mode
(programme selector switch in D, E, F
position) while the waste container is
raised.
ATTENTION
The container can only be tilted and emp-
tied once a set minimum level has been
reached.
Turn the programme selector switch to
position C (drive).
Roughly position the appliance.
Note
The waste container can only be emptied in
two-hand operation. For this purpose, push
the two-hand operation button on the bon-
net together with the corresponding direc-
tion keys 1 to 4 on the control panel.
Raise waste container: Push the two-
hand operation button and direction key
1.
Slowly drive towards the collection con-
tainer.
Lock parking brake.
Tipping the waste container outwards:
Push the two-hand operation button
and direction key 2.
Completely tip the waste container in-
wards: Push the two-hand operation
button and direction key 3.
Release parking brake.
Drive away the collection container
slowly.
Lower the waste container to the end-
position: Push the two-hand operation
button and direction key 4.
Note
: The waste container can only be
completely lowered after it has been
tipped inwards into its initial position.
Note
: After switching off the appliance, the
dust filter is automatically dedusted.
Park the sweeper on an even surface.
Turn the program selection switch to
"OFF".
Activate parking brake.
Remove the key.
Open the engine hood.
Close the fuel supply.
Figure: Close fuel cock (petrol engine)
Figure: Close fuel cock (diesel engine)
Close engine bonnet.
Close gas drawing valve by turning it in
clock-wise direction.
DANGER
Risk of accident!
When loading the appliance the free-
wheel lever must be closed. Only then
the travel drive and parking brake are
ready for operation. The appliance
must always be moved up or down
slopes by engaging self-propulsion.
Risk of personal injury or damage!
Observe the net weight (transport
weight) of the device during transport
on trailers or vehicles.
When transporting in vehicles, secure
the appliance according to the guide-
lines from slipping and tipping over.
Sweeping damp or wet floors
Sweep in fibrous and dry waste (such as
dry grass, hay)
Sweeping dry floors
Filter dedusting
Emptying waste container
With appliances with low emptying
system
With appliances with high emptying
system
Turn off the appliance
Close fuel cock
Closing the gas supply (gas engine)
Transport
39
EN
Summary of Contents for KM 105/100 R G
Page 2: ...2...
Page 284: ...2 www kaercher com StVZO 284 EL...
Page 285: ...3 KM 105 1xx 18 16 12 KM 125 130 16 12 10 3 4 285 EL...
Page 286: ...4 HVBG DIN 51622 90 10 30 70 0 32 F BGG 936 33 37 UVV BGV D34 1 Nekal 286 EL...
Page 287: ...5 TRF 1996 DA BGV D 34 4 DA BGV D34 2 KIK K rcher Intelligent Key 3 4 5 2 1 2 287 EL...
Page 292: ...10 O 2 1 2 KM 125 400 kg 608 kg 292 EL...
Page 294: ...12 20 kg KIK 1 OFF 1 5 C 1 1 5 ON KIK 5 1 2 0 6 cm 294 EL...
Page 295: ...13 6 cm 3 2 1 ECO 2 MEDIUM 3 HEAVY 4 2 ECO KIK D E F 2 50 mm F 15 1 295 EL...
Page 296: ...14 D E F C 1 4 1 2 3 4 OFF K KIK OFF KIK 6 5 ml K 296 EL...
Page 298: ...16 0 K rcher 100 20 200 K rcher 20 100 200 300 3 4 OFF KIK 298 EL...


