


-
6
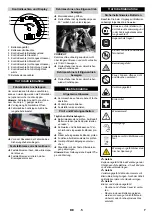
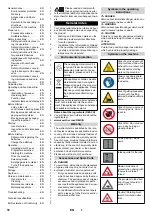
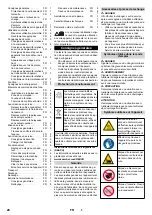
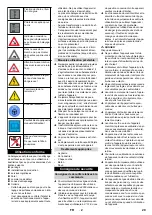
Danger
Danger of causticization!
–
Rinse thoroughly with lots of clear water
if acid gets into the eye or comes in con-
tact with the skin.
–
Then consult a doctor immediately.
–
Wash off the acid If it comes in contact
with the clothes.
CAUTION
Charge the batteries before commissioning
the machine.
DANGER
Risk of injury! Comply with safety regula-
tions on the handling of batteries. Observe
the directions provided by the manufacturer
of the charger.
Please read and follow the included operat-
ing instructions by the battery manufacturer
and follow them.
Charge the battery only with an appropriate
charger.
Rooms where batteries are charged must
have good ventilation because highly ex-
plosive gas is emitted during charging.
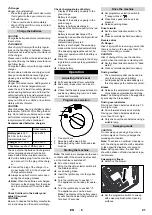
Danger
Danger of chemical burns. Adding water to
the battery in its discharged state can
cause the acid to leak! Use safety glasses
while handling battery acid and follow the
safety instructions to avoid personal injury
or damage to clothes. Should the acid
spray on to the skin or clothes, rinse imme-
diately with lots of water.
CAUTION
Risk of damage. Use only distilled or desal-
inated water (VDE 0510) for filling the bat-
tery. Do not add any substances (so-called
performance improving agents), else war-
ranty claims will not be entertained.
The use of other batteries and chargers is
not recommended and should be dis-
cussed with Kärcher customer service.
Pull the battery plug from the machine
and connect it to the plug of the charg-
er.
Connect the plug of the charger to a
proper socket of 16 A, the charger will
charge automatically.
Always keep both motor covers open
during the charging process.
Note:
When the batteries are charged,
first remove the charger from the mains
and then disconnect it from the batter-
ies.
CAUTION
Be sure to observe the battery manufactur-
er’s instructions and then act accordingly.
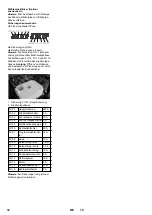
–
Display of the battery capacity in the
green range:
Battery is charged.
–
Display of the battery capacity in the
yellow range:
Battery is halfway discharged.
–
Display of the battery capacity in the red
range:
Battery is almost discharged. The
sweeping mode will be shortly switched
off automatically.
–
Indicator lamp glows red
Battery is discharged. The sweeping
mode will be terminated automatically
(the sweeping aggregates cannot be
taken into operation until the battery is
charged).
Drive the machine directly to the charg-
ing station; avoid any steep gradients in
the process.
Charge battery.
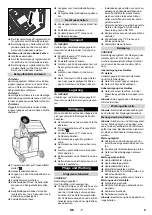
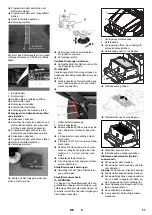
Pull seat adjustment lever outwards.
Slide seat, release lever and lock in
place.
Check that the seat is properly locked in
position by attempting to move it back-
wards and forwards.
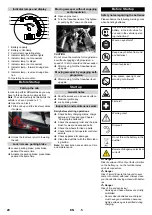
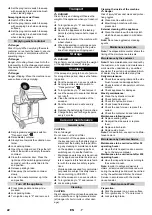
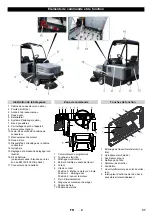
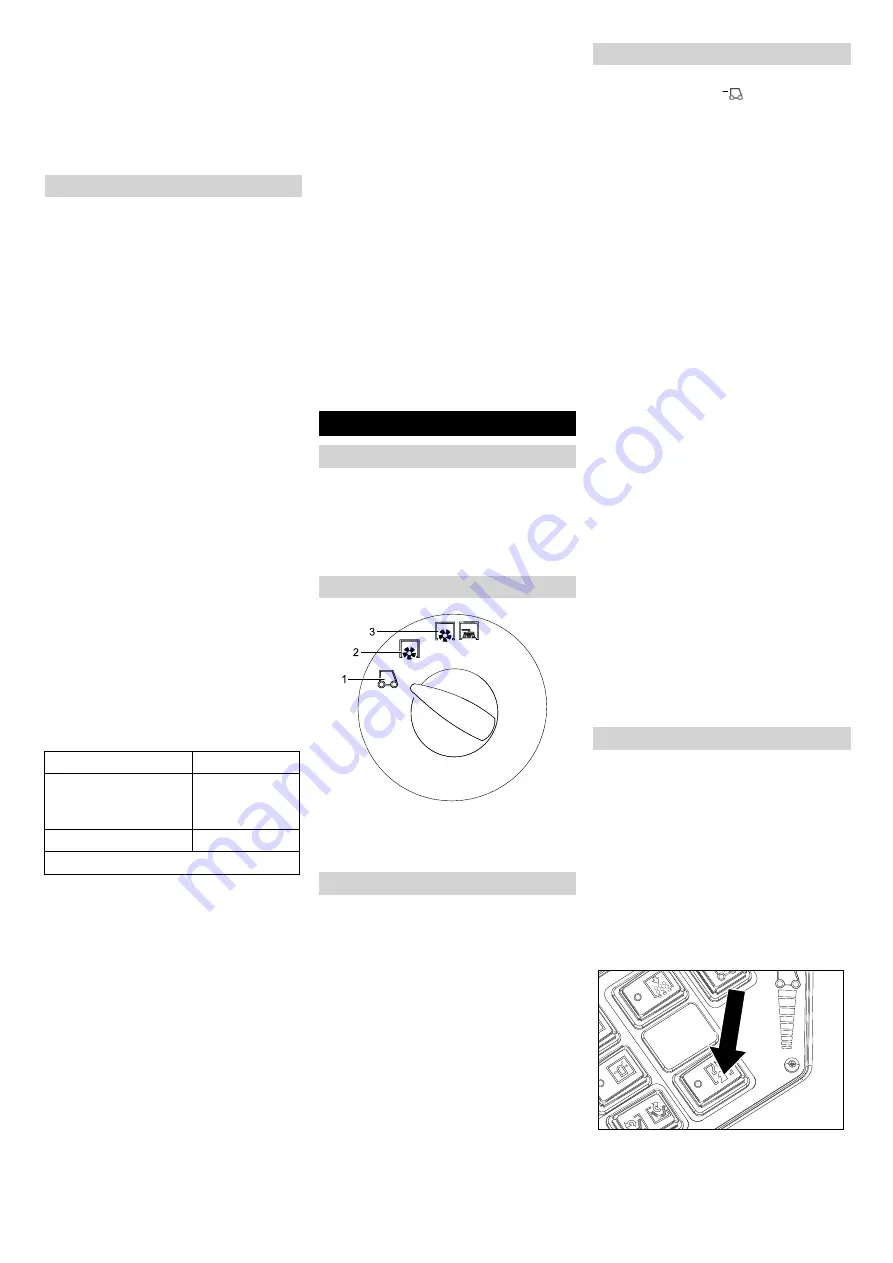
1 Transport drive
2 Sweeping with sweep roller
3 Sweeping using roller brush and side
brushes
Note:
The machine is equipped with a seat
contact switch If the driver's seat is vacat-
ed, the machine is switched off.
Sit on the driver's seat.
Bring the direction selector switch into
the middle position.
Lock parking brake.
Insert the ignition key into the ignition
switch.
Turn the ignition key to position "I".
The appliance is now ready for opera-
tion.
Turn the ignition key to position "II".
The appliance can now be driven.
Note
: The display of the battery capac-
ity will show the actual charge status af-
ter about 10 seconds.
Set programme selection switch to
"Transport drive".
.
Press brake pedal and keep it de-
pressed.
Release parking brake.
Set the travel direction switch to "for-
ward".
Press accelerator pedal down slowly.
Danger
Risk of injury! While reversing, ensure that
there is nobody in the way, ask them to
move if somebody is around.
CAUTION
Risk of damage! Only use the direction
switch when the machine is standing still.
Set the travel direction switch to "back-
wards".
Press accelerator pedal down slowly.
–
The accelerator pedal can be used to
vary the driving speed infinitely.
–
Avoid pressing the pedal suddenly as
this may damage the hydraulic system.
Release the accelerator pedal, the ma-
chine brakes automatically and stops.
Note:
The braking effect can be supported
by pressing the brake pedal.
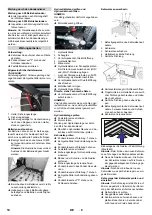
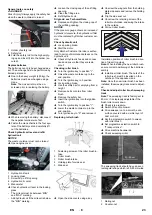
Driving over fixed obstacles which are 70
mm high or less:
Drive forwards slowly and carefully.
Driving over fixed obstacles which are
more than 70 mm high:
Only drive over these obstacles using a
suitable ramp.
CAUTION
Do not sweep up packing strips, wire or
similar objects as this may damage the
sweeping mechanism.
Note:
To achieve an optimum cleaning re-
sult, the driving speed should be adjusted
to take specific situations into account.
Note:
During operation, the dust filter
should be shaken off and cleaned at regu-
lar intervals.
Switch on the blower.
Set the programme switch to sweep
with sweeping brush when cleaning
surfaces.
Charge the batteries
Recommended batteries, chargers
Order number
Battery pack
36 V,
360 Ah, (in the trough,
low maintenance) *
6.654-282.0
Charger
36 V, 50 A
6.654-283.0
* Appliance requires 1 battery pack
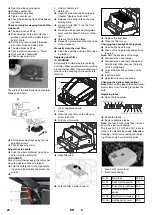
Check fluid level in the battery and
adjust if required
Check charging status of battery
Operation
Adjusting driver's seat
Programme selection
Starting the machine
Drive the machine
Drive forward
Reverse drive
Driving method
Brakes
Driving over obstacles
Sweeping mode
Sweeping dry floors
21
EN
Summary of Contents for KM 130/300 R Bp
Page 2: ......
Page 4: ...2...
Page 144: ...2 2000 PVC 0 C K rcher 14 142 EL...
Page 145: ...3 14 10 K rcher 91 157 K rcher 143 EL...
Page 146: ...4 70mm 2 2 840 kg 1300 kg 144 EL...
Page 148: ...6 1 2 3 4 5 6 7 8 9 10 5 90 10 km h 146 EL...
Page 150: ...8 2 0 0 4x 0 VDE 0701 0 148 EL...
Page 152: ...10 5 80 mm 80 85 mm 1 2 40 50 mm 1 2 6 3 SW 13 1 3 mm 150 EL...
Page 154: ...12 FU 1 K rcher K rcher K rcher K rcher K rcher K rcher K rcher K rcher K rcher 152 EL...
Page 170: ...2 2000 7 0 C K rcher 14 168 RU...
Page 171: ...3 14 10 K rcher 91 157 EWG K rcher 169 RU...
Page 172: ...4 70 2 2 840 kg 1300 kg 170 RU...
Page 174: ...6 1 2 3 4 5 6 7 8 9 10 5 90 10 172 RU...
Page 175: ...7 VDE 0510 K RCHER 16 1 2 3 I II 10 36 360 6 654 282 0 36 50 6 654 283 0 1 173 RU...
Page 176: ...8 70 70 2 0 0 4 0 174 RU...
Page 177: ...9 VDE 0701 0 K rcher 50 250 K rcher 0 1 2 450 4 1 2 3 4 5 MIN MAX MIN K rcher 175 RU...
Page 178: ...10 Karcher I 0 I 0 1 2 3 4 5 80 80 85 1 2 40 50 176 RU...
Page 180: ...12 FU 1 K rcher K rcher K rcher K rcher K rcher K rcher K rcher K rcher K rcher 178 RU...
Page 286: ...2 e 2000 PVC 0 C K rcher 14 284 BG...
Page 287: ...3 14 10 K rcher 91 157 K rcher 70 2 2 840 kg 1300 kg 285 BG...
Page 289: ...5 1 2 3 4 5 6 7 8 9 10 5 90 10 287 BG...
Page 290: ...6 VDE 0510 K RCHER 16 A 1 2 3 10 36 V 360 Ah 6 654 282 0 36 V 50 A 6 654 283 0 1 288 BG...
Page 291: ...7 70 70 2 0 0 4 0 2 VDE 0701 289 BG...
Page 292: ...8 0 K rcher 50 250 Karcher 0 1 2 450 kg 4 1 2 3 4 5 K rcher K rcher 0 290 BG...
Page 293: ...9 0 1 2 3 4 5 80 80 85 1 2 40 50 1 2 6 3 SW 13 1 3 291 BG...
Page 295: ...11 FU 1 K rcher K rcher K rcher K rcher K rcher K rcher K rcher K rcher K rcher 293 BG...
Page 337: ...2 2000 0 C K rcher 14 335 UK...
Page 338: ...3 14 10 K rcher 91 157 EWG K rcher 70 2 2 840 kg 1300 kg 336 UK...
Page 340: ...5 1 2 3 4 5 6 7 8 9 10 5 90 10 338 UK...
Page 341: ...6 VDE 0510 K RCHER 16 1 2 3 I II 10 36 360 6 654 282 0 36 50 6 654 283 0 1 339 UK...
Page 342: ...7 50 70 2 0 0 4 0 340 UK...
Page 343: ...8 VDE 0701 0 K rcher 50 250 K rcher 0 1 2 450 4 1 2 3 4 5 M N MAX M N K rcher I 341 UK...
Page 344: ...9 0 I 0 1 2 3 4 5 80 80 85 1 2 40 50 1 2 342 UK...
Page 346: ...11 FU Karcher Karcher Karcher Karcher Karcher Karcher Karcher Karcher Karcher 344 UK...
Page 350: ...2 39 e UFKHU UFKHU UFKHU 348 ZH...
Page 351: ...3 PP NJ NJ 349 ZH...
Page 352: ...4 0 5 S 3DFN 350 ZH...
Page 353: ...5 f e e NP K 9 351 ZH...
Page 354: ...6 5 5 PP PP 9 K 9 352 ZH...
Page 355: ...7 9 UFKHU UFKHU NJ 0 0 1 0 1 UFKHU UFKHU 353 ZH...
Page 356: ...8 PP PP PP 6 PP 1 2 2 1 354 ZH...
Page 357: ...9 8 8 8 8 8 8 8 8 8 8 8 8 8 8 8 8 8 8 8 8 8 355 ZH...
Page 358: ...10 8 UFKHU UFKHU UFKHU UFKHU UFKHU UFKHU UFKHU UFKHU UFKHU 356 ZH...
Page 360: ...12 G P V P V P V PP PP PP NJ NJ NJ NJ 0 5 S 0 5 S 3DFN 358 ZH...
Page 363: ...10 FU 1 361 AR...
Page 365: ...8 I 0 I 0 1 2 3 4 5 80 80 85 1 2 40 50 1 2 SW 13 1 3 363 AR...
Page 366: ...7 0 4X 0 VDE 0701 0 50 250 0 1 2 450 1 2 3 4 5 MIN MAX MIN 364 AR...
Page 367: ...6 16 1 2 3 I II 10 70 70 0 36 360 6 654 282 0 36 50 6 654 283 0 365 AR...
Page 368: ...5 1 2 3 4 5 6 7 8 9 10 5 90 10 VDE 0510 366 AR...
Page 370: ...3 K rcher 70 2 840 kg 1300 kg 368 AR...


