-
5
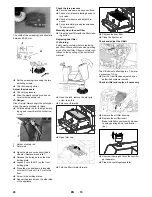
Note:
The machine is equipped with a seat
contact switch If the driver's seat is vacat-
ed, the machine is switched off.
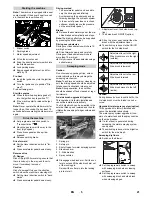
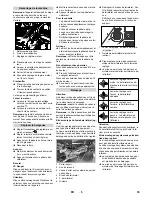
1 Blinker switch
2 Parking brake
3 Motor speed adjustment
Sit on the driver's seat.
Bring the direction selector switch into
the middle position.
Lock parking brake.
Engine speed adjustment - push for-
ward by 1/3.
Insert the ignition key into the ignition
switch.
Turn the ignition key to position "Fila-
ment".
Pre-heat lamp glows.
When the pre-heating lamp goes off,
turn the ignition key to position "II".
If the machine starts, release the igni-
tion key.
Note:
Never operate the starter motor for
longer than 10 seconds. Wait at least 10
seconds before operating the starter motor
again.
Set programme selection switch to
"Transport drive".
.
Move the gas lever all the way to the
front (high speed).
Press brake pedal and keep it de-
pressed.
Release parking brake.
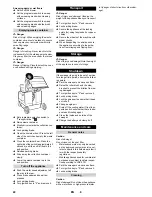
Set the travel direction switch to "for-
ward".
Press accelerator pedal down slowly.
Danger
Risk of injury! While reversing, ensure that
there is nobody in the way, ask them to
move if somebody is around.
Caution
Risk of damage! Only use the direction
switch when the machine is standing still.
Set the travel direction switch to "back-
wards".
Press accelerator pedal down slowly.
–
The accelerator pedal can be used to
vary the driving speed infinitely.
–
Avoid pressing the pedal suddenly as
this may damage the hydraulic system.
–
In the event of power loss on inclined
surfaces, slightly reduce the pressure
on the accelerator pedal.
Release the accelerator pedal, the ma-
chine brakes automatically and stops.
Note:
The braking effect can be supported
by pressing the brake pedal.
Driving over fixed obstacles which are 70
mm high or less:
Drive forwards slowly and carefully.
Driving over fixed obstacles which are
more than 70 mm high:
Only drive over these obstacles using a
suitable ramp.
Caution
Do not sweep up packing strips, wire or
similar objects as this may damage the
sweeping mechanism.
Note:
To achieve an optimum cleaning re-
sult, the driving speed should be adjusted
to take specific situations into account.
Note:
During operation, the dust filter
should be shaken off and cleaned at regu-
lar intervals.
This upgrade kit is factory-installed and
cannot be installed retroactively.
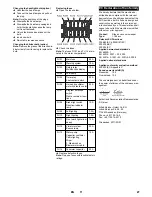
The 3rd side brush can be swivelled to the
outside, lifted up and lowered and thus fa-
cilitates the sweeping of edge contours and
gutters.
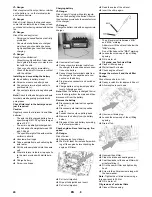
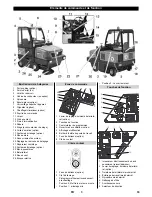
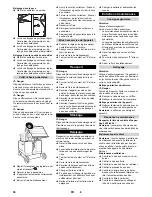
1 Spring pin
2 Safety pin
3 Shutoff valve for water spraying system
4 Side brush arm
5 3. Side brushes
6 Spray nozzles
Disengage side brush arm: Pull the cot-
ter pin out and lift the side brush arm out
of the locking pin.
Reinsert the cotter pin into the locking
pin to store it.
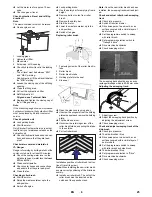
1 Adjustment lever, third side brush (op-
tion)
2 Third side brush ON/OFF (option)
Sit on the driver seat, control the side
brush with the adjustment lever.
The switching is done via the ON/Off
switch for the 3rd side brush.
Caution
During transport drives in public traffic, the
3rd side brush must be folded in and se-
cured.
This upgrade kit is factory-installed and
cannot be installed retroactively.
The water spray system upgrade kit con-
sists of a water tank and the spray nozzles
on the side brushes.
If a lot of dust is generated during
sweeping, the water spraying system
can be used.
The switching is done via the irrigation
switch for the side brush.
Switch on the blower.
Set the programme switch to sweep
with sweeping brush when cleaning
surfaces.
Set the programme switch to sweep
with sweeping brush and side brush
when cleaning edges.
Starting the machine
Pre-heat
Start the engine
Drive the machine
Drive forward
Reverse drive
Driving method
Brakes
Driving over obstacles
Sweeping mode
3rd side brush upgrade kit (option)
Adjustment lever to the right:
Side brush moves to the right
(outside).
Adjustment lever to the front:
Side brush is lowered.
Adjustment lever to the rear:
Side brush is raised.
Adjustment lever to the left:
Side brush moves to the left
(inside).
Upgrade kit water spray system (option)
Sweeping dry floors
21
EN


