English
75
4
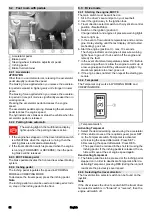
Front cover
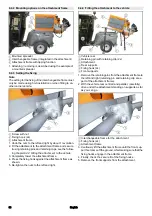
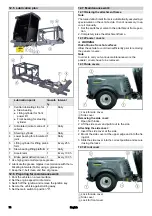
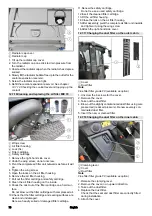
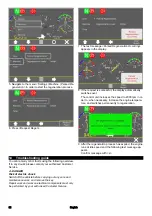
Removing the front cover:
1 Remove both side covers.
2 Open the left and right lock on the front cover.
3 Lift and remove the front cover.
Attaching the front cover:
1 Mount the front cover and fix it in place using both locks.
2 Install both side covers.
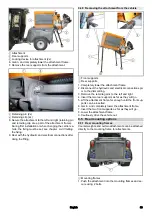
12.7.5Radiator protective grille
Removing the radiator protective grille:
1 Lift the radiator protective grille at the top.
2 Move out the lower part
3 Remove the radiator protective grille in a downward di-
rection.
Attaching the radiator protective grille:
1 Engage the radiator protective grille at the bottom, then
snap shut at the top.
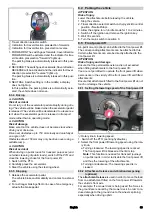
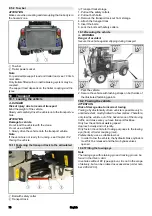
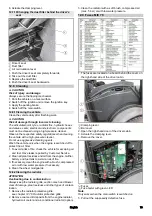
12.7.6Removing / installing the battery
DANGER
Risk of injury
Observe the safety instructions on the handling of batter-
ies.
Disconnect the minus terminal first when removing the bat-
tery.
Protect the battery terminals and terminal clamps with a
sufficient quantity of terminal grease.
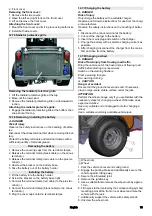
Removing the battery
1. Remove the covering caps from the terminal clamps.
2. Release the terminal clamp (black cable) on the minus
terminal (-).
3. Release the terminal clamp (red cable) on the plus ter-
minal (+).
4. Unscrew the bracket on the battery base.
5. Take the battery out of the battery holder.
Installing the battery
1. Fit the battery into the battery holder.
2. Screw the bracket on the battery base tight.
3. Connect the terminal clamp (red cable) to the plus ter-
minal (+).
4. Connect the terminal clamp (black cable) to the minus
terminal (-).
5. Plug the cover caps onto the terminal clamps.
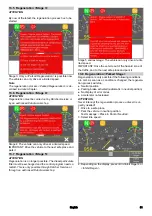
12.7.7Charging the battery
DANGER
Risk of injury
Only charge the battery with a suitable charger.
Observe and follow the instructions for use from the charg-
er manufacturer.
Observe the safety instructions on the handling of batter-
ies.
1. Disconnect the minus terminal at the battery.
2. Connect the charger to the battery.
3. Insert the mains plug and switch on the charger.
4. Charge the battery with as small a charging current as
possible.
5. After charging, disconnect the charger from the mains
first and then from the battery.
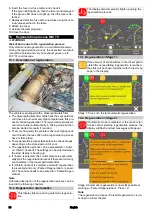
12.7.8Changing a wheel
DANGER
Risk of fatal injury from flowing road traffic
Bring the vehicle out of the hazard zone of flowing road
traffic before starting any repair work.
Switch on the warning flashers.
Erect a warning triangle.
Don warning clothing.
몇
CAUTION
Danger of accident
Ensure that the ground is level and solid. If necessary,
place a large-scale, stable surface under the jack.
ATTENTION
Perform the wheel change only if you are familiar with the
necessary steps for changing a wheel. Otherwise, seek
expert assistance.
Use only suitable and undamaged tools for changing a
wheel.
Use a suitable commonly available vehicle jack.
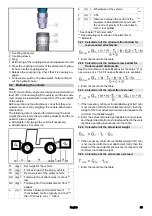
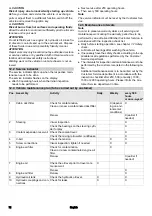
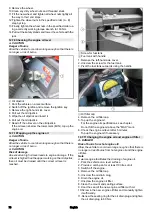
1
Wheel nuts
2
Wheel
1. Park the vehicle on level and solid ground.
2. Engage the parking brake and additionally secure the
vehicle against rolling away.
3. Secure the articulated joint.
4. Remove the ignition key.
5. Use a suitable tool to release the wheel nuts by approx.
1 turn.
6. Fit the jack to the (marked by the corresponding symbol)
mounting point at the front or rear wheel and raise the
vehicle with the jack.
7. Additionally support the vehicle with safety stands.
8. Unscrew the wheel nuts.
Summary of Contents for MIC 70
Page 2: ......
Page 302: ...302 K RCHER K RCHER 2 1 2 2 1 2 3 4 5 6 7 3 REACH www kaercher com REACH 3 1 3 2 4 4 1...
Page 303: ...303 4 2 4 3 4 4 3 4 4 5 DPF 600 C 13 MIC 70 4 6 4 7 4 8...
Page 304: ...304 4 9 10...
Page 305: ...305 4 10 F2 DOT 4 Main fuse 70A F2 3A F2 3A...
Page 310: ...310 1 6 6 4 1 2 3 6 6 5 1 2 0 on 1 on 3 0 1 2 4 5 6 7 8 6 6 6 6 6 7 1 2 3 4 5 6 7 8...
Page 316: ...316 1 Off 2 On 3 6 10 4 1 1 2 a b 6 10 5 1 1 2 a b 7...
Page 318: ...318 7 4 Comfort 1 2 3 4 5 6 7 8 9 10 11 12 13 1 2 3 4 a 7 5 1 2 1 2 3 4 5 7 6 1 2 3 4 8 14...
Page 324: ...324 9 3 9 3 1 3 H 3 2 1 3 2 3 4 5 1 2 9 3 2 3 1 2 3 2 4 1 2 3 1 9 3 3 4 H 4 2 1 4 2 3 4 5 1...
Page 326: ...326 9 4 2 1 2 3 1 9 4 3 1 2 2x 3 1 1 2 9 4 4 3 4 5 9 4 4 1 2 2x 3 4 5 2x 6 1 2 1 2 2x 3 3 4 5...
Page 327: ...327 1 2 3 2x 6 7 1 2x 2 2x 8 9 4 3 9 9 4 5 1 2 1 2 3 4 5 6 7 8 9 9 5 9 5 1 1 1 2...
Page 328: ...328 9 5 2 1 2 16 10 10 1 1 10 2 10 1 1 1 2 3 1 2 3 4 5 6 10 1 2 1 2 10 2...
Page 342: ...342 14 1 MIC 70 14 2 14 3 V2403 CR T EW03 V P0217 5 P0217 Joystick...


