English
79
6. Actuate the clamping lever.
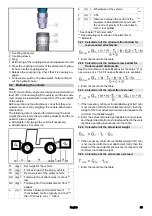
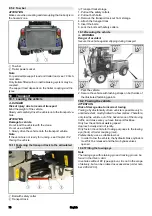
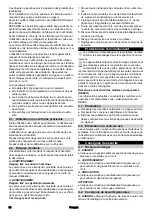
12.7.19Changing the dust filter behind the driver's
seat
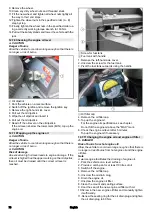
1
Driver's seat
2
Dust filter
3
Air recirculation lever
1. Push the driver's seat completely forwards.
2. Take out the dust filter.
3. Replace the dust filter.
4. Push the driver's seat backwards.
12.8 Cleaning
몇
CAUTION
Risk of injury and damage
Always secure the tipping mechanism.
1. Park the vehicle on a level surface.
2. Switch off the ignition and remove the ignition key.
3. Apply the parking brake.
4. Switch off the main switch.
12.8.1Cleaning the vehicle
Clean the vehicle daily after finishing work.
몇
CAUTION
Risk of damage through incorrect cleaning
The articulated joint, tyres, radiator fins, hydraulic hoses
and valves, seals, electrical and electronic components
must not be cleaned using a high-pressure cleaner.
Observe the respective safety regulations when cleaning
the vehicle with a high-pressure cleaner.
Do not use aggressive cleaning agents.
Wash the vehicle only when the engine is switched off to
protect the air filter.
1. To avoid a risk of fire, check the vehicle for escaping oil
and fuel. Have leaks repaired by Customer Service.
2. Clean all plant residues and oil from the engine, muffler,
battery and fuel tank to avoid a risk of fire.
3. If necessary, clean the engine with a brush, compressed
air or with low water pressure if necessary.
4. Clean the wheel mudguards.
12.8.2Cleaning the radiator
ATTENTION
Overheating due to contamination
Always keep the radiator grille, suction mesh and blower
clear of damage, plant residues and other types of contam-
ination.
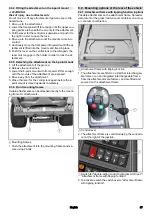
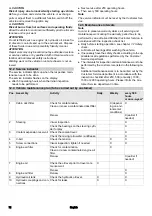
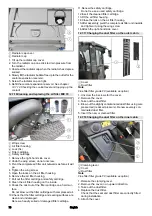
1. Remove the radiator protective grille.
12.7.5 Radiator protective grille
2. Remove coarse dirt deposits from the engine radiator,
hydraulic oil cooler and air-conditioner radiator (option).
3. Clean the radiator with a soft brush, compressed air
(max. 5 bar) or with low water pressure.
12.9 Fuses MIC 70
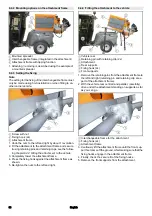
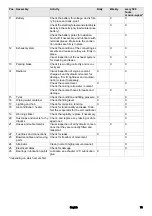
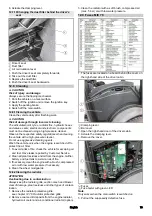
1. The fuses are located on a board behind the cover, on
the right-hand side of the driver cabin.
1
Clamping lever
2
Bar cover
2. Open the right-hand door of the driver cabin.
3. Actuate the clamping lever.
4. Remove the cover.
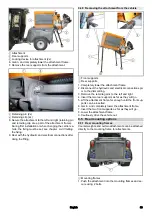
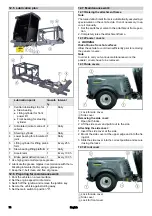
1
Fuses
2
Fuse tester with green LED
Note
Only works when the main switch is switched on
5. Pull out the supposedly defective fuse.
Summary of Contents for MIC 70
Page 2: ......
Page 302: ...302 K RCHER K RCHER 2 1 2 2 1 2 3 4 5 6 7 3 REACH www kaercher com REACH 3 1 3 2 4 4 1...
Page 303: ...303 4 2 4 3 4 4 3 4 4 5 DPF 600 C 13 MIC 70 4 6 4 7 4 8...
Page 304: ...304 4 9 10...
Page 305: ...305 4 10 F2 DOT 4 Main fuse 70A F2 3A F2 3A...
Page 310: ...310 1 6 6 4 1 2 3 6 6 5 1 2 0 on 1 on 3 0 1 2 4 5 6 7 8 6 6 6 6 6 7 1 2 3 4 5 6 7 8...
Page 316: ...316 1 Off 2 On 3 6 10 4 1 1 2 a b 6 10 5 1 1 2 a b 7...
Page 318: ...318 7 4 Comfort 1 2 3 4 5 6 7 8 9 10 11 12 13 1 2 3 4 a 7 5 1 2 1 2 3 4 5 7 6 1 2 3 4 8 14...
Page 324: ...324 9 3 9 3 1 3 H 3 2 1 3 2 3 4 5 1 2 9 3 2 3 1 2 3 2 4 1 2 3 1 9 3 3 4 H 4 2 1 4 2 3 4 5 1...
Page 326: ...326 9 4 2 1 2 3 1 9 4 3 1 2 2x 3 1 1 2 9 4 4 3 4 5 9 4 4 1 2 2x 3 4 5 2x 6 1 2 1 2 2x 3 3 4 5...
Page 327: ...327 1 2 3 2x 6 7 1 2x 2 2x 8 9 4 3 9 9 4 5 1 2 1 2 3 4 5 6 7 8 9 9 5 9 5 1 1 1 2...
Page 328: ...328 9 5 2 1 2 16 10 10 1 1 10 2 10 1 1 1 2 3 1 2 3 4 5 6 10 1 2 1 2 10 2...
Page 342: ...342 14 1 MIC 70 14 2 14 3 V2403 CR T EW03 V P0217 5 P0217 Joystick...

