66
English
9.3
Front mounting options
9.3.1 3-point mount (optional)
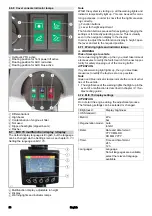
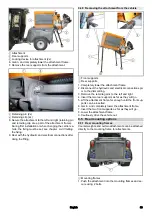
The 3-point mount is attached to the front power lift and se-
cured with 2 bolts.
It has got one inclination adjustment system.
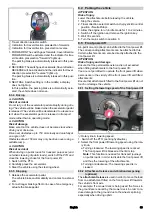
1
3-point mount
2
Lower link
3
Fastening for top link
4
Bolt for inclination adjustment
5
Bolt for securing front power lift
Inclination adjustment
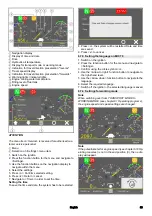
1. Remove the bolt for the inclination function; the attach-
ment is able to swing.
2. If the attachment is completely raised, the device will be
aligned horizontally.
9.3.2 Fitting the attachment on the 3-point mount
몇
WARNING
Risk of injury due to attachments
Do not move or fit any attachments if persons are in the
hazard zone.
몇
CAUTION
Risk of damage due to incorrect fitting
After fitting the attachment, check to see that the driver
cabin or add-on parts are not damaged during the lifting
process.
ATTENTION
Observe the graphics and mounting guidelines provided
for preventing erroneous installation.
Note
Keep a sufficient gap to the driver cabin or superstruc-
tures. Any contact must be ruled out.
Bear in mind the weight of the attachment. Attach heavy
superstructures as near as possible to the vehicle.
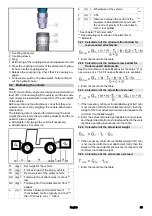
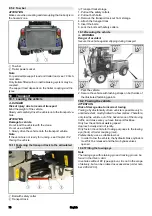
1. Drive up to the attachment.
2. Connect the lower link to the attachment.
3. Fix the attachment in place using 2 bolts and secure the
bolts with locking pins.
4. Connect and secure the top link to the attachment.
Observe the following description pertaining to correct /
erroneous installation of the top link.
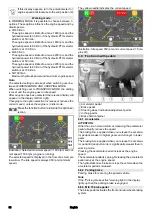
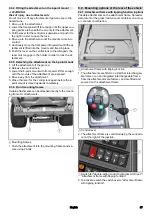
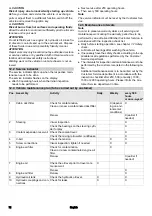
Erroneous installation of the top link
1 The upper connection (top link) of the vehicle for the at-
tachment is not correctly installed. The angle to the low-
er mounting deviates too much.
2 If the attachment is raised in this way, this will lead to a
sudden retraction towards the driver cabin and thus to
damaging the windscreen, or other add-on parts.
3 The more the angle deviates from the upper to lower
mounting, the more the attachment will be tilted back-
wards during the lifting process.
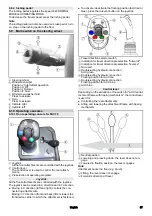
Correct installation of the top link
1 The upper connection of the vehicle for the attachment
is correctly installed. The angle of the connection is
much flatter than with an incorrectly installed connec-
tion. This prevents the driver cabin from being damaged
when the attachment is being lifted.
9.3.3 4-point mount (optional)
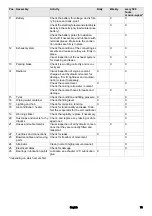
The 4-point mount is attached to the front power lift and se-
cured with 2 bolts.
It has got one inclination adjustment system.
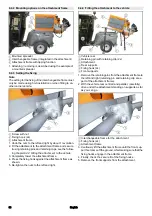
1
4-point mount
2
Central locking lever
3
Lower mount
4
Top mount
5
Bolt for inclination adjustment
Inclination adjustment
1. Remove the bolt for the inclination function; the attach-
ment is able to swing.
2. If the attachment is completely raised, the device will be
aligned horizontally.
Summary of Contents for MIC 70
Page 2: ......
Page 302: ...302 K RCHER K RCHER 2 1 2 2 1 2 3 4 5 6 7 3 REACH www kaercher com REACH 3 1 3 2 4 4 1...
Page 303: ...303 4 2 4 3 4 4 3 4 4 5 DPF 600 C 13 MIC 70 4 6 4 7 4 8...
Page 304: ...304 4 9 10...
Page 305: ...305 4 10 F2 DOT 4 Main fuse 70A F2 3A F2 3A...
Page 310: ...310 1 6 6 4 1 2 3 6 6 5 1 2 0 on 1 on 3 0 1 2 4 5 6 7 8 6 6 6 6 6 7 1 2 3 4 5 6 7 8...
Page 316: ...316 1 Off 2 On 3 6 10 4 1 1 2 a b 6 10 5 1 1 2 a b 7...
Page 318: ...318 7 4 Comfort 1 2 3 4 5 6 7 8 9 10 11 12 13 1 2 3 4 a 7 5 1 2 1 2 3 4 5 7 6 1 2 3 4 8 14...
Page 324: ...324 9 3 9 3 1 3 H 3 2 1 3 2 3 4 5 1 2 9 3 2 3 1 2 3 2 4 1 2 3 1 9 3 3 4 H 4 2 1 4 2 3 4 5 1...
Page 326: ...326 9 4 2 1 2 3 1 9 4 3 1 2 2x 3 1 1 2 9 4 4 3 4 5 9 4 4 1 2 2x 3 4 5 2x 6 1 2 1 2 2x 3 3 4 5...
Page 327: ...327 1 2 3 2x 6 7 1 2x 2 2x 8 9 4 3 9 9 4 5 1 2 1 2 3 4 5 6 7 8 9 9 5 9 5 1 1 1 2...
Page 328: ...328 9 5 2 1 2 16 10 10 1 1 10 2 10 1 1 1 2 3 1 2 3 4 5 6 10 1 2 1 2 10 2...
Page 342: ...342 14 1 MIC 70 14 2 14 3 V2403 CR T EW03 V P0217 5 P0217 Joystick...


