English
-
1
Please read and comply with
these original instructions prior
to the initial operation of your appliance and
store them for later use or subsequent own-
ers.
The packaging material can be recy-
cled. Please do not place the packag-
ing into the ordinary refuse for disposal, but
arrange for the proper recycling.
Old appliances contain valuable
materials that can be recycled.
Please arrange for the proper recy-
cling of old appliances. Please dispose
your old appliances using appropriate col-
lection systems.
–
Please do not release engine oil, fuel
oil, diesel and petrol into the environ-
ment Protect the ground and dispose of
used oil in an environmentally-clean
manner.
–
When removing workpieces, avoid get-
ting the floor dirty. If necessary, use a
pan or mats.
–
Please select the installation site so that
no liquid can leak into the soil or sewer
in case of leaks. If necessary, place the
machine into the pan.
–
Dispose of the detergent solution in an
environmentally friendly manner and
according to the local provisions.
Notes about the ingredients (REACH)
You will find current information about the
ingredients at:
http://www.karcher.de/de/unternehmen/
umweltschutz/REACH.htm
The machine has been designed for auto-
matic cleaning of parts with watery solution
in commercial and industrial applications.
–
The machine can only be operated us-
ing a watery detergent liquid.
–
Do not fill in solvents, inflammable or
explosive liquids.
–
Only liquid detergents listed in the
Kärcher catalog, detergents for clean-
ing parts, may be used.
–
The machine is only to be installed in
enclosed rooms.
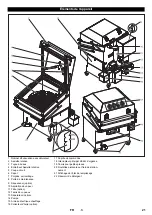
The work station is located on the front of
the machine. This is the side that the con-
trol panel is installed on.
The liquid detergent in the detergent con-
tainer is heated by the heating element at
the set temperature and is transported via
the pump to the 2 nozzle pipes. The parts
to be cleaned are placed on an electrically
driven rotating table and are rotated around
the nozzle pipe frame. This ensures proper
cleaning from all sides.
After the cleaning time has expired or if a
manual reset is done, then the pump and
the electrical rotating drive get switched off
automatically. The cleaned parts can now
be taken off.
You can use a skimmer (upgrade kit, op-
tion) to separate the oil from the detergent
liquid that come in contact with the deter-
gent fluid during the cleaning process. To
ensure optimal functioning, the same can
only be activated between the cleaning
processes.
–
Please read the operating instructions
for your machine before using it, and
pay particular attention to the following
safety instructions.
–
In addition to the information contained
in the operating instructions, all statuto-
ry safety and accident prevention regu-
lations must be observed.
Danger
Immediate danger that can cause severe
injury or even death.
몇
Warning
Possible hazardous situation that could
lead to severe injury or even death.
Caution
Possible hazardous situation that could
lead to mild injury to persons or damage to
property.
–
The voltage indicated on the type plate
must correspond to the voltage of the
electrical source.
–
Safety class I - Appliances may only be
connected to sockets with proper earthing.
–
It is recommended that you connect this
device to a socket that has a 30 mA pro-
tection switch against wrong currents.
–
Please use the mains cable prescribed
by the manufacturer; the same is also
applicable when you replace the ca-
bles. For type details see circuit plan.
–
The appliance may only be connected
to an electrical supply which has been
installed by an electrician in accord-
ance with IEC 60364.
–
Operating procedures create short term
power sinkings.
During unfavorable net conditions other
devices might be disturbed.
With a net impedance lower then 0,15 Ohm
no disturbances are to be expected.
–
Never touch the mains plug with wet
hands.
–
Make sure that the power cord or exten-
sion cables are not damaged by run-
ning over, pinching, dragging or similar.
Protect the cable from heat, oil, and
sharp edges.
–
The power cord must be checked regularly
for damages, such as cracks or aging. If
damage is found, the cable must be re-
placed before further use.
–
If couplings of the power cord or extension
cable are replace the splash protection and
the mechanical tightness must be ensured.
–
The extension cable must have the cross-
section listed in the circuit plan and be pro-
tected against spraying water. The connec-
tion must not lie in water.
–
If couplings of the power cord or exten-
sion cable are replace the splash pro-
tection and the mechanical tightness
must be ensured.
Contents
Environmental protection . .
EN . . 1
Proper use . . . . . . . . . . . . .
EN . . 1
Function . . . . . . . . . . . . . . .
EN . . 1
Safety instructions . . . . . . .
EN . . 1
Safety Devices . . . . . . . . . .
EN . . 2
Device elements . . . . . . . . .
EN . . 3
Start up . . . . . . . . . . . . . . . .
EN . . 4
Operation . . . . . . . . . . . . . .
EN . . 4
Shutting down . . . . . . . . . . .
EN . . 5
Transport . . . . . . . . . . . . . .
EN . . 5
Maintenance and care . . . .
EN . . 6
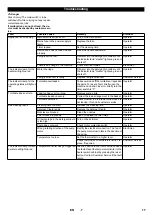
Troubleshooting . . . . . . . . .
EN . . 7
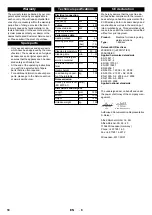
Warranty . . . . . . . . . . . . . . .
EN . . 8
Spare parts . . . . . . . . . . . . .
EN . . 8
Technical specifications . . .
EN . . 8
CE declaration . . . . . . . . . .
EN . . 8
Environmental protection
Proper use
Please do not let mineral oil contaminated
waste water reach soil, water or the sew-
age system.
Function
Safety instructions
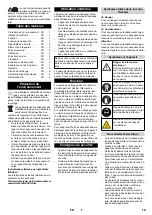
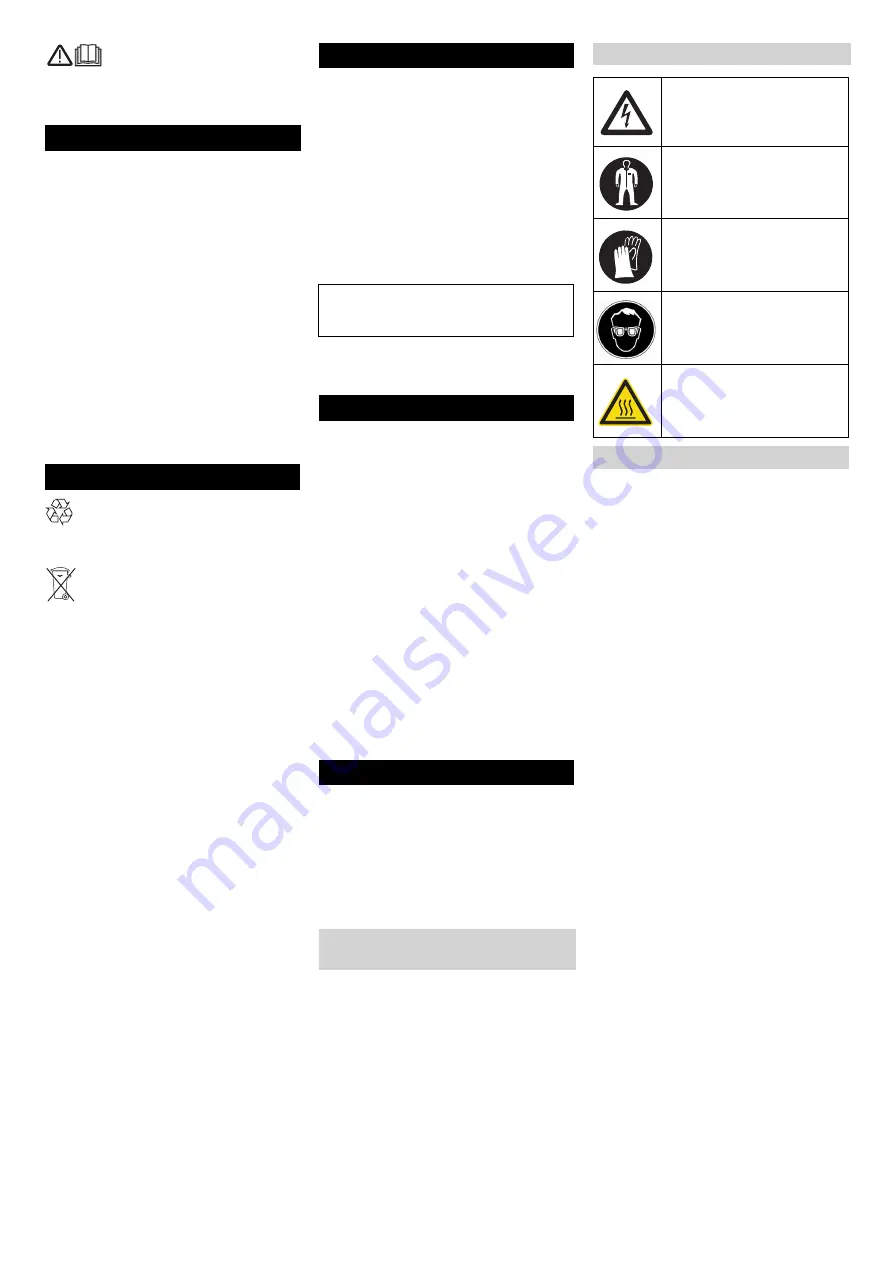
Symbols in the operating
instructions
Symbols on the machine
Risk of electric shock!
Only electricians or authorised
technicians are permitted to
work on parts of the plant.
The operator must wear prop-
er safety gear to be protected
against the water sprays.
Wear suitable protective
gloves during work.
Risk of injury on account of
spraying detergent liquid.
Wear safety goggles.
Risk of burns on account of hot
surfaces!
Power connection
11
EN
Summary of Contents for PC 60T
Page 2: ...2...
Page 92: ...2 0 15 Ohm 3 92 EL...
Page 93: ...3 1 2 3 4 5 6 7 8 9 10 11 12 13 14 15 16 17 18 Not Aus 19 20 21 22 93 EL...
Page 94: ...4 1 2 3 AUTO OFF 1 ON 4 5 6 94 C 7 AUTO OFF 1 ON 8 80 C 130 kg 30 3 1 2 3 OFF 94 EL...
Page 95: ...5 Am besten vor Arbeitsbeginn durchf hren 1 A 5 B C1 1 C2 2 C D E F G 1 2 H I 1 95 EL...
Page 96: ...6 1 K rcher 40 200 1000 96 EL...
Page 97: ...7 0 97 EL...
Page 108: ...2 0 15 BGV A3 108 RU...
Page 109: ...3 1 2 3 4 5 6 7 8 9 10 11 12 13 14 15 16 17 18 19 20 21 22 109 RU...
Page 110: ...4 1 2 3 OFF 1 ON 1 4 5 6 94 C 7 OFF 1 ON 1 8 80 C 130 30 1 2 3 OFF 110 RU...
Page 111: ...5 Am besten vor Arbeitsbeginn durchf hren 1 A 5 B C1 1 C2 2 C D E F G 1 2 H I 1 111 RU...
Page 112: ...6 1 Karcher 40 200 1000 112 RU...
Page 113: ...7 0 113 RU...
Page 180: ...2 30 mA IEC 60364 1 0 15 Ohm BGV A3 180 BG...
Page 181: ...3 1 2 3 4 5 6 7 8 9 10 11 12 13 14 15 16 17 18 19 20 21 22 181 BG...
Page 182: ...4 1 2 3 AUTO OFF 1 ON 4 5 6 94 C 7 AUTO OFF 1 ON 8 80 C 130 30 3 1 2 3 OFF 182 BG...
Page 183: ...5 Am besten vor Arbeitsbeginn durchf hren A 5 B C1 1 C2 2 C OK D E F G 1 2 H I 1 T o 183 BG...
Page 184: ...6 1 K rcher 40 200 1000 184 BG...
Page 185: ...7 0 185 BG...
Page 212: ...2 0 15 BGV A3 212 UK...
Page 213: ...3 1 2 3 4 5 6 7 8 9 10 11 12 13 14 15 16 17 18 19 20 21 22 213 UK...
Page 214: ...4 1 2 3 OFF 1 ON 1 4 5 6 94 C 7 OFF 1 ON 1 8 80 C 115 30 3 1 2 3 OFF 214 UK...
Page 215: ...5 Am besten vor Arbeitsbeginn durchf hren A 5 B C1 1 C2 2 C OK D E F G 1 2 H I 1 215 UK...
Page 216: ...6 1 K rcher 40 200 1000 216 UK...
Page 217: ...7 0 217 UK...
Page 219: ......


