457462_a
55
GB
9
MAINTENANCE AND CARE
CAUTION!
Risk of injury
Sharp-edged and moving
appliance parts can lead to
injury.
■ Always wear protective
gloves during mainte-
nance, care and clean-
ing work.
9.1
Cleaning
IMPORTANT!
Danger from water
Water in the automatic
lawnmower and in the
charging station leads to
damage to electrical com-
ponents.
■ Do not spray the auto-
matic lawnmower and
charging station with
water.
Cleaning the automatic lawnmower
CAUTION!
Danger of injury due to
the cutting blade
The cutting blades are
very sharp and can cause
cutting injuries.
■ Wear protective gloves.
■ Make sure that parts of
the body do not get into
the cutting blade.
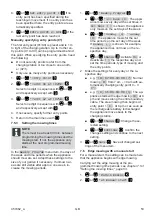
Once a week, carry out the following:
1.
Switch off the appliance with
ON
OFF
.
2.
Wipe off the surface of the housing with a
broom, a brush, a damp cloth or a fine
sponge.
3.
Brush off the underside, mower deck and cut-
ting blade with a brush.
4.
Check the cutting blade for damage. If neces-
sary, replace the following: see
chapter 9.3
"Replacing the cutting blades", page 56
.
Cleaning the charging station
1.
Regularly remove grass residues and leaves
or other objects out of the charging station.
2.
Wipe off the surface of the charging station
with a damp cloth or a fine sponge.
9.2
Regular checks
General checks
1.
Once a week, check the whole Installation for
damage:
■
Machine
■
Charging station
■
Boundary cable
■
Power supply
2.
Replace defective parts by original spare
parts from Kärcher or have them replaced by
a Kärcher service centre.
Check the rollers can move freely
Once a week, carry out the following:
1.
Carefully remove grass residues and soiling
from the areas around the rollers. Use a
broom and cloth for this.
2.
Check that the rollers run freely and that they
can be steered.
Note:
If the rollers do not move freely or can-
not be steered, have them replaced by a
Kärcher service centre.
Check the contact surfaces on the automatic
lawnmower
1.
Use a cloth to remove soiling and then lightly
grease with contact grease.
Check the charging contacts of the charging
station
1.
Disconnect the mains plug.
2.
Press the charging contacts in the direction
of the charging station and release them. The
charging contacts must spring back into the
initial position.
Note:
If the charging contacts do not spring
back, have them replaced by the Kärcher
service centre.
Summary of Contents for RLM 4
Page 427: ...457462_a 427 RU 1 1 1...
Page 433: ...457462_a 433 RU 2 9 0 3 3 1 CE 500 2 45 24 45 24 0 45 C 0 55 C 3 2...
Page 434: ...434 RLM 4 RU 3 3 3 3 1 PIN PUK PIN PIN PIN 3 PUK 24 PIN PUK PIN PUK 3 3 2...
Page 435: ...457462_a 435 RU 24 45 EGMF 3 4 3 4 1 16 3 4 2...
Page 436: ...436 RLM 4 RU 3 4 3 3 4 4...
Page 448: ...448 RLM 4 RU 9 3 K rcher 1 ON OFF 2 3 4 5 180 6 180 K rcher 10 1 START STOP 2 ON OFF 3...
Page 449: ...457462_a 449 RU 11 11 1 30 1 5 1 08 441 2 9 1 447 3 11 2 1 2 3 4 1 2 3 4 08 4 5 11 3 1 12...
Page 450: ...450 RLM 4 RU 2012 19 EC Hg Cd Pb Hg 0 0005 Cd 0 002 Pb 0 004 2006 66 EC 1 2 3 1 1 2 2 3 3 4...
Page 451: ...457462_a 451 RU 13 13 1 K rcher K rcher...
Page 452: ...452 RLM 4 RU K rcher K rcher K rcher K rcher 13 2 CN001 Tilt sensor CN002 Lift sensor...
Page 459: ...457462_a 459 UA 1 1 1...
Page 466: ...466 RLM 4 UA 24 PIN PUK PIN PUK 3 3 2 24 45 EGMF...
Page 467: ...457462_a 467 UA 3 4 3 4 1 16 3 4 2 3 4 3 3 4 4...
Page 468: ...468 RLM 4 UA 3 4 5 4 4 1 1 2 K rcher 3 p 2 1 460 4 2 01 01 1 01 01 h n 01 01 HF 01 NF...
Page 480: ...480 RLM 4 UA 11 2 1 2 3 4 1 2 3 4 08 4 5 11 3 1 12 ElektroG 2012 19 C...
Page 481: ...457462_a 481 UA BattG Hg Cd Pb Hg 0 0005 Cd 0 002 Pb 0 004 2006 66 C 1 2 3 1 1 2 2 3 3 4...

