background image

  Aufbauanleitung

  Building Instructions

  notice de montage

  montagehandleiding

  Montagevejledning

  Instrucciones de construcción

  Istruzioni per il montaggio

  Montážní návod

  +49 421 38693 33

68229

15.05.2018

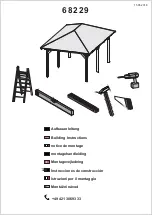
Summary of Contents for Pavillon Chur 1

Page 1: ...Aufbauanleitung Building Instructions notice de montage montagehandleiding Montagevejledning Instrucciones de construcción Istruzioni per il montaggio Montážní návod 49 421 38693 33 68229 15 05 2018 ...

Page 2: ...uali reclami pos sono essere accolti solo prima del montaggio Nejprve překontrolujte obsah balení podle materiálového listu Mějte pochopení pro to že případnou reklamací se můžeme zabývat pouze tehdy když díly nebudou smontované Za pomoci tohoto seznamu můžete jednotlivé díly přiřadit k montážnímu návodu 16 x B1 660 x 90 x 40 mm ID 69673 1 x B2 1290 x 90 x 40 mm ID 69674 4 x B3 2145 x 115 x 55 mm ...

Page 3: ...duct The H post anchors and associated fasteners are not included with this product De berichten van dit product moet op de grond vastgemaakt Wij bevelen ook het H bericht ankers Deze dienen echter pas na de uiteindelijke structuur van het product met beton worden De H paal ankers en de bijbehorende bevestigingsmaterialen worden niet meegeleverd met dit product Los mensajes de este producto debe f...

Page 4: ...ferumfang enthalten Niet bijgeleverd Not included Non comprises dans la livraison No forman parte del suministro Non incluso V ceně není zahrnuto 2890mm A B 01 03 02 6x 6x B 5 2890mm 04 A B A B A B 4290mm A B 4290mm ...

Page 5: ...05 05 1 P 2 Ø5mm 6 100 05 2 Ø10mm 06 1 06 2 Ø5mm 6 100 90 B 4 B 3 B 4 B 3 B 3 06 P 2 P 2 P 2 P 2 P 2 P 2 P 2 05 2 B 3 06 1 P 2 P 2 06 2 P 2 P 2 6 100 48x 12x 12x 12x 05 1 1 05 1 2 Ø10mm ...

Page 6: ... B 2 6 100 Ø5mm 6 160 Ø5mm B 1 B 1 912mm 912mm A B A B C 09 K 1 K 1 6 100 4x 6 160 8x 6 160 Ø5mm Bündig Affleurement Gelijk Aras Flush Combacia Flush 6 160 4x 2x 07 E 1 E 1 P 1 3431mm 40mm 4 35 Ø3mm 4 35 16x 90m m ...

Page 7: ...2 6 160 Ø5mm E 2 E 2 6 100 Ø5mm 11 E 3 E 4 E 6 E 3 E 5 E 5 E 6 E 4 E 3 E 4 E 6 E 5 E 5 E 6 E 4 E 3 6 160 Ø5mm Ø5mm 6 100 E 2 C D A B C D A B A B C D E F G A B C D E F G 6 100 4x 6 160 8x 6 100 16x 6 160 16x ...

Page 8: ... 13 3 13 4 13 5 13 6 13 1 13 3 13 4 13 5 13 6 20mm 20mm 20mm 20mm 20mm 20mm 20mm 20mm B 1 B 1 B 1 B 1 B 1 B 1 B 1 B 1 B 1 B 1 2x 2x H 3 H 1 6 100 A B C ca 41 5 cm D ca 41 cm E ca 51 5 cm C B 1 B 1 B 1 B 1 Ø5mm 4 50 38x 6 100 56x 13 1 13 2 12 ...

Page 9: ...14 15 H 2 H 4 H 4 H 4 H 4 H 2 4 50 Ø3mm H 5 H 5 H 5 H 5 H 5 H 5 H 4 H 4 H 4 H 4 H 5 H 5 H 2 H 2 4 50 56x 4 50 Ø3mm 4 50 36x ...

Page 10: ...placement must be no later than two months supplemented by a suitable product Le remplacement ne doit pas être plus tard deux mois complétés par un produit adapté El reemplazo debe ser no más tarde de dos meses complementan con un producto adecuado La sostituzione deve essere entro e non oltre due mesi completate da un prodotto adatto Pokrytí střechy musí být nejpozději po 2 měsících nahrazeno vho...

Page 11: ... 18 19 20 ...
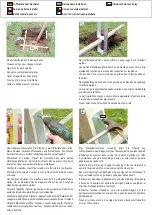
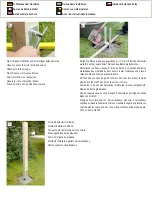
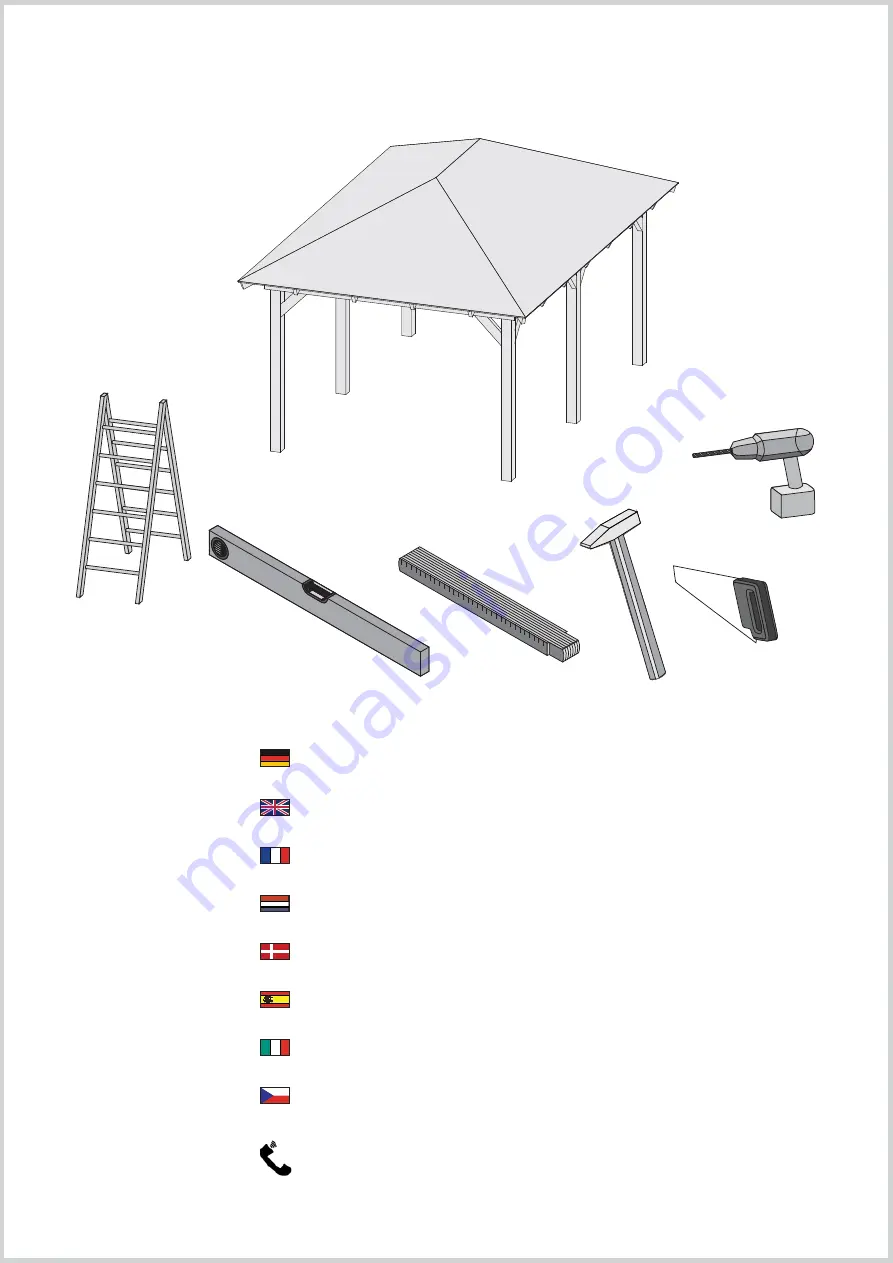
Page 12: ...n the process Drill holes in the columns in order to connect them to the joists by means of screws Het paviljoen opstellen De staanders daarbij in de staanderdragers stellen Om de staanders met de dragers vast te schroeven moeten de staanders doorgeboord worden Colocar el pabellón Colocar los postes en los portapostes Perforar los postes para poderlos atornillar con los portapostes Posizionare il ...

Page 13: ...příspěvek Füllen Sie Beton in das ausgegrabene Loch Der H Pfostenanker bleibt weiterhin mit der Leiste fixiert Danach den Beton glattstreichen Remplissez les trous creusés à l aide de béton Les parties inférieures métalliques des montants doivent encore rester maintenues en place à l aide des liteaux Nivelez ensuite le béton Fill the holes you have dug with concrete The concrete anchor remains att...

Reviews: