background image

Contents

1. Overview


3

2. Panel Description


3


2.1  Front Panel Description 

3


2.2  Rear Panel Description 

4

3. Basic Operations


5


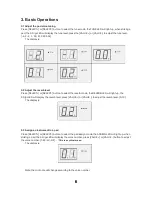
3.1  Adjust the pad voice tuning 

5


3.2  Adjust the reverb level 

5


3.3  Assign an instrument to a pad 

5


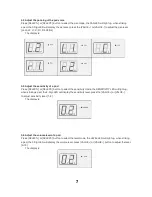
3.4  Adjust the panning of pad voices 

6


3.5  Adjust the sensitivity of a pad 

6


3.6  Adjust the level of a pad 

6


3.7  Adjust the midi note of a pad 

7


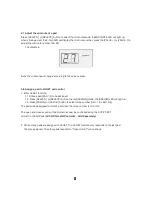
3.8  Assign a pad to HI-HAT pad control 

7

4. Appendixes


8


4.1  Voice List 

8


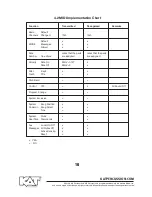
4.2  MIDI Implementation Chart 

9

2

Summary of Contents for multipad KTMP1

Page 1: ...Owner s Manual ktmp1 Electronic Drum Percussion Pad Sound Module...

Page 2: ...Magnetic Interference If so simply reset the product to resume nor ration by following the owner s manual In case the function could not resume please use the product in other location CAUTION Change...

Page 3: ...pad voice tuning 5 3 2 Adjust the reverb level 5 3 3 Assign an instrument to a pad 5 3 4 Adjust the panning of pad voices 6 3 5 Adjust the sensitivity of a pad 6 3 6 Adjust the level of a pad 6 3 7 A...

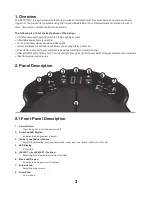
Page 4: ...m kit Sounds can be tuned to your preference as well as panning and reverb control USB and MIDI output allows for PC connectivity to play parts right into your DAW or trigger external sound sources Id...

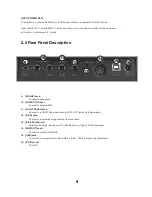
Page 5: ...o headphone 10 LINE OUT Output Connect to external AMP 11 HI HAT PEDAL Jack Connect to a HI HAT Pedal controller KAT KT HC1 Pedal Sold Seperately 12 KICK Jack Connect to external kick trigger using 1...

Page 6: ...d USB 2 0 Data Output Headphones Speakers PA Mixing Console Direct Box Monitors Hi Hat Controller Pedal KT HC1 sold separately Bass Drum Trigger Pedal sold separately MIDI Output to Computer via Auido...

Page 7: ...T button to select the reverb mode the REVERB LED will light up the 2 Digi LED will display the reverb level press VALUE or VALUE to adjust the reverb level 0 10 The display is 3 3 Assign an instrumen...

Page 8: ...f a pad Press SELECT or SELECT button to select the sensitivity mode the SENSITIVITY LED will light up when striking a pad the 2 Digi LED will display the sensitivity level press the VALUE or VALUE to...

Page 9: ...function 1 1 Strike a pad PAD1 4 to be assigned 1 2 Press SELECT or SELECT button to enter ASSIGN mode the ASSIGN LED will light up 1 3 Press VALUE or VALUE button to select voice number from 1 to 48...

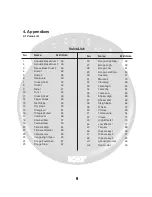
Page 10: ...21 Timbale Rimshot 65 22 Timbale Low 66 23 Conga High Open 63 24 Conga Low Open 67 25 Conga Slap 62 No Name Midi Note 26 Bongo High Slap 60 27 Bongo High 59 28 Bongo Low 61 29 Bongo Low Slap 50 30 Ca...

Page 11: ...After Key s x x Touch Ch s x Pitch Bend Control 120 All Sound Off Program Change System Exclusive System Song Position x x Common Song Select x x Tune x System Clock x x Real Time Commands x Aux Loca...

Reviews: