19 of 56
5.1.6 Installing the Turntable
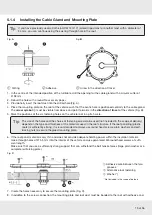
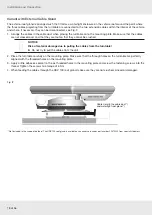
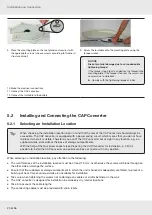
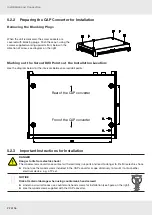
The sequence of pictures shown below illustrates all the necessary installation steps that are required to
install the turntable and the pre-assembled parabolic reflector on the roof of the vehicle. However, follow the
other detailed instructions in this installation and operating manual!
1. Determine the installation location. Note the following:
●
Swing path of the unit = Ø 96 cm.
●
Drill a hole with Ø 38 mm for the cable gland.
●
Deburr any sharp edges of the hole
See also 5.1.3, p. 13ff and 5.1.4 – 5.1.5, p. 17ff
2. Apply DEKAsyl MS adhesive sealant to the spigot of the
roof duct. Insert the spigot into the hole and secure it from
below with the knurled nut.
3. Unscrew the screws (x 6, 10 AF) from the mounting plate and
remove the mounting plate.
4. Place the turntable on prepared wooden supports to
protect the roof of the vehicle.
5. Align the mounting plate with the arrow in the direction of
travel. The arrow is marked with an
①
at step 8 in the illustra-
tion.
6. Mark out the six holes to secure the mounting plate.
7.
WARNING
Risk of skin injuries!
►
Avoid any skin contact with the adhesive
sealant.
►
For safety information on the adhesive
sealant, see Chapter 11, p. 38.
Apply DEKAsyl MS adhesive sealant in a wavy line
between the two grooves and spread it with a spatula or
similar.

