The Joy of Quilting with Your Long-Arm Machine
41
KathyQuilts.com
TIP FROM KATHY: Before you begin loading your quilt, make sure your leaders are
marked (with a marker) at the center as discussed in Lesson 1.
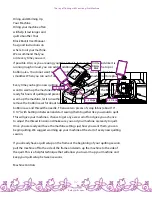
Floating a quilt onto a frame in 4 steps
Important:
Find the center of your leaders
(you previously marked), then use pins to mark
the center of the quilt top, and quilt back.
1. Pinning on the quilt back:
• Pin the bottom edge of the quilt back to the edge of the leader labeled “quilt
back,” starting at the center then working along the edges, keeping the pins
parallel to the edge. Make sure that the edge of the leader is lined up with the
edge of the quilt so that they form a seam-like ridge; you do not want to simply
lay the quilt on top of the leader and pin them together.
• Pin the top edge of the quilt back along the edge of the leader labeled “take-up
rail,” starting at the center then pinning along the edges, keeping the pins parallel
to the edge. When finished, leave the pin that is marking the center (you will use
this center pin to line up the center of the batting and quilt top).
• Roll the rail with the leader labeled “quilt back” (the rail that you first pinned the
quilt back to) until the fabric has some tension on it.
2. Pinning on the quilt top:
• Pin the bottom edge of the quilt top to the leader that says “quilt top,” matching
the center markings and then pinning across the edge of the quilt, with the pins
parallel to the edge.
• After you pin the edge, let the quilt top rest on the floor and then roll the “quilt
top” rail away from you, rolling it up just a little so it’s not hanging on the floor.
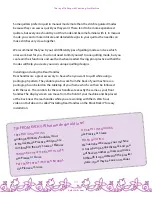
3. Inserting the batting:
• Lay the top edge of the batting on the top edge of the quilt back near the pins
• Next lay the bottom edge of your batting in between the “quilt back” and “quilt
top” rails. Let it rest on the floor.
TIP FROM KATHY: As described in “Preparing Your Quilt,” make sure that the
batting is wider and longer than the quilt top.
HELPFUL VIDEO:
Floating Your Quilt Onto a Frame


