background image

M

AI

NT

EN

AN

CE 

AND

 TIPS 

FOR YOUR BLOCK

 ROC

KiT

 & F

RA

M

Kathy’s

Quick Reference 

“ We designed the Block RockIT to be 

fun, reliable, and simple to maintain. 

This quick reference guide will help you 

better understand your Block RockIT  

so you can diagnose and fix just about 

any issue you may encounter.  And you 

can always count on our KathyQuilts 

team to be available to help you.  

Happy Quilting!”    


--Kathy


Kathy’s


Quick Reference 

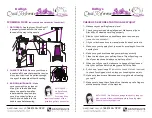
1.  When your frame arrives, don’t procrastinate! Set up your

frame right away so you are ready to set up your Block RockiT

when it arrives.

2.  If you ordered a frame, you should have received a set of

cloth leaders. Attach these leaders after your frame has

been assembled.

3.  Adjust the frame height. Make sure the front rail is at the

height of your elbow

4.  When your Block RockiT arrives, install the encoder onto

the carriage. It will be easier to do this before putting your

machine and carriage onto your frame.

5.  Next, put the machine on the frame. You may need to remove

the rail first if you’re doing this alone.

6.  Make sure all your Block RockiT wheels roll on the tracks. If

they don’t, follow page 8 in the manual to correct the alignment.

7.  Install the thread mast and the display screen on your machine.

Don’t forget to raise the thread mast!

8.  Level your frame by adjusting the leveling feet.
9.  Use an extension cord for your Block RockiT so the power cord

doesn’t pull the machine to one side.

10.  If you don’t have adequate lighting, consider purchasing the

handy light bar found on www.kathyquilts.com

 SETTING UP YOUR FRAME AND BLOCK ROCKiT

   KATHY SAYS:  When setting up your quilting frame if you 

find you are missing parts, Please contact the Grace 
Company immediately  1-800-264-0644.

QUESTIONS? CALL US:


(888) 826-0222

Summary of Contents for Block RockiT

Page 1: ...ow 4 When your Block RockiT arrives install the encoder onto the carriage It will be easier to do this before putting your machine and carriage onto your frame 5 Next put the machine on the frame You may need to remove the rail first if you re doing this alone 6 Make sure all your Block RockiT wheels roll on the tracks If they don t follow page 8 in the manual to correct the alignment 7 Install th...

Page 2: ...our Block RockiT wheels are rolling properly 3 Blow out your bobbin case needle area and tension discs CANNED AIR WORKS GREAT 4 Oil your machine and run in manual mode for about a minute 5 Make sure your hopping foot is a credit cards length from the needle plate 6 Make sure you have threaded your machine correctly 7 Clean the tracks on your quilting frame This will prolong the life of your tracks...

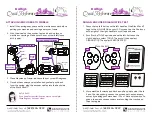
Page 3: ...le to scroll up and down 2 Scroll to the TOOLS option and use the left button on the right handle to select TOOLS Then scroll to and select DIAGNOSTICS Then select ENCODER TEST 3 Move machine forwards and back as well as side to side If both X and Y buttons show green on the screen both encoders are correctly reading your movement If X or Y have not shown solid green then make sure encoders are to...

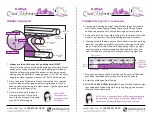
Page 4: ...rail FIRST Put a pin in the center of the quilt backing on both ends Match up the pin to the center line of the quilt backing cloth leader Hold these layers together like a seam in clothing and start pinning the pins parallel to the edge about 1 4 or 1 8 from the edge pins close together head to tail Roll it all the way up 2 Go to the back of the frame Attach the quilt back to the take up cloth le...

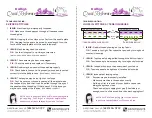
Page 5: ...OOTING SKIPPED STITCHES KATHY SAYS Keep your Block RockiT manual nearby while you re quilting Don t forget to check our helpful online videos found at videos kathyquilts com and YouTube KATHY SAYS While adjusting your tension be sure to quilt on a test quilt piece until tension is fixed QUESTIONS CALL US 888 826 0222 Kathy s QuickReference 1 ISSUE Bobbin thread showing on the top fabric FIX Tensio...

Page 6: ...erly threaded FIX Make sure thread passes through all tensioners and thread guide Check thread mast and thread spool 2 ISSUE Thread tension too tight FIX Loosen tension by turning tension knob counter clock wise 3 ISSUE Hesitating too long at one point FIX Sewing in one place may cause thread to break Move machine quicker within speed limitations so stitches don t overlap or build up 4 ISSUE Bobbi...

Reviews: