Page 15
Copyright © 2012 Kato Engineering, Inc. All rights reserved
Use a straight edge and a thickness gauge for rough alignment as shown
in Figure 10. Check for angular and parallel alignment as follows:
Figure 10: Rough alignment
Straight edge
Thickness gauge
Shaft
Flywheel
Flywheel housing
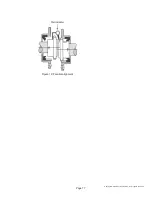
Dial indicator pointer
for radial runout
Dial indicator
pointer for face
runout
Figure 9: Engine coupling check


