background image


KAVIR S4 150 


OWNER MANUAL 


KAVIR YEKTAZ CYCLET CO. 

Summary of Contents for S4 150

Page 1: ...KAVIR S4 150 OWNER MANUAL KAVIR YEKTAZ CYCLET CO ...

Page 2: ......

Page 3: ...otential safety hazards Caution After opening the packaging box please check the accessories and various documents delivered with the motorcycle according to the packing list The motorcycle accommodates two persons and the maximum payload is 150kg The moped accommodates 1 person and the maximum payload is 75kg It is not allowed to modify any part of the motorcycle Otherwise the reliability stabili...

Page 4: ...le driving license and motorcycle registry Please fill in appropriate numbers for future reference Please fill in appropriate numbers for future reference Motorcycle VIN Engine Number The motorcycle Vehicle Identification Number VIN is printed on the vertical tube of the frame The product nameplate is riveted on the right lower part of the frame The Engine Number is printed on the left lower part ...

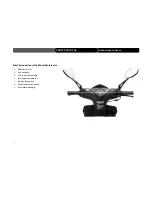
Page 5: ...NUAL Instructions to Users Brief Introduction to the Whole Motorcycle Rearview mirror Left handgrip Left combination switch Instrument combination Ignition lock switch Right combination switch Accelerator handgrip ...

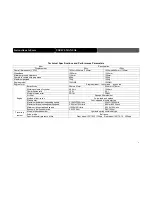
Page 6: ...ng volume of cylinder 49 6mL 124 6mL Compression ratio 10 2 1 9 0 1 Model of carburetter PD18J PD24J Air filter Sponge filter element Method of lubrication Force feed and splash Startup way Foot stepped electric start up Maximum power corresponding speed 2 10kW 7500r min 5 5kW 7000r min Maximum torque corresponding speed 2 80N m 7000r min 8 0N m 6000r min Minimum idling stabilized speed 1500 100 r...

Page 7: ... ratio 1 5 0 6 2 66 0 866 Fixed transmission ratio 13 33 8 615 Braking system Front brake Disc brake Rear brake Disc brake Electric system Ignition way CDI Model of spark plug CR7HSA Spark plug gap 0 6mm 0 7mm Specification of accumulator cell 12V9Ah Fuse 15A Head Light 12V 35W 35W Tail light Braking light 12V 5W 21W Turning signal light 12V10W 4 Turn signal indication lamp 12V1 7W 2 Instrument li...

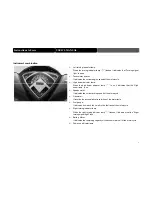
Page 8: ...is on it indicates that the High beam lamp is on Speedometer It indicates the current driving speed of the motorcycle Odometer It records the accumulative travel miles of the motorcycle Fuel gauge It indicates how much fuel is left in the fuel tank of the motorcycle Right turning indicator lamp When the right turning indicator lamp flashes it indicates that the Right turning signal light is on Bat...

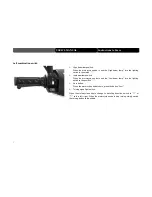
Page 9: ...eam lamp switch When the motorcycle needs to use the Low beam lamp turn the lighting switch to the position Horn button When the motorcycle needs to horn press the button Turning signal light switch When the motorcycle needs to change its travelling direction switch to or to turn left r right When the motorcycle needs to stop turning simply switch the turning button to the middle ...

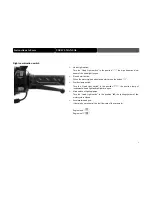
Page 10: ...torcycle needs electric start press the button Position lamp switch Turn the Head Light switch to the position the position lamp of instruments head light and tail light are open Main switch of lighting lamps Turn the Head Light switch to the position the lighting system of the motorcycle is closed Accelerator handgrip It is mainly use to control the fuel flow rate of the carburetor Engine is on E...

Page 11: ...the ignition lock key to the position to switch on the electrical system of the motorcycle Don t remove the motorcycle key Ignition Lock Off Turn the ignition lock key to the position to switch off the electrical system of the motorcycle The motorcycle key can be removed Direction lock Turn the steering gear left to the flameout position Turn the ignition lock key to the position to lock the direc...

Page 12: ...uel should be filtered in filling fuel In filling fuel smoking should be strictly forbidden and it should not be close to any open fire Caution Only Grade 90 or above fuel should be used Fuel tank negative pressure switch it is opened mainly relying on the negative pressure produced by the operation of the engine so as to make fuel enter the carburetor Fuel filter fuel must be filtered through a f...

Page 13: ...omatic clutch please repair it in a designated after sales service center or in a professional maintenance station Front braking handgrip controls the running speed of the front wheel of the motorcycle Rear braking handgrip controls the running speed of the rear wheel of the motorcycle Automatic clutch automatically controls the separating meshing of the clutch based on the running speed of the mo...

Page 14: ...concentration of emitted HC is 1000 10 6 The environmental protection device is mainly a two in one air compensating valve air pump combining a one way leaf valve and a secondary air control valve Fresh air enters the exhaust passage of the engine under the action of the air pump to perform second burning for unburned gas discharged from the engine By making use of the principle of negative pressu...

Page 15: ... carrier must not exceed 5kg The maximum payload of motorcycles is 150kg and the maximum payload of mopeds is 75kg Tools delivered together with the motorcycle Common service and maintenance tools are delivered together with the Motorcycle The load of the rear storage box should not exceed 5kg Tools delivered together with the motorcycle can be accessible simply by opening the seat cushion storage...

Page 16: ...conditions of the motorcycle Level 1 Service and Maintenance Odometer reading 1000km 2000km the service and maintenance is dominated by lubricating and fastening Level 2 Service and Maintenance Odometer reading 3000km 6000km the service and maintenance is dominated by checking and adjusting Level 3 Service and Maintenance Odometer reading 6000km 10000km the service and maintenance is dominated by ...

Page 17: ... miles Check the flexibility and stability of the steering gear Level the motorcycle and check the oil gauge to see whether the oil level is between the upper and lower markings Check whether the acceleration handgrip turns flexibility If not it is necessary to clean the accelerator or change the steel cable ...

Page 18: ...tch separates or meshes properly Check the air pressure of the front tire and the wear of the tire casing Check whether the connection of the accumulator cell is loose Check the air pressure of the rear tire and the wear of the tire casing ...

Page 19: ...ng handgrip meets the standard 10mm 20mm Check whether the head light turning lights and indictor lamps work properly Check whether the free travel of the rear braking handgrip meets the standard 10mm 20mm Check whether the tail light and braking lights work properly ...

Page 20: ...torcycle work properly Step down the starting arm to its limit and then reset the starting arm in time The starting arm must be reset in time after the startup of the motorcycle Hold the front braking handgrip to prevent the slipping of the motorcycle Turn the acceleration handgrip slightly with your right hand to add an appropriate amount of fuel to start up the motorcycle The motorcycle can be r...

Page 21: ...cle must be checked First insert the key into the ignition switch lock and turn it to the position Hold the front braking handgrip turn on the electric startup switch and perform electric startup Or hold the rear braking handgrip turn on the electric startup switch and perform electric startup Push the electric startup button with your right thumb and meanwhile turn the acceleration handgrip sligh...

Page 22: ...turn the lighting switch to the position and the low beam lamp begins to work When the motorcycle needs to turn left turn the turning light switch to the position and the left turning light begins to work When the motorcycle needs to overtake another vehicle or warn pedestrians push down the Horn button to warn them Turn the turning light switch to the position both left and right turning signal l...

Page 23: ...ectric startup can be done for the motorcycle You may refer to the operating procedures of electric startup described in this Manual When the motorcycle needs to use its position lamp tail light and instrument indicator lamp turn the lighting switch to the position and the position lamp tail light and instrument indicator lamp begin to work When the motorcycle needs to stop using lighting lamps tu...

Page 24: ...n to the following points in parking the motorcycle Turn on the right turning light to warn surrounding vehicles and pedestrians Hold the rear braking handgrip to reduce the speed of the rear wheel At the same time hold the front braking handgrip to reduce the speed of the front wheel Turn the ignition lock key to the position to shut off the ignition system and stop the motorcycle ...

Page 25: ...ock switch to the position to prevent the motorcycle from being stolen After parking the motorcycle put up the side support as shown in the figure The front wheel of the motorcycle must be towards an uphill direction so as to prevent the slipping of the motorcycle Then put up the main support At the same time the front wheel of the motorcycle must be towards an uphill direction so as to prevent th...

Page 26: ...exible operation of the braking handgrip and ensure that the braking results meet relevant requirements After the brake is released the brake should be able to be reset automatically and show no friction sound Ensure good lubricating performance of the motorcycle 4 The front and rear shock absorbers should work properly and reliably The air pressure of the tire should be normal and the electrical ...

Page 27: ...ld be strictly forbidden Otherwise the drive system will wear more faster Heavy load should be avoided 8 Avoid emergent and long time braking 9 Strictlycontrol the running speed of the motorcycle 10 Within the run in period the load should not exceed 80 of the payload Contents of Level 1 Service and Maintenance Level 1 Service and Maintenance should be performed every time after the motorcycle run...

Page 28: ...nt and check whether the rearview mirror is properly located 10 Check whether the electrical components of the whole motorcycle can work normally Contents of Level 3 Service and Maintenance Level 3 Service and Maintenance should be performed every time after the motorcycle runs 6000km 10000km Its main contents are as follows 1 Ensure normal oil supply for the lubricating system 2 Ensure normal wor...

Page 29: ...f the carburetor directly affect the dynamic property and economy of the motorcycle the carburetor should be regularly cleaned to maintain good performance 2 In driving some impurities and dirt may build up on the carburetor Generally after every 2000 km the carburetor should be removed for checking and cleaning to eliminate faults of the carburetor Otherwise the main measuring orifice idle measur...

Page 30: ...re SF15W 40 gasoline engine oil is recommended Check whether the filter screen sealing gasket spring O ring and oil drain plug are in good conditions If not replace them After replacing the lubricating oil tighten the oil drain plug and oil fill plug and check whether there is any oil leakage After replacing the lubricating oil the idle speed of the engine must be re adjusted to be within the rang...

Page 31: ...dark black carbon deposit on the surface the main reason for it is that the gaseous inflammable alkene mixture of the carburetor is overrich Take off the spark plug If it is found that the color of the insulator skirt of the spark plug is brown it indicates that the engine works properly and there is nothing wrong with the spark plug Cleaning the Spark Plug Caution In cleaning the spark plug make ...

Page 32: ...asoline low ignition point solvent acid alkaline or organic volatile oil Take off the fastening screws of the air filter cover and remove the air filter cover Check whether there is too much dust on the sponge foam of the filter element Take off the sponge foam Wipe off the dust inside the air filter with clean and dry cloth Clean the foam filter element Take off the foam filter element First soak...

Page 33: ... Front Brake This model uses the front disc brake which is featured by secure and reliable braking labour saving and good heat dissipation Adjustment of the front disc brake 1 First use the main support to prop up the Motorcycle and then it is possible to adjust the free travel of the front brake 2 Adjust the regulating nut of the front brake to adjust the free travel of the front braking handgrip...

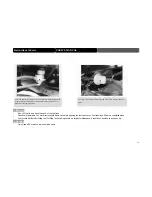
Page 34: ...If the travel of the front braking handgrip is too large it indicates that the wear of the front brake shoe is already beyond the limit Check the wear of the front disc brake If the surface of friction is abnormal or deformed please replace it with a new disc brake Disc brake ...

Page 35: ...he rear braking handgrip for several times and then loosen it Rotate the rear wheel assembly to check whether the rear wheel rotates freely First check the wear of the rear brake shoes If the travel of the rear braking pedal is too large to be adjusted it indicates that the wear of the rear brake shoe is already beyond the limit Use the support to prop up the motorcycle and adjust the free travel ...

Page 36: ...torcycle should be adjusted in the following steps Start the motorcycle first and the idle speed must be adjusted when the engine of the motorcycle is preheated Adjust the idle speed to the specified value Rotate the accelerator handgrip to check whether the speed of the engine is stable or whether flameout occurs If the engine still works improperly both the idle speed screw and the gas mixture s...

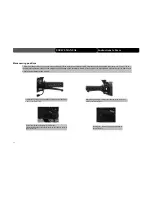
Page 37: ...lacement of Front Wheel Use the main support to prop up the motorcycle Remove the nut of the front wheel shaft and take off the front wheel shaft Take off the front wheel Caution After taking off the front wheel make sure not to grip the front braking handgrip In remounting the tightening torque of the nut of the wheel shaft 50N m 70N m Adjust the front brake and make several braking tests After l...

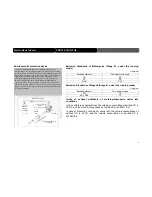
Page 38: ...he tire casing of the motorcycle reaches the following limit the tire case should be replaced immediately Minimum limit of tread depth Front wheel 2 0mm Rear wheel 2 0mm Caution Too low tire pressure will increase the rolling resistance of the tire of the motorcycle and increase fuel consumption In worse cases it may cause local delaminating of the tire body and cause tire burst Too high tire pres...

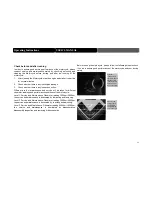
Page 39: ...he carburetor without authorization Regularly check whether the clamp of the intake negative pressure hose the clamp of the intake plastic hose or the fastening bolt of the intake iron pipe is loose If yes tighten or replace the clamp Regularly check whether there is any aging air leakage or damage on the intake negative pressure hose and the intake plastic hose If any replace the intake negative ...

Page 40: ...n the accumulator cell is not used for a long time the accumulator cell must be charged once a month 4 Check whether the electrolyte level of the accumulator cell is between the upper and lower markings When the level is below the lower marking add some distilled water Check whether the connection of the accumulator cell is loose It it is loose tighten it Check whether the voltage of the accumulat...

Page 41: ...lace it with a fuse with appropriate specification Service and Maintenance for the Horn After the motorcycle has run for a certain period of time the fixing of the horn may be loose and its housing may collide with other parts thus affecting the sound of the horn In this case the sound volume of the horn should be re adjusted When the electric system of the motorcycle outputs no current first we s...

Page 42: ... Perform slow charging for the accumulator cell once a month Wash the motorcycle clean and wipe if dry with soft cloth Wax the painted surfaces and apply a film of anti rust oil to the chromium plated surface Increase the tire pressure to the specified standard value Place tie plugs below the tires of the motorcycle to lift the wheels above the ground Well cover the Motorcycle and park it in a wel...

Page 43: ...n driving in an extremely moisture or highly dusty place the service and maintenance interval should be appropriately shortened Fuel filter C C C C Controller cable A A C A C A C Carburetor C C C C Air filter element C C C C Spark plug gap A C A C A C A C valve lash A A A A Lubricating oil of engine R R R R Lubricating oil filtering screen C C C C Timing chain I A A A Carburetor idling A A A A Dri...

Page 44: ... R R R R R Disc brake braking liquid DOT3 or DOT4 R Lubricating oil for front shock absorber Lubricating grease for shock absorber I I I T I I I Tachometer gear OKS 400 Multipurpose lithium based lubricating grease I R I R I Steering gear OKS 400 Multipurpose lithium based lubricating grease I R Bearings for front and rear wheels OKS 400 Multipurpose lithium based lubricating grease I R I R R Rear...

Page 45: ...ion of the carburetor The carburetor leaks Clean the carburetor or replace the carburetor floater The fuel filter is blocked Clean the fuel filter The throttle of the carburetor is worn Replace the throttle The fuel goes bad Replace the fuel The air vent of the fuel tank is blocked Dredge the air vent of the fuel tank The fuel in the fuel tank is not enough Add fuel to the fuel tank Air intake exh...

Page 46: ...rbon buildup and dirt on the spark plug The spark plug gap is improper Adjust the gap to 0 6mm 0 7mm The insulation part of the spark plug is damaged resulting in Short circuit of electrodes Replace the spark plug Short circuit of the ignition coil Replace the ignition coil C D I igniter is faulty Replace C D I igniter The impulse generator is faulty Replace the impulse generator The connection of...

Page 47: ...on ring The piston ring is improperly mounted Remount the piston ring There is scratch or wear on the piston or cylinder wall Replace the piston or cylinder The cylinder head leaks The air valve stem or air valve guide pipe wears out Replace the air valve stem and air valve guide pipe Travel system The front wheel deviates The front shock absorber deforms Replace the front shock absorber The front...

Page 48: ...ock absorber is improperly adjusted Re adjust the shock absorber Braking system The braking performance is poor The brake malfunctions Adjust and repair the braking system The brake shoe wears out Replace the brake shoe The brake disc wears out Replace the brake disc Add brake oil Lighting system The head Light is not on The head light bulb burns out Replace the head light bulb The housing assembl...

Page 49: ...47 USER S MANUAL Common Faults and Troubleshooting ...

Page 50: ...48 Schematic Wiring Diagram USER S MANUAL ...

Reviews: