


D
GB
8
5.1
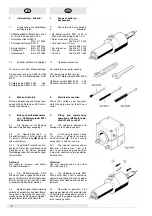
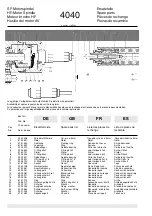
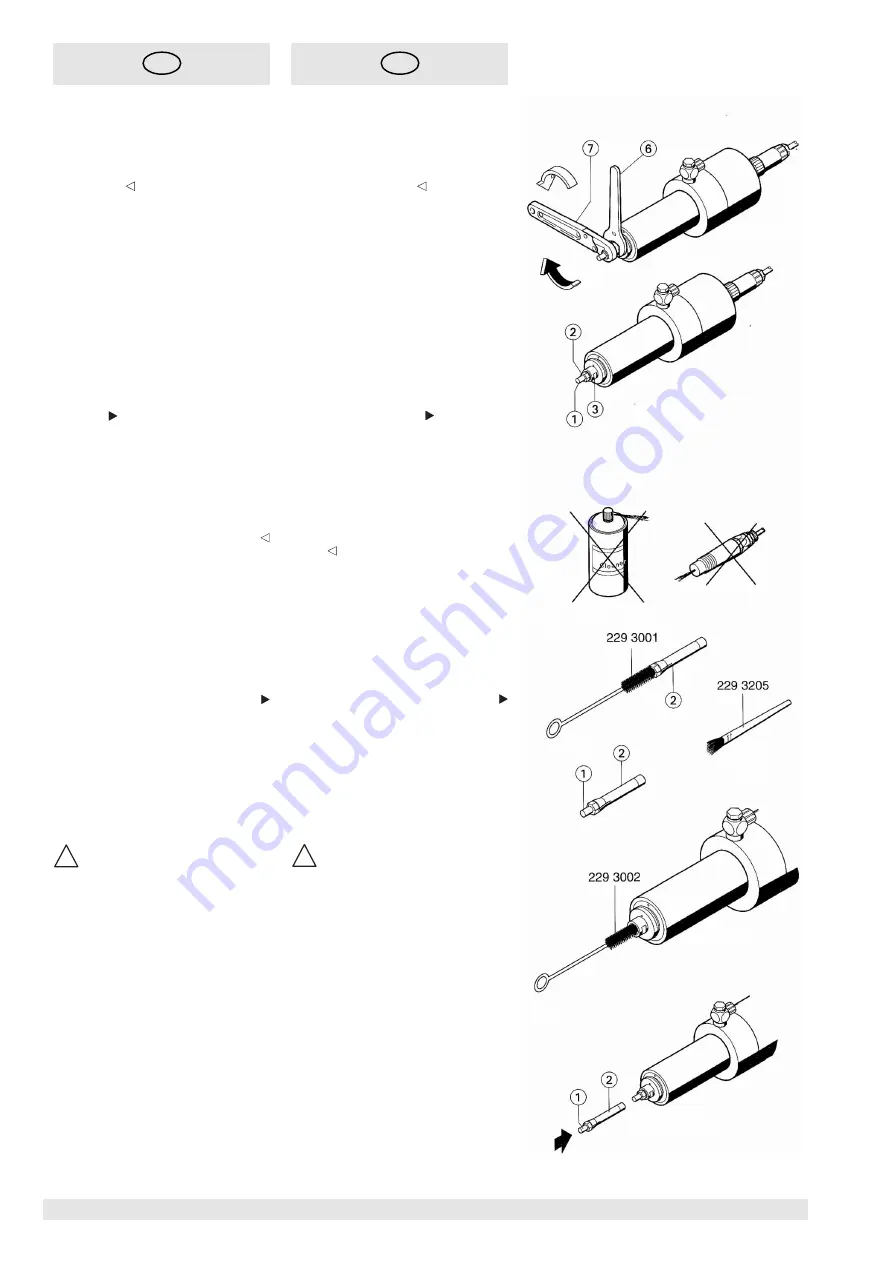
Removing the chuck
���
.
5.1.1
Hold rotor
���
with spanner of
13 mm
���
and turn chuck
���
with
ratchet spanner of 10 mm
���
in the
direction of the arrow
until chuck
���
can be removed towards the front.
5.2
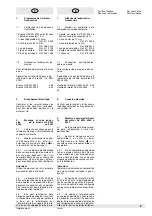
Inserting the chuck
���
.
5.2.1
Insert new chuck
���
with tool
or test pin
���
inserted in the chuck hol-
der.
5.2.2
Hold rotor
���
with spanner of
13 mm
���
and tighten the chuck
���
with
ratchet spanner of 10 mm
���
in the
direction of the arrow
and thereby
secure the tool or test pin
���
respectively.
5.3
When changing the tool, fix
rotor
���
with spanner of 13 mm
���
and
unscrew chuck
���
with ratchet spanner
of 10 mm
���
in the direction of the
arrow
and remove until test pin
���
or
the so far used tool can be removed
towards the front.
5.4
Slide in new tool into chuck
���
so far as it will go. Fix rotor
���
with
spanner of 13 mm
���
and screw up
chuck
���
with ratchet spanner of 10
mm
���
in the direction of the arrow
and thereby secure the tool.
6.
Maintenance
!
Attention!
On no account clean the HF Motor-
spindle EWL 4040 and/or 4042 with
ultrasound, steam jet, compressed air,
etc. Under no circumstances should
detergents like e.g. spray purifier, fat
solvents, etc. get into the inside of the
HF Motor-spindle EWL 4040 and/or
4042.
6.1
Clean the chuck
���
regularly.
6.1.1
Clean chuck holder and chuck
���
with an artist's brush or similar.
Apply a light film of oil to the chuck.
6.1.2
Reinsert the clean chuck
���
with tool or test pin
���
in HF Motor-
spindle EWL 4040 or 4042 (see 5.2 -
5.2.2).
5.1
Entnehmen der Spannzange
���
.
5.1.1
Rotor
���
mit Gabelschlüssel
SW 13
���
fixieren und Spannzange
���
mit Ratschenschlüssel SW 10
���
in
Pfeilrichtung drehen bis Spannzange
���
nach vorne entnommen werden
kann.
5.2
Einsetzen der Spannzange
���
.
5.2.1
Neue Spannzange
���
mit ein-
gelegtem Werkzeug oder Prüfstift
���
in
Spannzangen-Aufnahme einschieben.
5.2.2
Rotor
���
mit Gabelschlüssel
SW 13
���
fixieren. Spannzange
���
mit
Ratschenschlüssel SW 10
���
in Pfeil-
richtung
festdrehen und dadurch
Werkzeug bzw. Prüfstift
���
fixieren.
5.3
Bei Werkzeug-Wechsel Rotor
���
mit Gabelschlüssel SW 13
���
fixie-
ren und Spannzange
���
mit Ratschen-
schlüssel SW 10
���
in Pfeilrichtung
lösen, bis Prüfstift
���
bzw. bisher be-
nutztes Werkzeug nach vorn entnom-
men werden kann.
5.4
Neues Werkzeug bis Anschlag
in Spannzange
���
einschieben. Rotor
���
mit Gabelschlüssel SW 13
���
fixie-
ren und Spannzange
���
mit Ratschen-
schlüssel SW 10
���
in Pfeilrichtung
festdrehen und dadurch Werkzeug fi-
xieren.
6.
Wartung
!
Achtung!
SF-Motorspindel 4040 bzw. 4042 kei-
nesfalls mit Ultraschall, Dampfstrahl,
Druckluft o.ä. reinigen. Keinesfalls Rei-
nigungsmittel (wie z.B. Sprayreiniger,
Fettlöser usw.) ins Innere der SF-Mo-
torspindel EWL 4040 bzw. 4042 ein-
bringen.
6.1
Spannzange
���
regelmäßig
reinigen.
6.1.1
Spannzangen-Aufnahme und
Spannzange
���
mit Pinsel oder Bürste
reinigen. Spannzange
���
leicht einölen.
6.1.2
Gereinigte Spannzange
���
mit
Werkzeug oder Prüfstift
���
wieder in
SF-Motorspindel EWL 4040 bzw. 4042
einsetzen (s.h.5.2 - 5.2.2).


