background image

Instructions for use EXTRAmatic 9040
4 Commissioning | 4.3 Connector

26 / 56

3

4

5

1

2

7

6

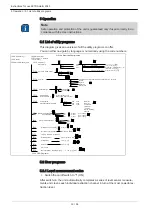
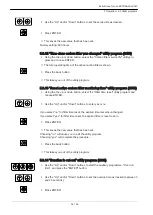
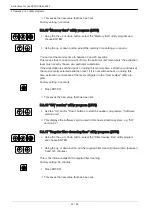
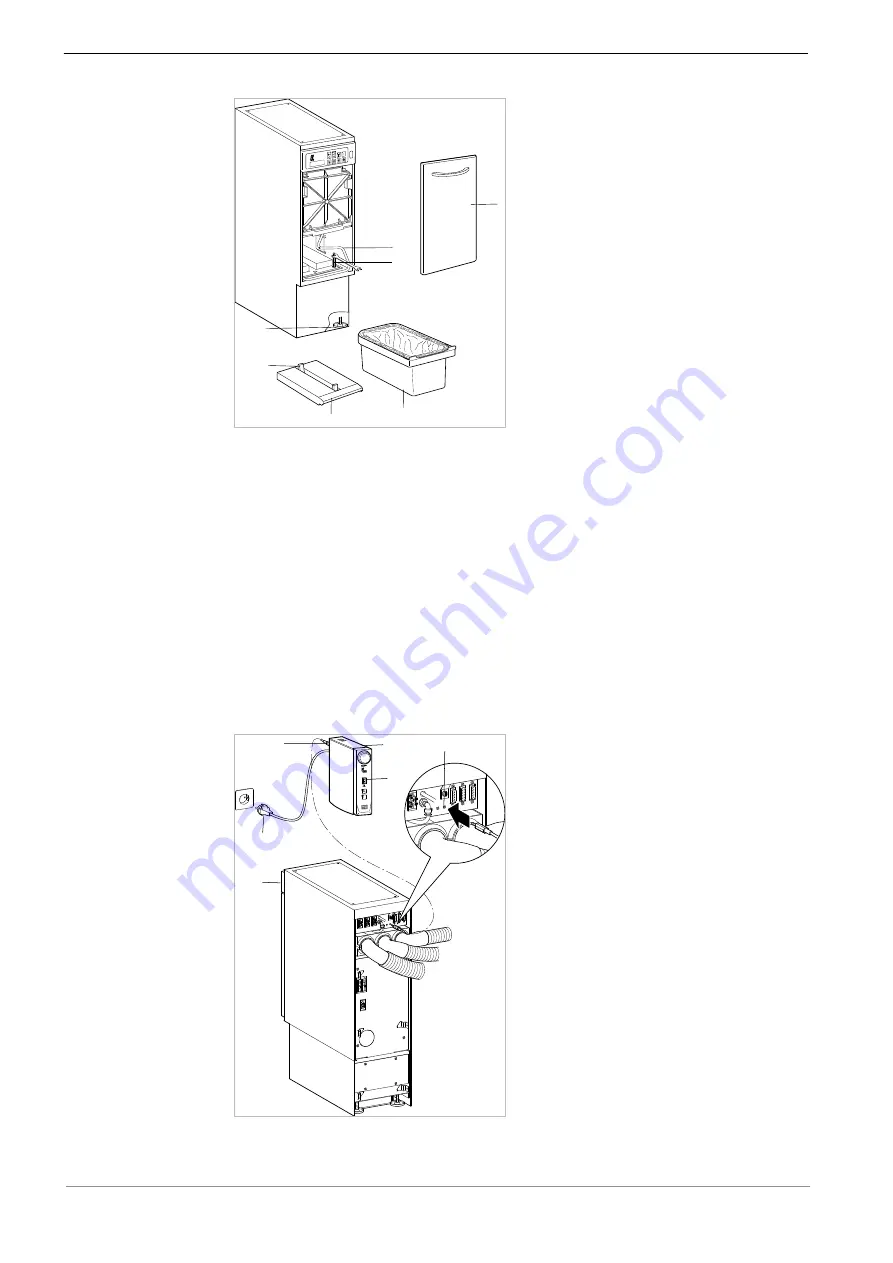
4.3.5 Connecting via control line

Whenn the equipment is appropriately set up (such as the K-control unit), a control
signal can be used to control the EXTRAmatic (a connection line is needed from the
equipment to the dust extraction system).
In this case, it is not necessary to plug the power plug of the equipment into the rear
socket.

▶ Press mains switch③ and⑤ into OFF position.

▶ Insert the control line in control sleeve④ of the dust extraction system.

▶ Insert the control line in control sleeve① on the K-Control unit.

▶ Insert the power cable⑥ from the K-Control unit② into the appropriately groun‐

ded socket.

1

2

4

6

3

Kcontrol

30

Nmax
x 1000/min

5

Summary of Contents for EXTRAmatic 9040

Page 1: ...Instructions for use EXTRAmatic 9040 Always be on the safe side...

Page 2: ...Manufacturer Kaltenbach Voigt GmbH Bismarckring 39 D 88400 Biberach www kavo com Distributed by KaVo Dental GmbH Bismarckring 39 D 88400 Biberach Phone 49 0 7351 56 0 Fax 49 0 7351 56 1488...

Page 3: ...l 13 3 2 EXTRAmatic rear panel 14 3 3 Control panel 15 3 4 Technical data 15 3 4 1 Transportation and storage conditions 17 3 5 Rating plate 18 3 5 1 Description of the rating plate 18 3 5 2 Dust filt...

Page 4: ...Active carbon filter control utility program 2500 38 5 3 11 Time to change active carbon filter utility program 2450 38 5 3 12 Time since carbon filter was changed utility program 2455 39 5 3 13 Reset...

Page 5: ...Instructions for use CI Care instructions AI Assembly instructions TI Technician s instructions SC Safety checks IEC International Electrotechnical Commission RI Repair instructions RK Retrofitting ki...

Page 6: ...tic parts The warranty expires if defects or their consequences could possibly have arisen be cause the product has been modified or changed Warranty claims can only be asser ted when they are immedia...

Page 7: ...val If the packaging is visibly damaged on delivery please proceed as follows 1 The recipient of the package must record the loss or damage on the delivery re ceipt The recipient and the representativ...

Page 8: ...you need to return the product for servicing or repair The symbols printed on the outside are for transportation and storage and have the following meaning Transport upright with the arrows pointing u...

Page 9: ...r hazard prevention 2 2 Purpose Intended use 2 2 1 General The KaVo product is for vacuuming and separating hazardous dust with MAK values and inert dusts and vapours primarily methyl methacrylate It...

Page 10: ...cited directive and must be disposed of according ly within Europe For more information please visit www kavo com or contact your specialised dental supplier For final disposal please contact In Germa...

Page 11: ...ir side must be sealed Accessory parts hoses etc are to be considered contaminated and treated correspondingly Use suitable personal protective equipment If possible use a room with filtered automatic...

Page 12: ...life Perform regular proper care and maintenance CAUTION Damage from overvoltage The product becomes damaged The nominal voltage and frequency must be the same as that on the rating plate CAUTION Imp...

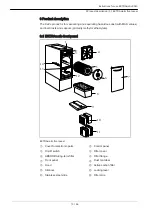
Page 13: ...MAK values and inert dusts and vapours primarily methyl methacrylate 3 1 EXTRAmatic front panel 10 7 5 4 9 8 6 1 14 12 13 11 3 2 EXTRAmatic front panel Cover for electronic parts Control panel On off...

Page 14: ...3 9 7 6 5 12 Rear view of the EXTRAmatic unit Control line connection Port for connecting lead Compressed air connection External control panel connection Connecting elbow 50 mm extraction hose Collar...

Page 15: ...or selected suction step Button Suction step Symbol for filter cleaning LED for filter operating status LED for dust container operating sta tus Symbol for dust container operating status LED for malf...

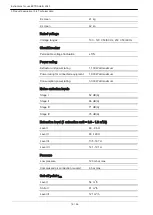
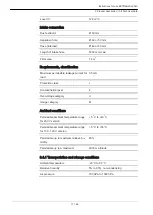
Page 16: ...Watt maximum Power rating for connected equipment 1 900 Watt maximum Consumption power rating 3 000 Watt maximum Noise emission levels Stage I 52 dB A Stage II 66 dB A Stage III 71 dB A Stage IV 75 dB...

Page 17: ...load 0 5 mA Protection class I Contamination level 2 Overvoltage category II Usage category M Ambient conditions Permissible ambient temperature range for 230 V version 5 o C to 40 o C Permissible am...

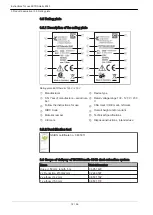
Page 18: ...ber Rated voltage range 100 120 V 230 V Follow the instructions for use CSA mark VDE mark GS mark HIBC Code Overall height and or variant Material number Technical Specifications CE mark Disposal ins...

Page 19: ...ction system Name Material number Instructions for use 1 003 6043 de 1 003 7096 en 1 003 7097 fr 1 003 7098 it 1 003 7099 es 1 006 4281 ru Enclosed in the dust container Connec tion parts for DL line...

Page 20: ...permissible connected load is 3 000 Watt In combination with just one dust extraction point no compressed air connection and or no switching module is required Close unused dust extraction openings w...

Page 21: ...Note Make sure that the control line with display extraction hose connection and socket for the item generating dust are positioned and aligned correctly 4 3 1 Connecting at the workplace Set up the...

Page 22: ...is clamped on to the worktop using levelling screws If the extractor unit is beneath a work bench the height of the unit will need to be ad justed Remove the rear panel from the adjacent cabinet elem...

Page 23: ...a 50 mm extraction hose is recommended Do not stretch the hose vertically or allow it to sag Use hose clips as required 4 3 2 Connecting at the dental laboratory If the unit is to be used in a dental...

Page 24: ...hoses for use in KaVo laboratory workstations or at KaVo extractor units or support racks choose those with a diameter of 42 mm G A S D I N D V G W G A S D I N D V G W G A S D I N D V G W A B S O R m...

Page 25: ...anel Flip the locking lever downwards Remove dust container Flip the latches up and remove the cover Using the allen key adjust the four height adjusters until the unit is at the desired level With th...

Page 26: ...ine is needed from the equipment to the dust extraction system In this case it is not necessary to plug the power plug of the equipment into the rear socket Press mains switch and into OFF position In...

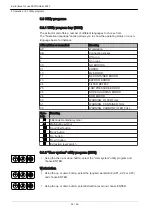
Page 27: ...ts If the unit is connected without a control line a connecting cable is required between the controller and extractor unit Insert connecting lead into socket on the extractor unit Insert the country...

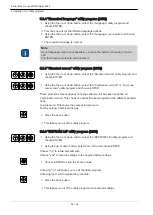
Page 28: ...ke sure that all constituent parts are positioned correctly Plug the cable from the external control panel into the extractor unit EXTRAmatic 1 4 3 2 EXTRAmatic 4 3 9 Connecting to the mains Mains con...

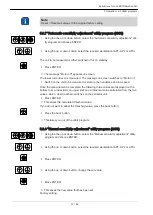
Page 29: ...EXTRAmatic 9040 4 Commissioning 4 3 Connector 13 2 3 1 Mains connection 100 120V Plug the mains connection lead 100 120 Volt for Japan and US in at the mains which must be earthed in accordance with...

Page 30: ...uerung 2300 Automatische 2310 AP1 2301 Motor aus Empfindlichkeitseinstellung 2311 AP2 2302 Motor ein 2312 AP3 2303 bernehmen gespeichert verworfen falsche Meldung Schwelle 2350 Manuelle Empfindlich 23...

Page 31: ...generating dust does not deliver an electric signal and there is no exter nal operating panel present a foot switch can be used to switch to continuous mode A 5 5 Press the button This switches manua...

Page 32: ...OR 11 B8 CONTAINER ERROR 23 EEPROM ERROR 24 FILTER DEFECT 25 LOW PRESSURE ERROR 26 NODE GUARDING ERROR 28 ROM ERROR 30 WARNING FILTER FULL 31 WARNING CONTAINER FULL 32 WARNING CARBON FILTER FULL Sym b...

Page 33: ...if this amount of power is available The other workstations will not be locked and the extraction level may drop below that configured Factory setting Optimum No Identification Using the up or down b...

Page 34: ...rkstation 2 AP2 and workstation 3 AP3 Extraction level 24 U Optimum No Current identification Example 2 Extraction channel 1 Shape grinder Extraction channel 2 Sandblaster Extraction channel 3 Technic...

Page 35: ...on Settings for AP 2 Extraction level 36 U Optimum No Current identification Settings for AP 3 Extraction level 24 U Optimum No Current identification The shape grinder AP 1 sandblaster AP2 and techni...

Page 36: ...tion screen or Low pres sure screen utility program and choose ENTER These selection screens appear once the extractor unit has been switched on Combination screen This shows the extraction level requ...

Page 37: ...e handpiece at a low speed Once the measurement is complete the following three values are displayed on the bottom row a lower limit an upper limit and a threshold value calculated from the two values...

Page 38: ...es in the Automatic sensitivity adjustment and Manual sensi tivity adjustment utility programs Press the back button This takes you out of the utility program 5 3 10 Active carbon filter control utili...

Page 39: ...am 2550 Using the the up or down button select the Filter time reset utility program and choose ENTER Use the Up and or Down buttons to enter yes or no If you select no for filter time reset the expir...

Page 40: ...selected extraction level if it is not switched back on during this time extraction commences at the level configured in the User system utility pro gram Factory setting 5 seconds Press ENTER This sa...

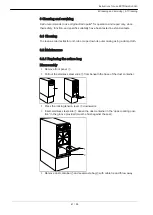
Page 41: ...extractor unit rub or wipe down its outer casing using a damp cloth 6 2 Maintenance 6 2 1 Replacing the refuse bag Disassembly Remove front panel Pull out the stainless steel slide from beneath the b...

Page 42: ...fully against the contours of the dust container to keep trapped air to a minimum Place cardboard insert accessories disposal setMat no 06570951 on container floor and tighten 1 3 2 Reinsert the dust...

Page 43: ...rts or plug in units for the active charcoal filter and remove cover 1 2 3 Remove the two sound insulation inserts or used active charcoal filter blocks Mat no 0 657 1152 monitoring and length of use...

Page 44: ...filter monitoring time At the same time the change time can be adjusted to between 100 and 2 500 oper ating hours as required as per utility program Time to change active carbon filter 6 2 3 Replacin...

Page 45: ...nd can no longer be remedied by frequent cleaning the filter including strip must be re placed Disassembly Remove the front panel and the dust container Remove hex head screw M5 x 14 and remove safety...

Page 46: ...e bag accessories dis posal set Mat no 0 657 0951 and dispose of it EXTRAm atic 1 2 3 4 5 6 7 8 Installation Carefully insert new filters Mat no 0 657 1142 and centre them in the rear filter flange Sl...

Page 47: ...clean for approx 60 seconds This indicator is also a sign to the user that they should temporarily turn off the con nected tool EXTRAmatic 2 1 3 4 Filter LED flashing If LED is flashing this indicates...

Page 48: ...ED always on If LED is constantly lit this indicates that the dust container is full The next time operation of the extraction motor is interrupted the motor will be stop ped automatically and prevent...

Page 49: ...upon start up after changes and repair as well as in recurrent tests is required Caution Electrical safety checks have to be carried out by electrically skilled persons or by individuals trained in e...

Page 50: ...EPROM is tested when switching on the unit with the on off switch This error is returned if the com ponent is faulty or has an intermittent malfunction After choosing the Save button to confirm you ca...

Page 51: ...e the active carbon filter Extraction only occurs at one or two extraction points rather than three Extraction line s blocked due to intake of larger par ticles of debris for in stance Check extractio...

Page 52: ...4 1578 Dust extraction panel for EXTRA matic 0 657 0841 Dust extraction panel EXTRAmatic 904x 0 657 1531 Foot switch 1 000 3147 Reduction 50 42 0 224 6597 5 meter hose 50 mm 0 695 1422 1 2 meter hose...

Page 53: ...EXTRAmatic 9040 9 Accessories 6 2 Maintenance Servicing materials and consumables Presentation Material summary Material number Carbon filter 0 657 1152 Disposal set 0 657 0951 ABSORBA long term filt...

Page 54: ...Instructions for use EXTRAmatic 9040 10 Declaration of conformity 6 2 Maintenance 54 56 10 Declaration of conformity...

Page 55: ......

Page 56: ...1 003 7096 Fk 20140715 3 en...

Reviews: