background image

Operating Instruction STERIclave B 2200 / 2200 P
4 Installation

 | 

4.5 Settings

4.5 Settings

Note

The STERIclave B is normally set with the units for temperature and pressure for

Germany.

The following settings are made one after the other:

▪ Date and time

▪ Pressure

4.5.1 Setting the date and time

Requirement

The unit is in "ON" mode.

▶ Press the Set button.

"SET YEAR" will appear on the display.

▶ Press 1 or 2 to set the value for the year.

The month, day, hour and minute settings are all made in the same way.

▶ Press the Set button to go to the next time setting.

The next time setting will appear on the display.

▶ Press 1 or 2 to set the value for the next time setting.

All time values have been set.

▶ Press the Set button to revert to operation.

4.5.2 Setting the temperature unit

Requirement

The unit is in "ON" mode.

+

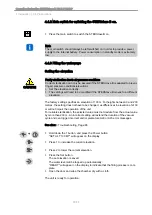
▶ Hold down the Set button, and press the 3 button to call up the menu.

"SET UNIT °C" or "SET UNIT F" will appear on the display.

▶ Press 1 repeatedly until the required temperature unit is selected.

"Set UNIT °C" or "SET UNIT F" will appear on the display.

▶ Press 2 to access the setting for the language for the pressure or for recording

cycle data (for service engineers only).

31/78

Summary of Contents for STERIclave B 2200

Page 1: ...Operating Instruction STERIclave B 2200 2200 P Always be on the safe side...

Page 2: ...Sales KaVo Dental GmbH Bismarckring 39 D 88400 Biberach Tel 49 7351 56 0 Fax 49 7351 56 1488 Manufacturer Kaltenbach Voigt GmbH Bismarckring 39 D 88400 Biberach www kavo com...

Page 3: ...information 13 2 3 2 Product specific 13 3 Product description 14 3 1 STERIclave B 2200 2200 P 14 3 1 1 Front 14 3 1 2 Rear 15 3 2 Rating plate 16 3 3 Technical Data 17 3 4 Scope of delivery 19 3 5 Sa...

Page 4: ...er 54 6 10 1 Emptying the foul water tank 54 6 10 2 Filling the fresh water tank 55 7 Maintenance 56 7 1 Maintenance schedule 56 7 2 Using the STERIclave B after servicing 57 7 3 Regular checks 58 7 3...

Page 5: ...Operating Instruction STERIclave B 2200 2200 P Contents 11 Certificates 76 11 1 EC statement of conformity 76 11 2 EN 13060 2004 Annex B informative process evaluation system 77 3 78...

Page 6: ...s TA Technician s instructions STK Safety check IEC International Electrotechnical Commission RA Repair instructions EMC Electromagnetic compatibility 1 1 2 Symbols See the section Safety Warning Symb...

Page 7: ...following address Please indicate the product serial number in all requests Service hotline 49 7351 56 1500 Service Instrumente kavo com Please indicate the product serial number in all requests Addit...

Page 8: ...in the absence of mandatory legal regulations to the contrary KaVo cannot be held liable for defects and their consequences due to natural wear improper cleaning or maintenance non compliance with op...

Page 9: ...Damage in transit In Germany If external damage to the packaging is visible upon delivery follow the procedure below 1 The recipient must record the loss or damage in the notice of delivery The re cip...

Page 10: ...o not use the product If the product is damaged and there is no discernable damage to the packaging upon delivery proceed as follows 1 Report the damage immediately or at least 7 days after the delive...

Page 11: ...Operating Instruction STERIclave B 2200 2200 P 1 User instructions 1 4 Transportation and storage Humidity 5 to 95 Air pressure 700 to 1060 hPa 9 78...

Page 12: ...ance The optional step contains necessary measures for avoiding hazards 2 1 3 Description of danger levels Safety instructions with three hazard levels are used in this document for avoiding personal...

Page 13: ...of electronics Note According to the EC directive concerning electrical and electronic used devices this product is subject to the cited directive and must be disposed accordingly within Europe Additi...

Page 14: ...roper use This steriliser meets the requirements of EN 13060 2004 for small steam sterilisers It contains operating programs for class B sterilisation processes and operating programs for class S ster...

Page 15: ...ept responsibility for damage caused by External factors beyond its control poor media quality or defective installation The use of incorrect information Repair work carried out incorrectly 2 3 2 Prod...

Page 16: ...ront Internal printer STERIclave B 2200 P only Control panel Door Bacteriological filter Temperature sensor Safety valve outlet Vacuum filter Fresh water inlet Drainage filter Door seal Handle Quick c...

Page 17: ...ir outlet for intercepting tank Fuse Power supply cable Rating plate Air grille PC port RJ 45 for technicians only Safety valve Parallel interfaces only for the type 2200 are for connecting a printer...

Page 18: ...iption 3 2 Rating plate 3 2 Rating plate Manufacturer Type Unit type STERIclave B 2200 2200 P SN Serial number REF Material number GOST R certification CE mark Note Read and note the content of accomp...

Page 19: ...mm Height 505 mm Weight 3 kg Power supply Mains voltage 230 VAC Mains frequency 50 60 Hz Max power consumption 1500 W Average power consumption 600 W Standby 1 W Fuse 2 x 10 AT model 6 3 x 32 CT Envir...

Page 20: ...0 P 3 Product description 3 3 Technical Data Fresh water tank 2 6 l Foul water tank 2 6 l Transportation and storage conditions Transportation and storage temperature 0 C to 60 C Relative humidity 5 t...

Page 21: ...no 1 000 1200 STERIclave B 2200 Mat no 1 000 1400 Tray holder 1x Mat no 1 004 9264 Tray 6x Mat no 1 004 9255 Handle for removing trays 1x Mat no 1 004 9279 Tank drain hose 1x Mat no 1 004 9241 Filter...

Page 22: ...ng Instruction STERIclave B 2200 2200 P 3 Product description 3 4 Scope of delivery Figure Description Cleaning tabs 2x Mat no 1 004 8678 for 10 Printer paper Mat no 1 004 9529 Instructions for use 1x...

Page 23: ...the valve will open and an acoustic signal will sound at the same time to warn of de fective operation ALARM 16 will ap pear on the display Overheating protection The temperature inside the chamber is...

Page 24: ...t the major phases in the steri lisation process and indicate errors Signal Meaning 1 short tone A button has been pressed Continuous tone separated by short breaks The door has not been closed proper...

Page 25: ...Operating Instruction STERIclave B 2200 2200 P 3 Product description 3 7 Signs on the product 3 7 Signs on the product Caution hot surfaces 23 78...

Page 26: ...Operating Instruction STERIclave B 2200 2200 P 4 Installation 4 1 Unpacking 4 Installation 4 1 Unpacking Open the cardboard box at the top Carefully lift out the unit 24 78...

Page 27: ...2 Location Bear the following factors in mind when selecting a location for the unit Even surface No flammable gases and extreme humidity in the vicinity Distance to wall at least 4 cm Note Make sure...

Page 28: ...B 2200 2200 P 4 Installation 4 2 Location Note The feet are pre adjusted Even out by adjusting the feet Make sure that the chamber is inclined slightly to the rear in order to facilitate water draina...

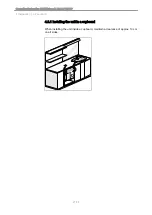
Page 29: ...ng Instruction STERIclave B 2200 2200 P 4 Installation 4 2 Location 4 2 1 Installing the unit in a cupboard When installing the unit inside a cupboard maintain a clearance of approx 10 cm on all sides...

Page 30: ...ation 4 3 Connections 4 3 Connections 4 3 1 Connect the electrical power supply voltage Requirement The characteristics of the mains supply must tally with the characteristics indicated on the rating...

Page 31: ...Use of poor quality water Poor quality water can cause calcification on instruments in the chamber and on trays Other liquids and additives can cause irreparable damage to the STERIclave B and put us...

Page 32: ...etting specifies an elevation of 100 m For heights between 0 and 200 metres the setting does not have to be changed as differences in elevation of 100 m will not impair the operation of the unit For r...

Page 33: ...the same way Press the Set button to go to the next time setting The next time setting will appear on the display Press 1 or 2 to set the value for the next time setting All time values have been set...

Page 34: ...down 2 until the required language or recording of cycle data is selected L1 L2 L3 L4 L5 or L6 will appear on the display Display Language for the pressure report L1 Italian L2 English L3 Spanish L4 F...

Page 35: ...the physical pa rameters of pressure temperature and time A well trained user is capable of evaluating the sterilisation process and deciding if the loads are sterilised and ready to use or not Users...

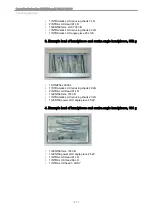
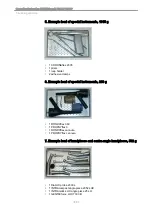
Page 36: ...the sterilisation should be considered unsatisfactory and a malfunction should be displayed The load should be consi dered unsterile 1 Example load of handpieces and contra angle handpieces 3 trays 1...

Page 37: ...mple load of handpieces and contra angle handpieces 372 g 1 SONICflex 2003 L 1 INTRAmatic LUX reducing shank 29 LN 2 INTRA LUX Head 61 LR 1 GENTLEforce 7000 B 1 INTRAmatic LUX reducing shank 20 LN 1 G...

Page 38: ...1 loop holder 2 adhesive clamps 6 Example load of special instruments 290 g 1 RONDOflex 360 1 PROPHYflex 3 1 RONDOflex cannula 1 PROPHYflex cannula 7 Example load of handpieces and contra angle handp...

Page 39: ...8 Example load for surgery 514 g 2 INTRA surgical reducing shank 3624 N 2 INTRA surgical handpiece 3610 N 1 INTRA surgical reducing shank 3624 N 1 INTRA surgical reducing shank C 09 1 INTRA surgical h...

Page 40: ...id instruments 136 g 1 scalpel holder 1 scissors 1 Spanner 1 Scaler 1 tweezers 1 mirror 11 Example load of special instruments 264 g 1 SONICflex 2003 L 1 PROPHYflex 3 4 SONICflex tips 1 PROPHYflex can...

Page 41: ...DIAGNOdent pen holder 1 DIAGNOdent sleeve 1 HealOzone handpiece 13 Example load of special instruments 37 g 1 aspiration cannula 2 multifunctional tip attachments EN 13060 2004 Annex B informative pro...

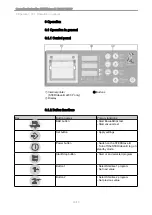
Page 42: ...Display 6 1 2 Button functions Key Button names Primary functions B D button Start Bowie Dick test Start vacuum test Set button Apply settings Power button Switch on the STERIclave B Turn off the STER...

Page 43: ...Fast cycle program Button 4 Select Special S1 to S4 programs Note Do not exert excessive pressure on the buttons 6 1 3 Display Time LED Program sequence LEDs Time display Alarm LED Pressure LEDs bar...

Page 44: ...ge 65 Note An indication of the water quality will appear at the end of self diagnosis H2O good indicates good water quality If H2O hard appears the water quality is below the permissible range and th...

Page 45: ...ave B on and running a self diagnosis A temperature of 100 C will appear on the display to indicate that the STERIclave B has heated up Note During the heating phase the temperature indicated on the d...

Page 46: ...an instruments prior to sterilisation Prepare the instruments carefully in accordance with the manufacturer s recom mendations Check that there is enough water in the tank and that the min LED is not...

Page 47: ...unpacked single packed Helix test B LED 3 Fast cycle 15 min 134 4 min 2 pre vacuum pha ses drying 3 min 2 min vacuum 1 min ventilation Solid sterilisation items up to 134 unpacked S LED 4 SPECIAL S1 P...

Page 48: ...selected program The sterilisation cycle starts The program sequence LEDs light up to indicate which phase of the cycle is currently active See also 6 6 Tracking the program sequence Page 50 6 4 3 St...

Page 49: ...S1 S2 or S3 Press the Start Stop button to start the selected program The sterilisation cycle starts The program sequence LEDs light up to indicate which phase of the cycle is currently active See al...

Page 50: ...d down the Set button Press 4 SET TEMP will appear on the display Press 1 or 2 to set the temperature Setting range 121 C to 135 C Setting the time Press the Set button to set the time SET TIME will a...

Page 51: ...ss and hold down 4 and use 1 or 2 to select the Special S4 program Press 4 and the Start Stop button at the same time to start the selected program The sterilisation cycle starts The program sequence...

Page 52: ...Current temperature drops End of sterilisation Sterilize flashes Remaining time in phase Current pressure Current temperature Aspiration of residual vapour Drying lights up Process duration Current p...

Page 53: ...e the handle for removing trays Allow trays and instruments to cool Requirement The Ready LED lights up Important Press the start stop button to unlock the doors Open the doors and remove the trays Th...

Page 54: ...ill appear on the left hand display See also 8 Troubleshooting Page 65 Press the Start Stop button to interrupt the active sterilisation process MANU STOP will appear Make sure that the pressure indic...

Page 55: ...t the start of each new sterilisation cycle The printout will contain the following information Unit serial number Sterilisation date Selected sterilisation program Sterilisation temperature and time...

Page 56: ...7 4 Regular total cleaning Page 61 Place a container with a capacity of at least 2 6 litres in front of the STERIclave B Put one end of the drain hose into the container and connect the other to the...

Page 57: ...ill light up if there is not enough water in the fresh water tank The water level will need to be topped up after approx 5 cycles See also 7 4 Regular total cleaning Page 61 Fill the fresh water tank...

Page 58: ...chedule Interval Task At the beginning of the work week Vacuum test Every time the unit is swit ched on Automatic self diagnosis Daily Bowie Dick test or Helix test Prior to each sterilisation Clean t...

Page 59: ...n switch on the back The date and time are shown on the display Hold down button 1 and press the Power button SET Altitude flashes in the display Use the 1 and 2 buttons to set the altitude at which t...

Page 60: ...e display Press the B D button to start the test The test will start automatically and lasts approximately 16 minutes After the end of the test Test Good appears in the display 7 3 3 Sterility tests K...

Page 61: ...am Page 45 Once the sterilisation cycle is complete remove the SMU LC take hold of it by the tear flap and allow it to cool briefly Open the tear flap and check the colour of the indicator Error free...

Page 62: ...Operating Instruction STERIclave B 2200 2200 P 7 Maintenance 7 3 Regular checks Measuring point for the safety check 60 78...

Page 63: ...ouching hot objects can cause skin burns Make sure that the Power button is off The bottom display shows OFF Only clean the device when it is cold 7 4 1 Clean the tray holder and trays Note Scouring a...

Page 64: ...close the doors Hold down the Start Stop button and then pressure the Power button Automatic cleaning starts CLEANING will appear on the display The vacuum pump is running CAUTION Vapour may escape w...

Page 65: ...on and drain the water into a container min capacity 2 6 litres Use the filter key to remove the fresh water filter Use compressed air or ultrasound to clean the filter or Change the filter Carefully...

Page 66: ...airs A special test program which is available to all authorised customer service centres can be used to test all main components and identify problems quickly Note Only technicians trained by KaVo ma...

Page 67: ...rre sponding message and the sounding of an acoustic signal In the tables below the error codes have been listed systematically in the Fault column Error codes can be classified in accordance with the...

Page 68: ...h reduced volume Check the mains volta ge Contact customer service if ne cessary NEED TEST CD 3 The lower heating element is rea ching the calculated temperatures too late Run the program with reduced...

Page 69: ...ut cleaning FAIL AL 7 Door was not closed properly on starting up Close the door and restart FAIL AL 8 Air in the chamber Check the door seal Clean the seal Run a vacuum test when the unit is cold FAI...

Page 70: ...r messages listed in the table below are only relevant for the Sterilize1 Sterilize 2 Special S1 Special S2 and Special S3 programs Malfunction Cause Remedy Error code 18 during drying Drying phase in...

Page 71: ...e chamber and repeat the program BLAC OUT Blackout during process Check the mains plug If there is moisture inside the chamber dry the chamber and repeat the program NEED CLEANING 60 cycles without in...

Page 72: ...ems according to DIN EN 868 5 Helix test Mat no 1 005 0548 for 10 Handle for removing trays Mat no 1 004 9279 Tank drain hose Mat no 1 004 9241 Filter key Mat no 1 005 0724 Bacteriological filter Mat...

Page 73: ...l be dis turbed Interference voltage transmissions according to EN 55011 Class B The STERIclave B has been desig ned for use in all facilities including residential and facilities that are di rectly c...

Page 74: ...IEC 61000 4 5 1 kV symmetrical test voltage 2 kV asymmetrical test voltage 1 kV symmetrical test voltage 2 kV asymmetrical test voltage The quality of the supply voltage should correspond to that of...

Page 75: ...and 800 MHz the higher frequency range applies Comment 2 These guidelines may not be applicable in every case The spread of electromagnetic waves is absorbed and reflected by buildings objects and pe...

Page 76: ...g Instruction STERIclave B 2200 2200 P 10 Electromagnetic compatibility 10 3 Electromagnetic Immunity d Within the frequency range of 150 kHz to 80 MHz the field strength should be less than 3V eff V...

Page 77: ...f the communication device as indicated below The table shows the necessary safe distance depending on the transmission fre quency in m Rated power of the trans mitter in W 150 kHz to 80 MHz d 1 17 P...

Page 78: ...Operating Instruction STERIclave B 2200 2200 P 11 Certificates 11 1 EC statement of conformity 11 Certificates 11 1 EC statement of conformity 76 78...

Page 79: ...Operating Instruction STERIclave B 2200 2200 P 11 Certificates 11 2 EN 13060 2004 Annex B informative process evaluation system 11 2 EN 13060 2004 Annex B informative process evaluation sys tem 77 78...

Page 80: ...Operating Instruction STERIclave B 2200 2200 P 11 Certificates 11 2 EN 13060 2004 Annex B informative process evaluation system 78 78...

Page 81: ......

Page 82: ...1 005 0083 kb 20080708 03 en...

Reviews: