High Speed Camera User Guide
45
The Flat-field and Dark-field corrections are used to improve the quality of the image by removing
the artifacts that are caused by fixed pattern noise and variations in the pixel-to-pixel sensitivity of
the detector.
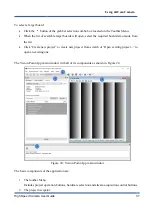
To make Dark/Flat field correction, two pictures should be taken. One with lens closed (offset should
be boosted) and one with uniform illumination of around 40%.
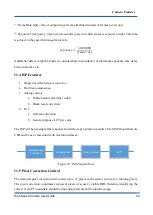
The operator is per pixel and defined according to following formula:
𝑃(𝑥, 𝑦) = 𝐺𝑎𝑖𝑛(𝑥, 𝑦)[𝑃(𝑥, 𝑦) − 𝑃
𝑑𝑎𝑟𝑘
(𝑥, 𝑦)]
Where P(x,y) is the pixel at offset X in horizontal and Y in vertical. P
dark
(x,y) is the offset of the pixel
at offset X in horizontal and Y in vertical that was measured during the calibration stage and Gain(x,y)
is the gain of the pixel at offset X in horizontal and Y in vertical that was measured during the
calibration stage.
This correction is valid for the specific camera settings and conditions (gain, exposure time,
temperature etc.) which were selected during the calibration process.
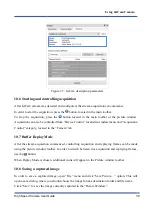
Follow this steps to perform calibration process:
1.
Prepare light source for specific calibration:
a.
Dark field calibration: in this case, light should be blocked from the sensor. This can be
achieved by covering the sensor with a solid cap.
b.
Flat field calibration: in this case, uniform light should be applied across the sensor.
This can be achieved by setting a uniform light source in front of the camera.
2.
Select the “Calibration Mode” either “Dark” or “Flat”
3.
Start camera’s stream either in free run or by applying an external trigger.
4.
Initiate the selected calibration with “Field Calibration Start” command Execute.
5.
NOTE that Flat field calibration should be performed after Dark field calibration has already be
performed for the selected camera settings.
Camera Features


