浙江华洋赛车股份有限公司
6- 5
Wheel inspection
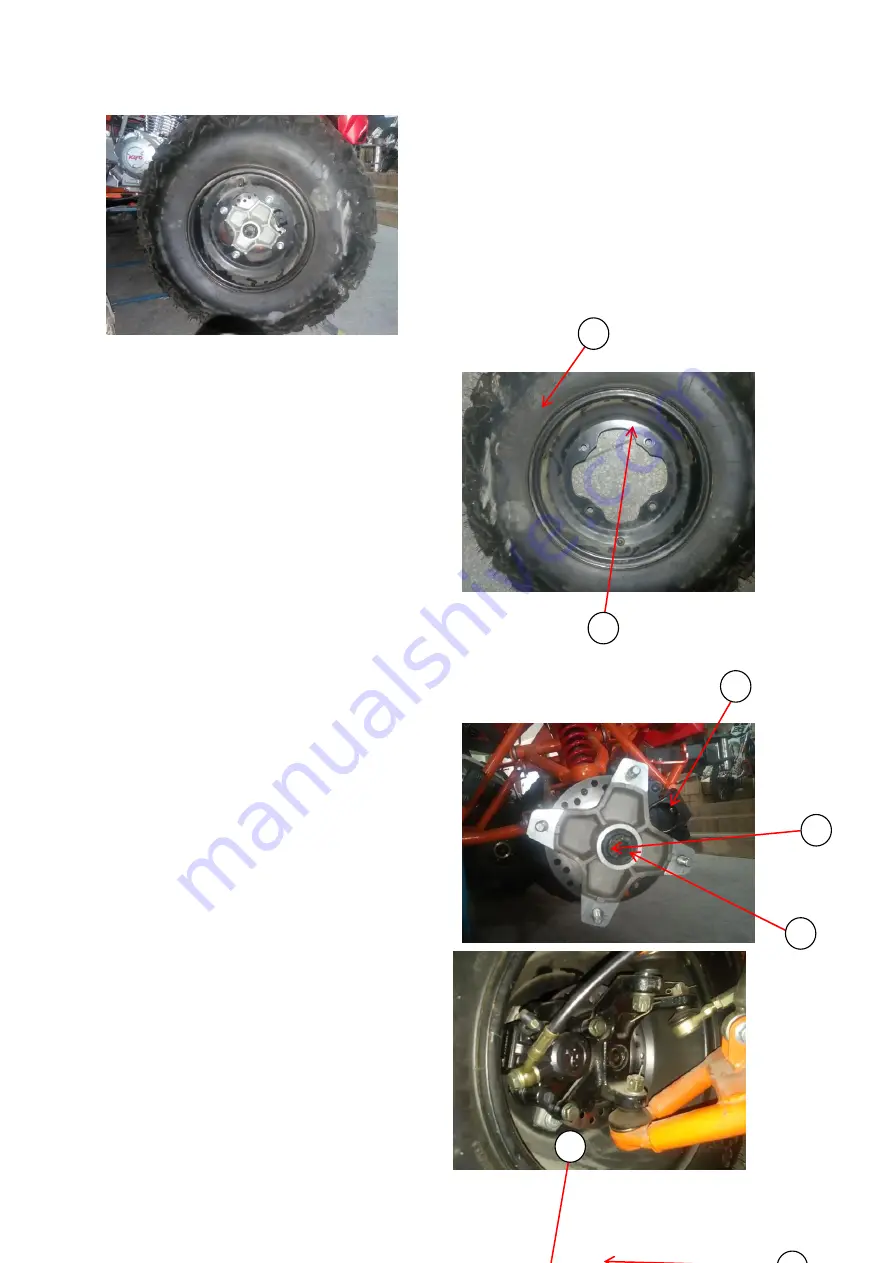
Check if the rim 1 has damage, deformation,
and scratches. Replace if there is any
abnormality. Slowly turn the wheel and
measure the runout of rim 1 with a dial
gauge
Use limit: axial: 2.0mm
Radial: 2.0mm
Rim installation
Press the rim 2 into the tire on a special
machine
Front wheel mounting bracket removal
Remove the front wheel
Remove the front caliper body 3
Take out the cotter pin 4
Remove the rim shaft mounting nut 5
Brake disc and mounting bracket are
removed together
Remove the front wheel mounting bracket
Installation
Installation in reverse order of disassembly
Wheel rim mounting nut torque: 209N
•
m
~
278N
•
m
Brake disc mounting bolt torque: 30N
•
m
~
36N
•
m (threaded fixative)
Note: The rear wheel is disassembled and
installed similar to the front wheel, please
refer to the front wheel.
6.3
Brake system
Front brake caliper disassembly
Remove the front wheel
Remove the 2 bolts mounted on the steering
knuckle 6
Remove the brake caliper 7
examination
Observe the brake caliper for cracks, oil
leaks at each fastening point, and replace
installation
Brake caliper fixing bolt 2 Torque: 38N
•
m
~
51N
•
m (Threaded fixing agent
)
2
1
3
4
4
5
4
7
5
Summary of Contents for AU200
Page 1: ...1 KAYO MOTO AU200 Maintenance Manual...
Page 4: ...4...
Page 6: ......
Page 11: ......
Page 22: ......
Page 32: ......
Page 50: ......
Page 56: ......
Page 138: ...10 Appendix...


