

Thank you for choosing KB ELEMENTS Products, please read carefully
the instructions and precautions indicated in this Manual, and keep it for
future reference.
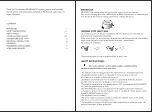
BEFORE USE
IMPORTANT: The cooking zones will not switch on if pots are not the right size.
Only use pots bearing the symbol “INDUCTION SYSTEM” (Figure below) or enameled pots.
Place the pot on the required cooking zone before switching the hob on.
EXISTING POTS AND PANS
Use a magnet to check if the pot is suitable for the induction hob: pots and pans are
unsuitable if not magnetically detectable.
-
Make sure pots have a smooth bottom, otherwise they could scratch the hob. Check dishes.
-
Never place hot pots or pans on the surface of the hob’s control panel.
This could result a damage
-The bottom diameter of pots or pans should be at least 10cm.
SAFETY INSTRUCTIONS
This is the warning / caution-safety symbol, regarding safety,
warning of potential risks to users and other.
1.The induction must be unplugged from the outlet before any installation operation.
2.Unplug the Induction Cooker from the outlet if you’re not using it, and wait
until it cools down in order to clean, dry and store.
3.Installation and maintenance must be made by a specialized technician, Incorrect
assembly and improper use can present a risk of electric shock.
4.The usage of accessories or attachments that are NOT recommended by KB ELEMENTS
may cause fire, electric shock or injury.
5.DO NOT USE if the cord or any other part of the appliance has been damaged
or dropped, in order to avoid risk of electric shock. If you face any faults, please contact
nearest KB ELEMENTS point of sales.
6.The appliance must be earthed.
7.The power cable must be long enough to connect the induction cooker to the outlet.
8.Do not use multi-sockets or extension cords.
9.For installation to comply with the current safety regulations, an omnipolar switch with
minimum contact gap of 3mm is required.
1
CONTENTS
BEFORE USE
SAFETY INSTRUCTIONS
INSTALLATION
CONTROL PANEL LAYOUT
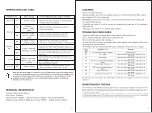
TEMPERATURE LEVEL TABLE
TECHNICAL INFORMATION
CLEANING
TROUBLESHOOTING GUIDE
AFTER-SALES SERVICE
1
1-2
3
4-5
6
6
7
7
8


