background image

Hanaro Cam 

15 


7. Hanaro Cam Server Program 
Instructions


Start Hanaro Cam.exe program and the first dialog box will appear. 


Enter “1234” for password, then 
click “OK”.  Later, you may 
change the password by clicking 
“Option” from the menu. 


1) File Menu 


There are “Image Save”, “Image Play”, and “Exit” 
on the File Menu.  “Image Save” will save the 
current images.  “Image Play” will play previous 

recorded images.  “Exit” will end the program.   


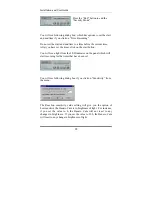
If you click on “Image Save” 
you will see the following 
dialog box. 


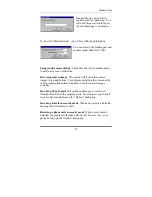
Initial setting for quality is 80.  The higher the quality setting, the 
more space is needed.  The lower the quality setting, the less space is 
needed.  It is best not to change the initial setting.  Click “OK” when 
you are done. 


Summary of Contents for HANARO

Page 1: ......

Page 2: ...Hanaro Cam Model KBHC 1 User Manual r Gp G Gj USGs U r Gp G Gj USGs U r Gp G Gj USGs U r Gp G Gj USGs UG G aVV U U aVV U U aVV U U aVV U U U U U U G G G G ...

Page 3: ...f not installed and used in accordance with the instructions may cause harmful interference to radio communications However there is no guarantee that interference will not occur in a particular installation If this equipment does cause harmful interference to radio or television reception which can be determined by turning the equipment off and on the user is encouraged to try to correct the inte...

Page 4: ...ded and system requirements 4 3 USB Camera specification 5 4 KBIT USB Camera Installation 6 5 Hanaro Cam Driver Installation 7 6 Hanaro Cam Setup 13 7 Hanaro Cam Server Program Instructions 15 8 System Configuration 30 9 Running Server Program 34 10 Monitoring Camera from Remote Site 35 g Tips 38 ...

Page 5: ...ication for security or monitoring 2 Product Specifications Optical elements 320 000 pixels CMOS image sensor Lens F2 8 Focus 6 28 mm Exposure Automatic White balance Automatic Electricity consumption 1 3W Output method USB Dimension 69 5 x 71 2 x 36 0 mm Frame speed USB Camera Mode VGA 640x480 15 frames sec CIF 320x240 30 frames sec QCIF 160x120 30 frames sec Hanaro Cam Mode CIF 320x240 max 30 fr...

Page 6: ... Hanaro Cam POP Security Program Hanaro Cam Program Package Included Hanaro Cam Main Body Install CD Manual Audio Cable USB Cable System Requirements Pentium processor MMX 233 MHz or over USB port Minimum 64 MB memory CD ROM Drive VGA graphic adapter with 16 bits 640x480 resolution Internet connection LAN or Modem ...

Page 7: ...amera Specification 1 Snap shot Press the button to capture an image and save it to your hard disk 2 Focus volume Use this to focus the lens 3 Indicator You ll see a red light when camera is running 4 Lens 5 Base 1 2 3 4 5 ...

Page 8: ...cally detect your system and automatically install the driver to your computer For further information check Chapter 5 HANARO CAM Driver Installation Next Click on the HANARO CAM Setup to setup a server to watch images using a camera and to copy homepage files to your hard drive in order to watch camera images from other computers not in the area For further information please refer to Chapter 6 H...

Page 9: ... 1 Windows 98 SE ME driver installation Insert the program CD and click HANARO CAM Driver Setup USB port installation will begin when you have finished installing the USB driver This dialog box indicates that USB driver setup has began Click Next ...

Page 10: ...ser Guide 8 Click Next Click Finish to complete the setup The Hanaro Cam USB camera Driver installation is complete As soon as you plug your camera to the USB port your computer will automatically detect your USB camera ...

Page 11: ... then it will automatically install the driver However if driver files can t be found in your Windows 98 CD you will see a dialog box below Browse and select the driver location manually then it will automatically install the driver Ex Click on Browse to search for the folder Click on OK to automatically install the driver ...

Page 12: ...tallation Insert the program CD into the CD ROM drive and then click HANARO CAM Driver Setup USB port installation will begin when you have finished installing the USB driver This dialog box indicates that the USB driver installation is processing Click Next ...

Page 13: ...Hanaro Cam 11 Click Next Click Finish to complete the setup Plug your camera to the USB port and your computer will automatically detect your USB camera ...

Page 14: ...Installation and User Guide 12 Click Yes as seen below The Hanaro Cam USB camera Driver installation is complete ...

Page 15: ...e CD ROM drive and then click HANARO CAM Setup You will see following dialog box Read the License Agreement and then click Yes Specify the program folder If you don t change the folder click Next You will see the following dialog box while the program is installed ...

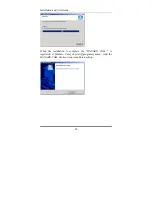
Page 16: ...Installation and User Guide 14 When the installation is complete the HANARO CAM is registered at Hanaro Cam in start programs menu And the HANARO CAM shortcut icon is made in desktop ...

Page 17: ...are Image Save Image Play and Exit on the File Menu Image Save will save the current images Image Play will play previous recorded images Exit will end the program If you click on Image Save you will see the following dialog box Initial setting for quality is 80 The higher the quality setting the more space is needed The lower the quality setting the less space is needed It is best not to change t...

Page 18: ... see a light from the LED dialog box below which indicates that it is saving the file to the folder To end saving click on the Stop button below Clicking on the Save Mjpeg button is a shortcut that performs the same function as Image Save You will see the dialog box below if you click on Image Play ...

Page 19: ...Hanaro Cam 17 Select the folder containing the saved files that you wish to play and click on OK Select a file then click on the play button to play your file Play button ...

Page 20: ... Pause button while the file is playing it will stop at that point Click the SAVE button and you will see dialog box below Enter the new file name Current frame will be saved as a jpeg file After you click Save you will return to the previous screen ...

Page 21: ... go back to the previous frame Each time you press the back button you will go back one image at a time When you press the Pause button while you are playing a video clip press the Fast Forward button to go forward one frame Each time you press the Fast Forward button you will go forward one frame at a time ...

Page 22: ...ser Guide 20 The Stop button will stop playing the current image file Press the EXIT button to end the Image Play Clicking the Mjpeg Play button is a shortcut and performs the same function as Image Play of the File menu ...

Page 23: ...an set the specific time to record In Sensitivity you can change the standard setting for the Security Mode In MotionBox you can make regions to detect motion maximum 5 If you click on Security Mode you will see the following dialog box You can set timer for security mode You will see a light from the LED indicator from the dialog box which indicates the starting of the security mode when you clic...

Page 24: ...utton You will see a light from the LED indicator on the panel which will start recording for the times that have been set You will see following dialog box if you click on Sensitivity from the menu The Reaction sensitivity value setting will give you the option of how sensitive the Hanaro Cam is to brightness of light For instance if you set the value to 0 the Hanaro Cam will not react to any cha...

Page 25: ...n for motion detection If you check Operating Area detection when security mode is on motion is detected at the box regions instead of whole image while Security Mode is running If you set five for number of boxes you will see following picture If you want to move the motion box Drag mouse like following picture ...

Page 26: ...ouse like following picture If you click on box 1 in tab you can set sensitivity of motion box 1 Each box can have own sensitivity value If you press Set Default default value provided to program is set After change value press Apply button Following picture is running security mode when number of motion box is five ...

Page 27: ... Option from the Setup menu you will see the following dialog box If you click the Edit button from the Homepage directory you will see this dialog box Select a folder to store the Homepage files Leave at c Program Files KBIT Hanaro Cam homepage folder if it is not a special situation to do so ...

Page 28: ...here the image files are saved when motion is detected at security mode Next you will set up your E mail server and E mail address Put your SMTP server on E mail server box And also put in your E mail address This option will use the E mail address to receive IP and to alert you if any motion is detected If you click Change Password from the Password Change Box you will see the following dialog bo...

Page 29: ...ll reverse the camera images to top and bottom For example installing the camera to the ceiling requires this option to be able to see the camera images correctly Receiving IP by E mail This option enables you to receive IP through E mail when the program starts Be sure to set your E mail server and E mail address on the Option dialog box Receiving E mail on security mode When a movement is detect...

Page 30: ...unds an alarm Always Top HANARO CAM server program is always visible even while it s running in the background Print pixel for motion when motion detection is operated moving boundary is shown Click the Camera setting sub menu to set the camera s brightness contrast color balance and color setting ...

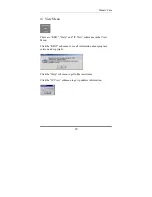
Page 31: ...e KBIT Help and IP View submenus in the View Menu Click the KBIT submenu to see all information about program version and copyright Click the Help submenu to get further assistance Click the IP View submenu to get ip address information ...

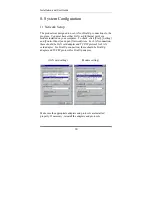
Page 32: ...computer To check click Start Setting and Control Panel and open Network item For LAN connection these should be LAN card adapter and TCP IP protocol for LAN card adapter For Dial Up connection these should be Dial Up adapter and TCP IP protocol for Dial Up adapter LAN card setting Modem setting Make sure the appropriate adapters and protocols are installed properly If necessary reinstall the adap...

Page 33: ...Consult your network administrator for the IP address TCP IP properties 2 Dial Up server setting for modem user Dial Up server is the program to respond to clients requests to be connected This program must be installed in clients sites for modem users Insert the MS Windows 98 installation CD disk when the system prompts you You will see a Dial Up server icon on the status bar below if you install...

Page 34: ... Windows Setup tab then double click on communications and make sure the Dial Up Network and Dial Up server are selected You will see the dialog box below if you have installed the Dial Up server in your Windows Select the Dial Up Network folder click on connections from the menu and you will see Dial Up server If you do not see the Dial Up server re install the Dial Up server ...

Page 35: ...ories and Dial Up network and then click on cancel if the Dial Up network wizard dialog box appears You do not need this option 2 Click on Connections C then click on Dial Up server D 3 Select Allow caller Access 4 Click on Change Password W if you want to change the password 5 Click on Server Type T 6 Select PPP Internet Windows 95 Windows NT 3 5 7 Click OK to close the dialog box 8 Click OK to e...

Page 36: ...Installation and User Guide 34 9 Running Server Program Running Hanaro Cam Program Use Dial Up Server to connect to the internet ...

Page 37: ...erver You need to connect to the Internet by using any ISP AOL Earthlink etc Next enter your LAN server IP in the address bar if you re connected to the Internet You will see the homepage server In case of LAN connection from outside to LAN server Click on the web browser and enter the LAN server IP in the address bar to logon to the homepage server In case of LAN connection from outside to modem ...

Page 38: ...Installation and User Guide 36 Enter your IP address in the Microsoft Internet Explorer address bar and you will see the following picture Enter the password ...

Page 39: ...Hanaro Cam 37 You will see your computer camera screen at remote site If you press the Click button in Internet Explorer you will see following window ...

Page 40: ... Q2 Can I change the screen size A2 Yes you can change the screen size by clicking on any edge of the screen The Hanaro Cam program s standard image setting is 320 X 240 It is not recommended to change the screen size larger than 320 X 240 because the quality of the image will decrease Q3 Can I capture current images A3 Yes simply click the snap shot button You will see the dialog box below Next s...

Reviews: