

I
UK
D
E
F
NL
P
S
DK
FIN
B
GR
CZ
EE
LV
LT
H
M
PL
SK
SLO
I
UK
D
48
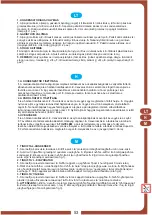
1. PULIZIA DEL CONDENSATORE
1.
2
3
4
5.
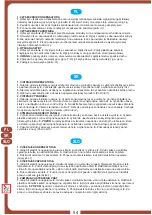
2. PULIZIA DELL'EVAPORATORE
1
2
3
4
5
6
7
3. SOSTITUZIONE DI UNA VETRATA
1
2.
3.
4.
5. ATTENZIONE:
6.
7.
8.
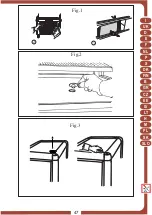
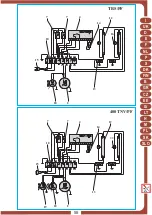
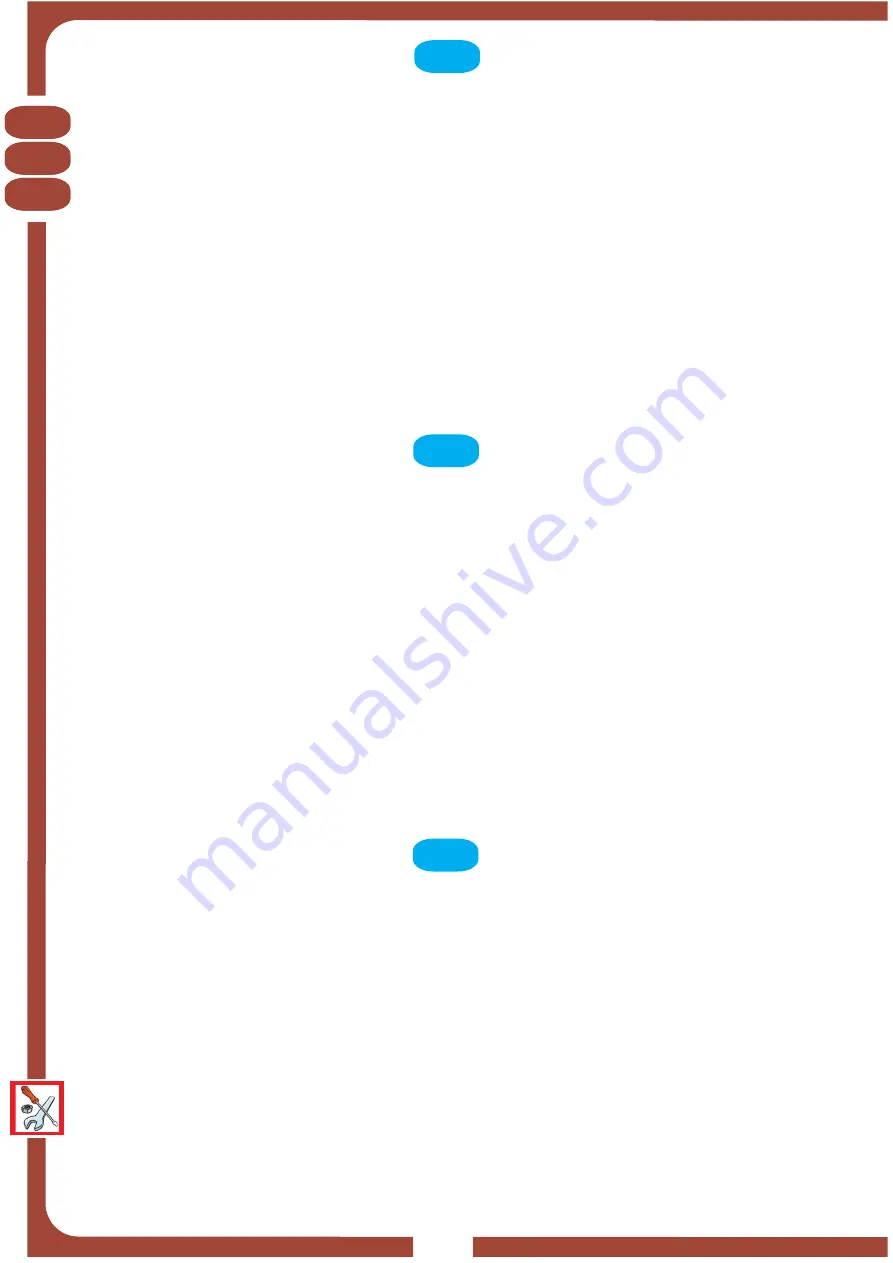
Togliere l'alimetazione elettrica, agendo sull'interruttore a protezione della presa e sfilando poi la spina
dalla presa. . Togliere le viti di fissaggio della griglia anteriore e rimuoverla. . Con un pennello eliminare
lo strato di pulviscolo dalle alette del condensatore. . Con l'aspirapolvere togliere la polvere residua.
Rimontare la griglia e ripristinare l'alimentazione elettrica (vedi fig.1).
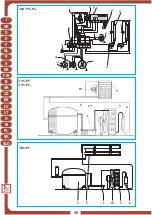
. Togliere l'alimentazione. . Rimuovere la merce, ponendola in luogo adeguatamente refrigerato.
. Lasciare la porta aperta, operare uno sbrinamnto totale. . Togliere il tappo di fondo all'interno della
vetrina. . Non usare corpi metallici appuntiti nel tentativo di rimuovere il ghiaccio dall'evaporatore.
. Asciugare con cura ogni cosa. . Lasciate asciugare con la porta aperta l'apparecchio prima di
rimetterlo in funzione (vedi fig.2).
. Togliere l'alimentazione.
Svitare le viti delle cerniere della porta togliendola.
Rimuovere i tappi in
plastica posti agli angoli del tetto.
Svitare le viti di fissaggio del tetto ai montanti in alluminio.
i supporti dei ripiani e le lampade sono inseriti in apposite sedi ricavate nella parte
inferiore del tetto.
Sfilare il tetto dai montanti verso l'alto.
Sfilare la vetrata interessata, facendola
scorrere verso l'alto.
Ripristinare con la nuova vetrata (Vedi fig.3).
1. CLEANING THE CONDENSER
1
2
3
4
5
2. CLEANING THE EVAPORATOR
1.
2
3
4
5
6
7
3. REPLACING A GLASS PANEL
1
2
3.
4.
5. WARNING!
6
7
8
. Switch off the appliance by turning off the power switch and pulling the plug out of the socket. . Undo
the screws attaching the front grille and then remove it. . Remove the dust from the condenser's fins
using a paintbrush. . Use a vacuum cleaner to remove any remaining dust. . Refit the grille and switch
on the electricity supply (see figure 1).
Switch off the appliance. . Remove the goods, placing them in a suitably refrigerated plate. . Leave
the door open and defrost the appliance completely. . Take the plug out from the inside of the display
cabinet. . Do not use sharp or pointed metal tools to remove the ice from the evaporator. . Dry with
care. . Leave the appliance to dry with the door open before restarting (see figure 2).
. Switch off the appliance. . Unscrew the screws attaching the door hinges to the frame and remove the
door.
Remove the plastic plugs at the corners of the roof.
Undo the screws fixing the roof to the
aluminium uprights.
The shelf supports and lamps are inserted in channels on bottom side
of the roof. . Push the roof upwards to detach it from the uprights. . Remove the glass panel, sliding
upwards. . Replace with new glass panel (see figure 3).
1. REINIGUNG DES KONDENSATORS
1
2.
3
4.
5
2. REINIGUNG DES VERDAMPFERS
1
2
3
4
5
6
7
3. AUSTAUSCH EINER GLASSCHEIBE
1.
2
3
4
5. ACHTUNG:
6
7
8
. Schalten Sie den Strom ab, indem Sie den Schutzschalter der Steckdose betätigen und dann den
Stecker aus eben der Steckdose ziehen.
Befestigungsschrauben lösen und das vordere Gitter
abnehmen. . Mit einem Pinsel den Staub von den Lamellen des Kondensators entfernen.
Mit einem
Staubsauger den restlichen Staub beseitigen. . Gitter wieder einbauen und die Stromversorgung wieder
herstellen(siehe Abb.1).
. Strom wie abschalten. . Die Ware heraus nehmen und an einem ausreichend gekühlten Ort
unterbringen. . Lassen Sie die Tür offen und tauen Sie das Gerät vollständig ab. . Entfernen Sie den
Bodenverschluss im Inneren der Vitrine. . Keine scharfen oder spitzen Metallwerkzeuge benutzen, um
das Eis von dem Verdampfer zu entfernen. . Sämtliche Teile sorgfältig abtrocknen. . Das Gerät vor der
erneuten Inbetriebnahme bei offener Tür trocknen lassen (siehe Abb. 2).
Strom wie abschalten. . Die Scharnierschrauben der Tür lockern und die Tür ausbauen. . Die
Plastikverschlüsse an den Dachecken entfernen. . Die Schrauben, die das Dach an den
Aluminiumhalterungen befestigen, entfernen.
Die Ablagenhalterungen und die Lampen
sind in eigens dafür vorgesehene Sitze im unteren Bereich des Dachs eingefügt. . Das Dach nach oben
aus den Streben herausziehen. . Die betreffende Glasscheibe nach oben schieben und herausnehmen.
. Die neue Glasscheibe einbauen (siehe Abb. 3).


